 Skip to content

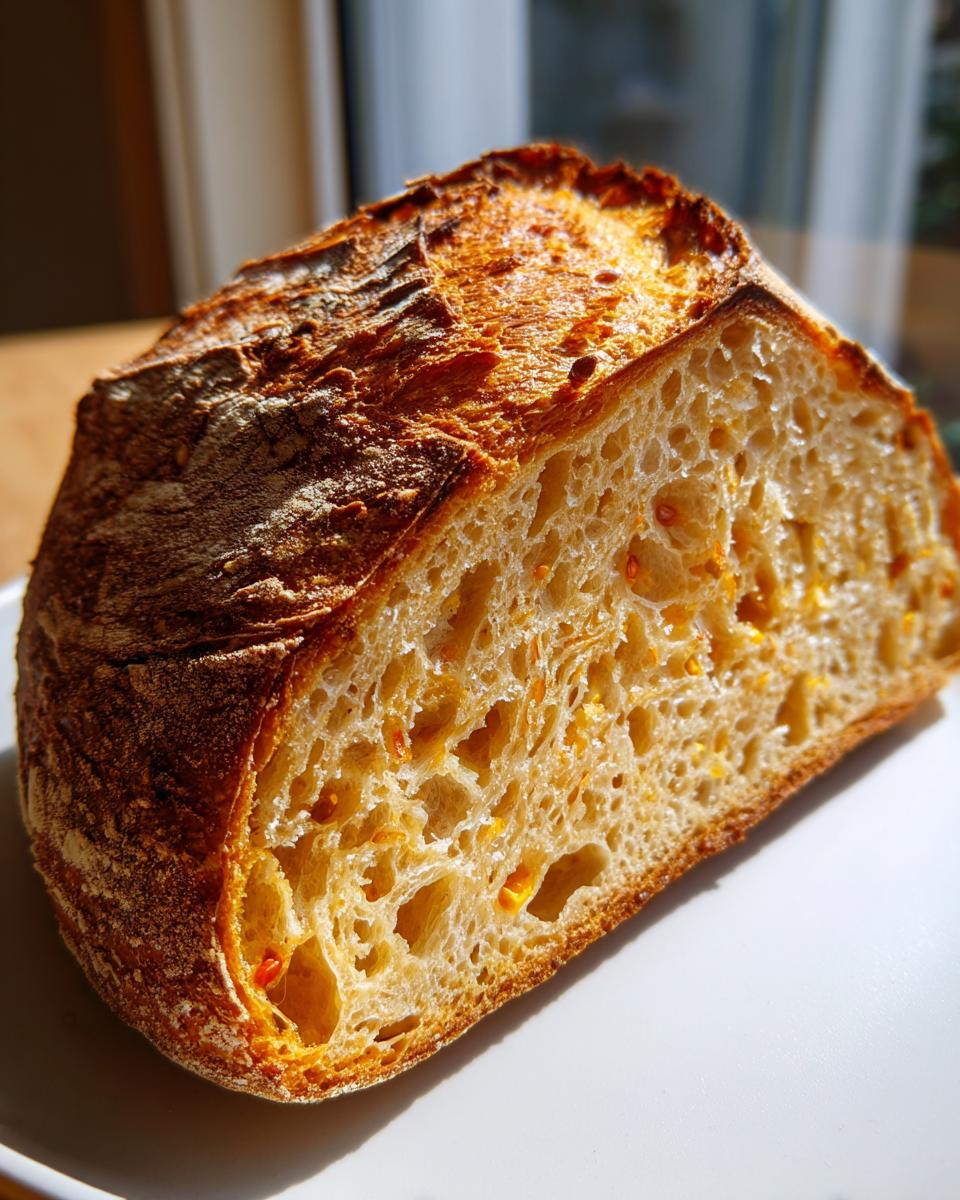
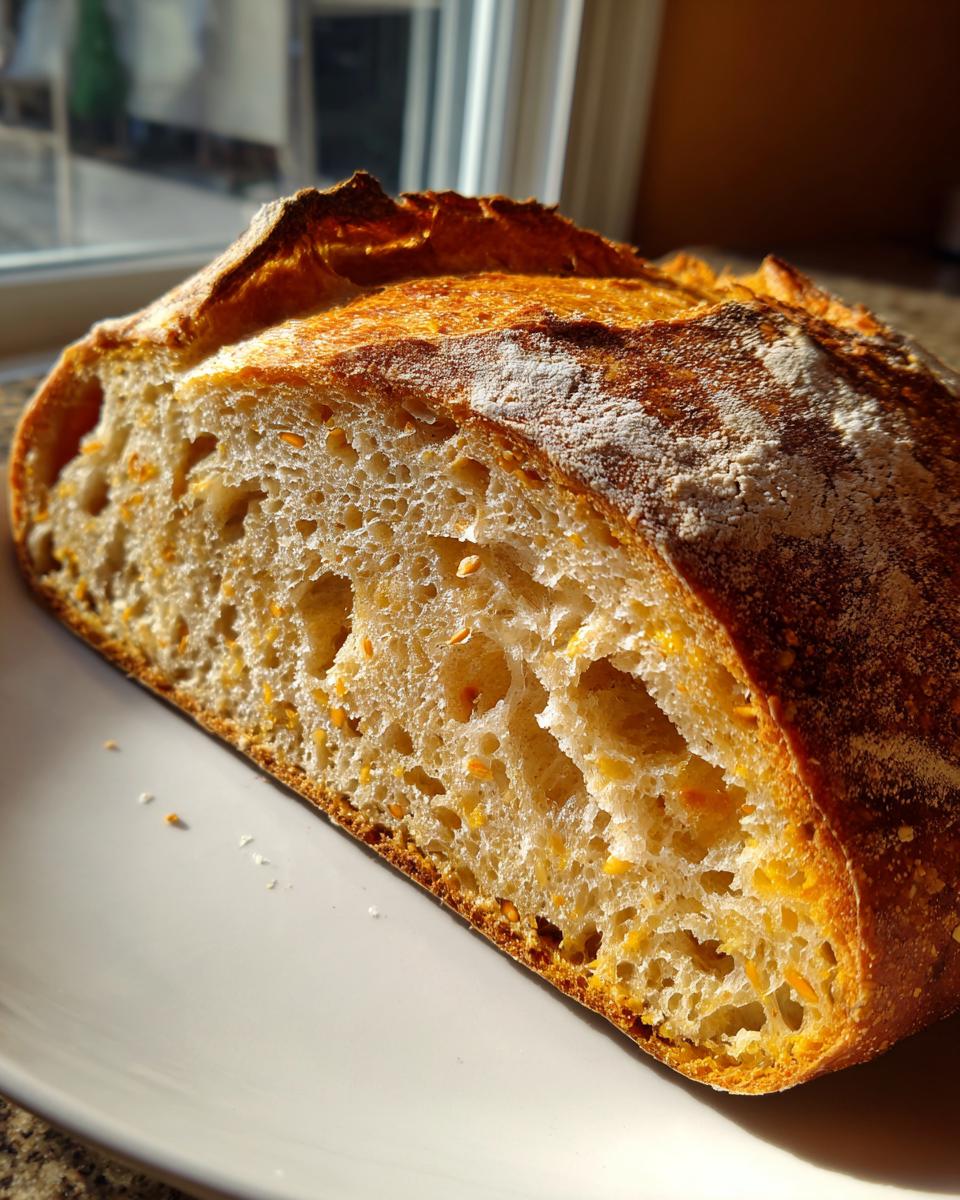
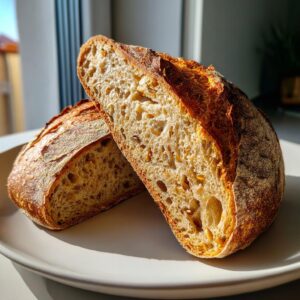
Oh, fall! The air gets crisp, the leaves turn those gorgeous shades of red and gold, and suddenly all I want to do is bake. And you know what screams fall to me more than anything? It’s a warm, crusty loaf of Pumpkin Sourdough Bread. It’s got everything – that subtle tang from the sourdough, the comforting sweetness of pumpkin, and that incredible artisan crust that just makes you feel so accomplished. I learned from my grandma that simple, joyful cooking is really the best kind, and this recipe? It’s pure magic that’s surprisingly doable. We’re going to get a fantastic rise and the most perfect crumb, all by using a happy, active starter. Trust me, your kitchen is about to smell like the coziest autumn dream!

- Why You'll Love This Pumpkin Sourdough Bread
- Active Starter vs. Discard for Pumpkin Sourdough Bread
- Understanding Hydration for Pumpkin Sourdough
- Mastering Bulk Ferment Timing for Your Pumpkin Loaf
- Ingredients for Artisan Pumpkin Sourdough
- Step-by-Step Guide to Making Pumpkin Sourdough Bread
- Tips for Success with Pumpkin Sourdough Bread
- Variations and Add-Ins for Your Pumpkin Sourdough
- Frequently Asked Questions about Pumpkin Sourdough
- Nutritional Information
- Share Your Pumpkin Sourdough Creations!
Why You’ll Love This Pumpkin Sourdough Bread
Seriously, this bread is a hug in loaf form! You’re going to adore:
- Its super cozy autumn flavor that’s just perfect for the season.
- How surprisingly easy it is to get that gorgeous, crackly artisan crust.
- The soft, perfectly moist crumb inside – nobody likes dry bread!
- That amazing sourdough tang balanced with the warmth of pumpkin.
- Knowing you baked this incredible loaf all by yourself!
- It’s a fantastic way to use up your active sourdough starter.
Active Starter vs. Discard for Pumpkin Sourdough Bread
Okay, let’s talk starter! When you’re making this glorious pumpkin sourdough, you’ve got a choice: active starter or discard. Now, I’ve played around with both, and here’s the honest truth from my kitchen: for the absolute *best* rise and that light, airy crumb we’re dreaming of, go with your active starter. Active starter is bubbly, lively, and full of yeast that’s ready to party and give your dough a serious lift.
Using sourdough discard is totally doable, and I love finding ways to use it up! You can absolutely make a delicious pumpkin sourdough with it, but be prepared for a slightly denser texture. It just doesn’t have that same oomph as a happy, recently fed starter. Think of it like this: discard is a bit like a sleepy starter, while active starter is wide awake and ready to work its magic. So, for this recipe, if you want that picture-perfect artisan loaf with a beautiful oven spring, feed your starter a few hours before you plan to mix your dough. You’ll see the difference!
Understanding Hydration for Pumpkin Sourdough
Adding pumpkin puree to your sourdough dough is like giving it a little secret boost of moisture, but it also changes things a bit! That lovely, smooth pumpkin puree adds extra water content, so technically, your dough’s hydration goes up. This is fantastic because it helps create that super tender, moist crumb we’re aiming for in our pumpkin sourdough. But, it means you might need to adjust things slightly. If your dough feels way too sticky or saggy compared to a regular sourdough batch, don’t be scared to add just a tiny bit more bread flour, maybe a tablespoon at a time, until it feels manageable.
Conversely, if your puree is super thick, you might find you don’t need to adjust at all! The key is to feel the dough. It should be soft and shaggy, but bounce back a little when you poke it. Getting the right hydration for pumpkin sourdough is all about that perfect balance – not too wet that it spreads out completely, but moist enough for that unbelievable tenderness. It just takes a little practice, and you’ll get a feel for it!
Mastering Bulk Ferment Timing for Your Pumpkin Loaf
Alright, let’s talk about the bulk ferment – this is where all the flavor and structure building happens for your pumpkin sourdough! It’s basically the dough’s first big rise after you’ve mixed everything together. How long it takes really depends on your kitchen’s temperature. If it’s warm, say 75-80°F, it might only take 3-4 hours. If your kitchen is cooler, it could easily take 5-6 hours. The goal is to watch the dough, not the clock!
You want to see the dough increase in size, maybe by about 50-75%, and look a bit puffier. A great way to check if it’s ready is the windowpane test. Grab a little piece of dough and gently stretch it. If you can stretch it thin enough to see light through it without it tearing immediately, your gluten development is spot on! This is super important for a good rise when you bake it. If it tears easily, it needs a little more time and maybe a few more stretch and folds. Don’t get discouraged if it takes longer than you expect; this bulk ferment timing for your pumpkin loaf is all about patience and observation.
Ingredients for Artisan Pumpkin Sourdough
To make this lovely pumpkin sourdough, you’ll need just a few simple things. Make sure you have:
- 100g active sourdough starter – nice and bubbly!
- 350g warm water
- 100g unsweetened pumpkin puree
- 500g bread flour – the good sturdy kind!
- 10g salt
- For a little extra somethin’ somethin’ (totally optional!): 50g pumpkin seeds and 1 teaspoon of cinnamon.
Step-by-Step Guide to Making Pumpkin Sourdough Bread
Alright, let’s get this amazing fall loaf into the oven! Making your own pumpkin sourdough bread is so rewarding, and following these steps will lead you to a gorgeous, delicious result.
Mixing the Dough for Your Pumpkin Sourdough
First things first, grab a big bowl. Pour in your warm water and then whisk in that happy, active sourdough starter until it’s all combined and looks a bit frothy. Next, add your pumpkin puree and give it a good mix. Now for the dry stuff: dump in the bread flour and salt. Stir everything together with a spatula or your hands until you’ve got a shaggy dough – no dry bits left! If you’re adding cinnamon and pumpkin seeds, now’s the time to toss them in and give the dough one last gentle mix to distribute them.
Developing Dough Strength with Stretch and Folds
This is where we build the strength your pumpkin sourdough needs! For the next 2-3 hours, every 30 minutes, we’ll do a round of stretch and folds. Just wet your hands a little so the dough doesn’t stick, grab one edge of the dough, stretch it up gently, and fold it over itself towards the center. Rotate the bowl and do this for all four sides. After a few rounds of this, your dough will start to feel smoother and more elastic. The real test? Try the windowpane test. Gently stretch a small piece of dough between your fingers. If you can stretch it super thin, almost see-through, without it immediately tearing, then your gluten is perfectly developed and ready to go!
Shaping and Cold Retarding Your Pumpkin Sourdough
Once your dough has passed the windowpane test and feels nice and strong, it’s time to shape it. Gently tip the dough out onto a lightly floured surface. Be gentle – we want to keep all those lovely air bubbles! Shape it into a round loaf (a boule) or an oblong one (a batard). Tuck it into a well-floured banneton or a bowl lined with a floured kitchen towel, seam side up. Then, cover it and pop it into the fridge for a good cold retard, anywhere from 12 to 24 hours. This is my favorite part – it deepens the flavor so much and makes scoring so much easier!
Baking the Perfect Pumpkin Sourdough Loaf
When you’re ready to bake your beautiful pumpkin sourdough bread, get your oven screaming hot! Place your Dutch oven inside and preheat everything to 475°F (245°C). Once it’s nice and hot, carefully take your dough out of the fridge and gently flip it out onto a piece of parchment paper. Now for the fun part: scoring! Grab a lame or a sharp knife and make your cuts. I love a simple cross or a few slashes on the top of a scored pumpkin boule. Carefully lower the dough into the hot Dutch oven, put the lid back on, and bake for 20 minutes. Then, take off the lid and bake for another 20-25 minutes until it’s a deep golden brown and sounds hollow when you tap the bottom. You want that internal temp to be between 200-210°F!
Tips for Success with Pumpkin Sourdough Bread
Making the perfect pumpkin sourdough bread is all about a few key things, learned from my own kitchen adventures – oops moments and all! First off, always make sure your starter is happy and active; a sluggish starter is the main reason for a flat loaf. Give it a good feed a few hours before you plan to mix up your dough. Also, the consistency of your pumpkin puree really matters. If it’s too watery, your dough will be way too wet, and vice versa. I like to give mine a little pat down with a paper towel if it seems extra moist.
Don’t be afraid of a super hot oven! That initial blast of heat is what gives your sourdough that amazing oven spring. And a crucial step that so many people skip? Letting the bread cool *completely*. I know, I know, the smell is torture! But slicing into it too early means a gummy interior. Trust me on this one, patience is a baker’s best friend. These little tips have saved many a loaf in my kitchen, and I hope they help yours turn out beautifully too!
Variations and Add-Ins for Your Pumpkin Sourdough
This pumpkin sourdough is already pretty darn amazing, but you know me, I love to play around in the kitchen! You can totally jazz it up. For an extra burst of fall flavor, add a teaspoon of cinnamon – or even a pinch of nutmeg and cloves – right along with that first mix of flour. If you like a little crunch, tossing in about 50g of toasted seeded pumpkin sourdough (pepitas!) is divine. They add a lovely texture and enhance that nutty flavor.

Want to get fancy? Try making a pumpkin swirl! After your bulk ferment, gently spread some sweetened pumpkin puree mixed with a pinch of cinnamon over the dough surface, then carefully shape it. Just a heads-up, adding extra wet things like purees or lots of seeds might make your dough a little softer, so be ready to adjust with a touch more flour if it feels too sticky. It’s all part of the fun of making your own pumpkin sourdough unique!
Frequently Asked Questions about Pumpkin Sourdough
Got questions about making your cozy Pumpkin Sourdough Bread? I’ve got answers from my own kitchen adventures!
Can I use canned pumpkin pie filling instead of plain pumpkin puree?
Oh, that’s a common one! While it’s tempting, I really recommend sticking to plain, unsweetened pumpkin puree for this recipe. Canned pumpkin pie filling already has sugar and spices mixed in, which will throw off the balance of our pumpkin sourdough bread. You want to control those flavors yourself! If you absolutely have to use it, just know your bread might be sweeter than expected, and you might want to skip the added cinnamon.
How long does the dough need to proof after shaping?
Great question! If you’re doing a same-day bake, after you shape your loaf, you’ll want it to proof at room temperature for about 1-2 hours, or until it looks nicely puffed up. If you’ve done the cold retard in the fridge (my favorite for flavor!), it will proof in there overnight. The most reliable way to tell if it’s ready to bake, whether same-day or cold-retarded, is the poke test: gently poke the dough. If the indentation springs back slowly, it’s ready. If it springs back immediately, it needs more time; if it stays indented, it might be a little over-proofed, but still bakeable!
What if my sourdough starter isn’t very active? Will my bread still rise?
This is super important for any sourdough baking, especially with something like sourdough discard pumpkin bread! If your starter is sluggish, it won’t have enough yeast power to lift that lovely, dense pumpkin dough. My best advice is to give it a good feed at least 4-8 hours before you plan to mix your dough. Use equal parts flour and water (by weight) for the feed. You want to see it nice and bubbly and doubled in size before you add it to your dough. A happy starter is key to a happy rise!

Nutritional Information
Please remember these are just estimates, as the exact numbers can change depending on the brands of ingredients you use and how big you slice your loaf. But generally, a slice of this delicious Pumpkin Sourdough Bread will have around 250 calories, 3g of fat, 8g of protein, and 50g of carbohydrates.
Share Your Pumpkin Sourdough Creations!
I absolutely LOVE seeing your creations! If you bake this pumpkin sourdough, please come back and tell me how it turned out in the comments below. Did you try any fun add-ins? I’d be thrilled if you shared a photo too – hearing from you makes my day! Don’t forget to rate the recipe if you enjoyed it, and feel free to share it with your friends! You can always reach out if you have questions via my contact page!
PrintPumpkin Sourdough Bread
A guide to making artisan pumpkin sourdough bread, covering starter use, hydration, fermentation, and add-ins for a perfect fall loaf.
- Prep Time: 30 min
- Cook Time: 45 min
- Total Time: 13.5 hours
- Yield: 1 loaf 1x
- Category: Bread
- Method: Baking
- Cuisine: American
- Diet: Vegetarian
Ingredients
- 100g active sourdough starter
- 350g warm water
- 100g pumpkin puree
- 500g bread flour
- 10g salt
- Optional: 50g pumpkin seeds, 1 tsp cinnamon
Instructions
- In a large bowl, mix active starter and warm water. Add pumpkin puree and mix well.
- Add bread flour and salt. Mix until a shaggy dough forms. If using, add pumpkin seeds and cinnamon.
- Perform stretch and folds every 30 minutes for 2-3 hours, or until the dough passes the windowpane test.
- Shape the dough into a boule or batard. Place in a floured banneton, seam side up.
- Cold retard in the refrigerator for 12-24 hours.
- Preheat your oven with a Dutch oven to 475°F (245°C).
- Score the dough as desired.
- Bake in the Dutch oven for 20 minutes, then remove the lid and bake for another 20-25 minutes, or until golden brown and the internal temperature reaches 200-210°F (93-99°C).
- Cool completely on a wire rack before slicing.
Notes
- Using active starter is recommended for best rise. Discard can be used, but may result in a denser crumb.
- Pumpkin puree increases hydration; adjust flour slightly if needed.
- Bulk fermentation timing can vary based on room temperature.
- For a same-day bake, allow the dough to bulk ferment at room temperature until doubled, then shape and proof for 1-2 hours before baking.
Nutrition
- Serving Size: 1 slice
- Calories: 250
- Sugar: 3g
- Sodium: 400mg
- Fat: 3g
- Saturated Fat: 0.5g
- Unsaturated Fat: 2.5g
- Trans Fat: 0g
- Carbohydrates: 50g
- Fiber: 3g
- Protein: 8g
- Cholesterol: 0mg