 Skip to content
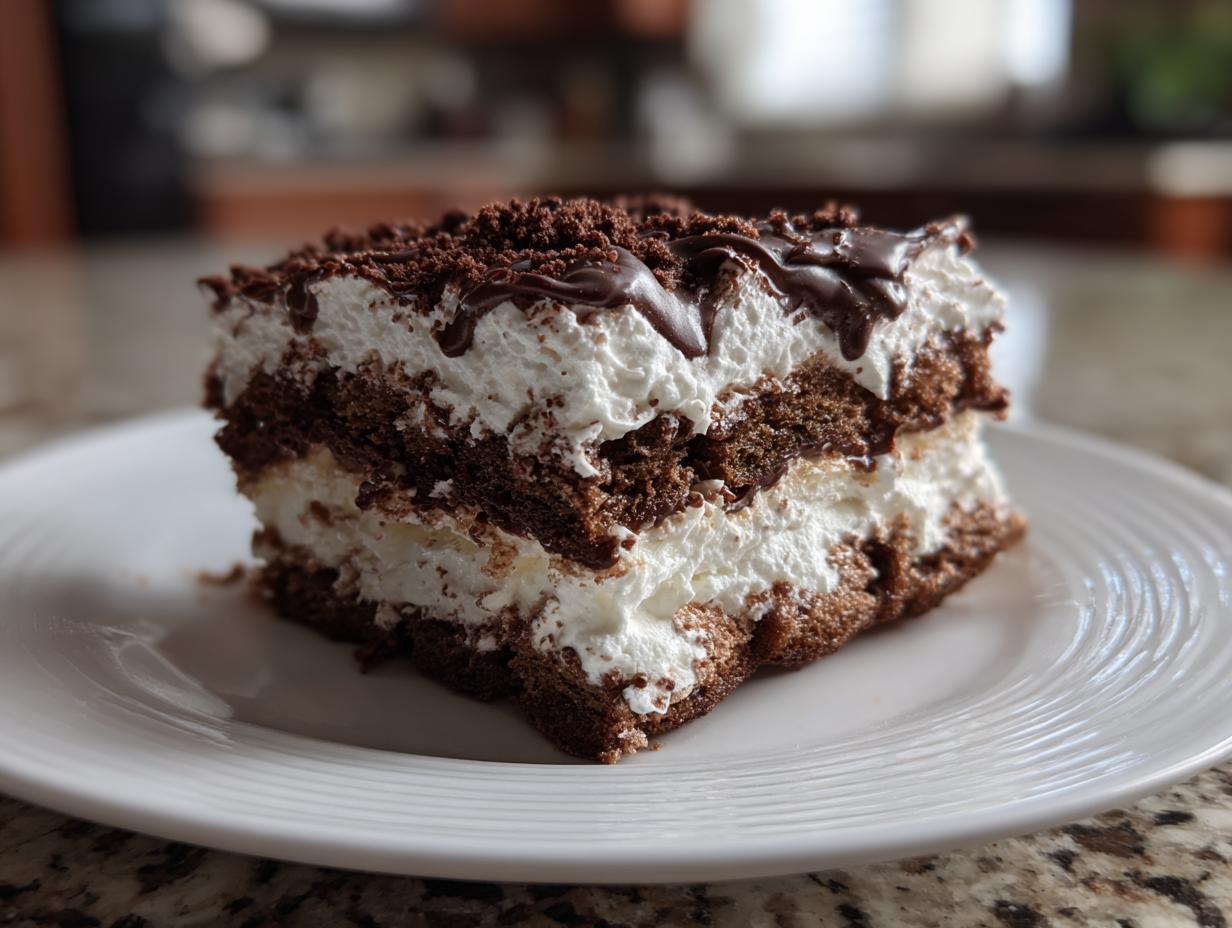

Oh, who else remembers the pure magic of an icebox cake? Seriously, it’s like a little bit of kitchen wizardry! You take simple cookies and cream, stack them up, pop them in the fridge, and BAM! Hours later, you have this impossibly dreamy, cake-like dessert with stripes. My Grandma Carla used to make one all the time when I was a kid, especially on those sweltering Ohio summer days. She’d say it was the easiest way to get a fancy dessert without even turning on the oven. This Classic Chocolate Wafer Icebox Cake is my nod to those sweet memories. It takes hardly any time to put together, but boy, does it impress everybody. Get ready, because this retro treat is about to become your new best friend for quick, show-stopping desserts!

- Why You'll Love This Classic Icebox Cake Recipe
- Ingredients for Your Perfect Icebox Cake
- Crafting Your Icebox Cake: Step-by-Step Instructions
- Tips for the Best Chocolate Wafer Cake
- Variations on the Classic Icebox Cake
- Frequently Asked Questions About Icebox Cake
- Nutritional Information for This Refrigerated Cookie Dessert
- Share Your Icebox Cake Creations!
Why You'll Love This Classic Icebox Cake Recipe
Honestly, what’s not to adore about this icebox cake? It’s a total lifesaver for those busy weeks or when you just don’t feel like fussing with the oven. Here’s why it’s become a go-to in my kitchen:
- No-Bake Wonder: Say goodbye to oven-watching! This cake magically sets up in the fridge, making it perfect for hot days.
- Retro Charm: It brings back those sweet, nostalgic vibes of simpler times – pure comfort food at its finest!
- Super Easy Layers: You just stack it up! Even if you’re new to baking (or, you know, *not* baking!), you’ll nail this.
- Impressive Results: The pretty striped layers look like you spent hours, but shhh, that’s our little secret!
- Perfectly Soft Texture: The cookies get wonderfully soft and cake-like, mingling with the creamy filling. So dreamy!
Ingredients for Your Perfect Icebox Cake
Alright, let’s talk about what you’ll need to make this magic happen. The beauty of this icebox cake is how simple the ingredient list is. Seriously, you probably have most of this stuff hanging out in your pantry right now! The key is using good quality, fresh ingredients – it really makes a difference, trust me. You’ll need:
- 1 package (about 9 ounces) chocolate wafer cookies: These are the stars! Make sure they’re nice and fresh so they soften up perfectly.
- 2 cups heavy whipping cream: For that luscious, dreamy filling. Make sure it’s nice and cold when you whip it!
- 1/2 cup powdered sugar: This gives us just the right amount of sweetness without making the cream grainy.
- 1 teaspoon vanilla extract: A little splash of vanilla really wakes up the flavors and makes everything sing.
That’s it! Four simple things for a dessert that tastes like you spent all day in the kitchen. How awesome is that?
Crafting Your Icebox Cake: Step-by-Step Instructions
Alright, let’s get this magic assembled! It’s really not hard at all, and watching it come together is half the fun. Just follow these simple steps, and you’ll have a showstopper ready to chill.
Preparing the Pan and First Layer
First things first, grab an 8×4 inch loaf pan. You absolutely *have* to line it with plastic wrap, leaving plenty of overhang. This is your secret weapon for getting the cake out without a disaster! Trust me, I’ve learned the hard way. Now, arrange a single layer of those lovely chocolate wafer cookies right on the bottom. Don’t worry if there are little gaps; just break some cookies to fill them in perfectly. This is the base of our cake-like creation!
Whipping the Cream for Your Icebox Cake
Next up, the dreamy filling! In a big bowl, pour in your cold heavy whipping cream. Add the powdered sugar and that lovely vanilla extract. Now, whip it up! You want to beat it until you get nice, stiff peaks. That means when you lift the beaters, the cream stands straight up and doesn’t flop over. Be careful not to go too long, or you’ll end up with butter – oops! The powdered sugar keeps it sweet and helps it hold its shape beautifully.
Assembling the Layers of Your No-Bake Layered Cake
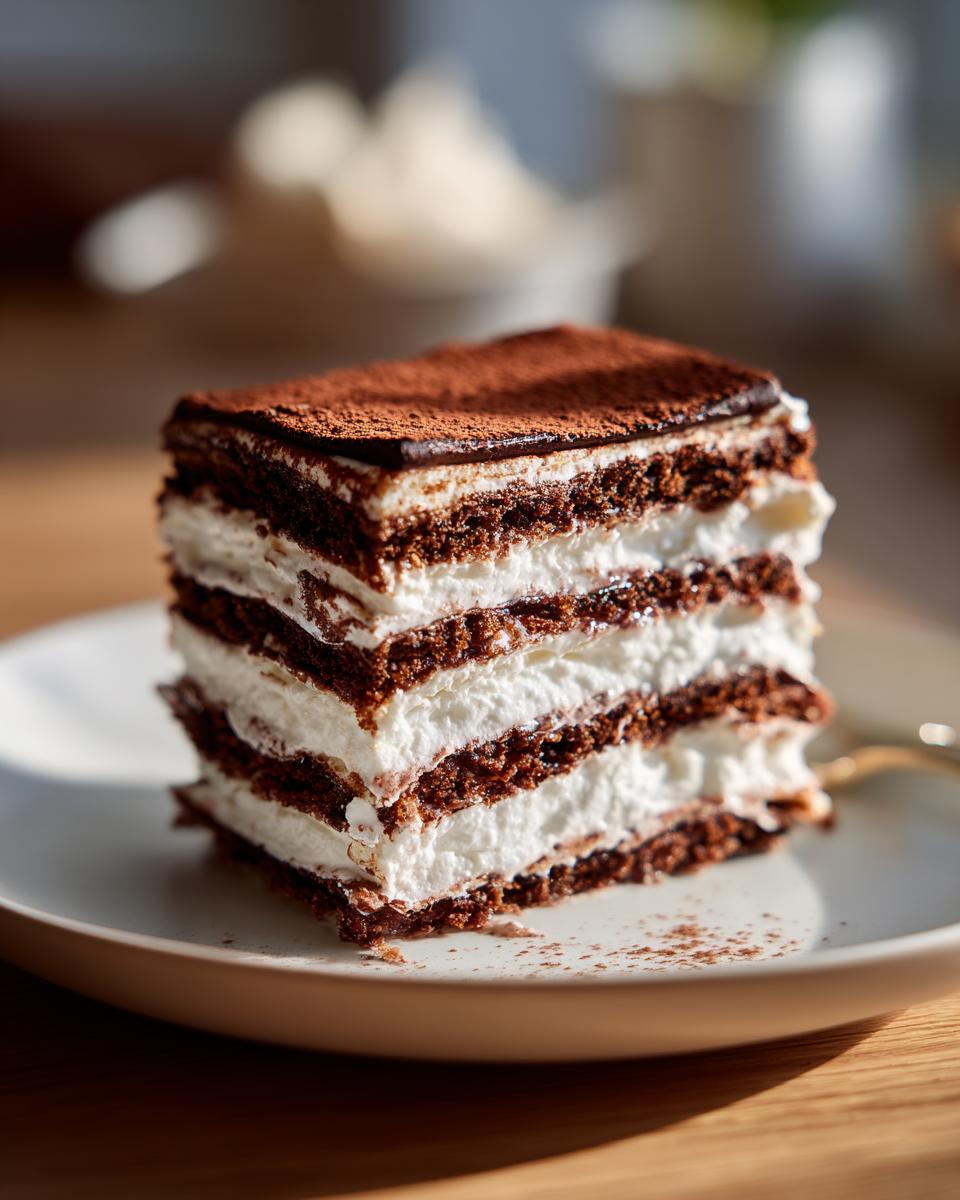
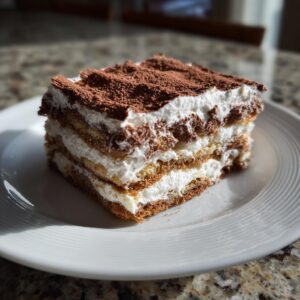
This is where the stripes happen! Spread about a third of your fluffy whipped cream mixture evenly over the cookie layer. Don’t be shy; make sure it covers all those little cookie bits. Now, add another layer of cookies on top of the cream. Gently press down just a tiny bit. Then, another dollop of whipped cream. Keep going, alternating cookies and cream, until you’ve used all of both, ending with a lovely, smooth layer of cream on top, ready for its final covering.
Chilling Your Whipped Cream Fridge Cake to Perfection
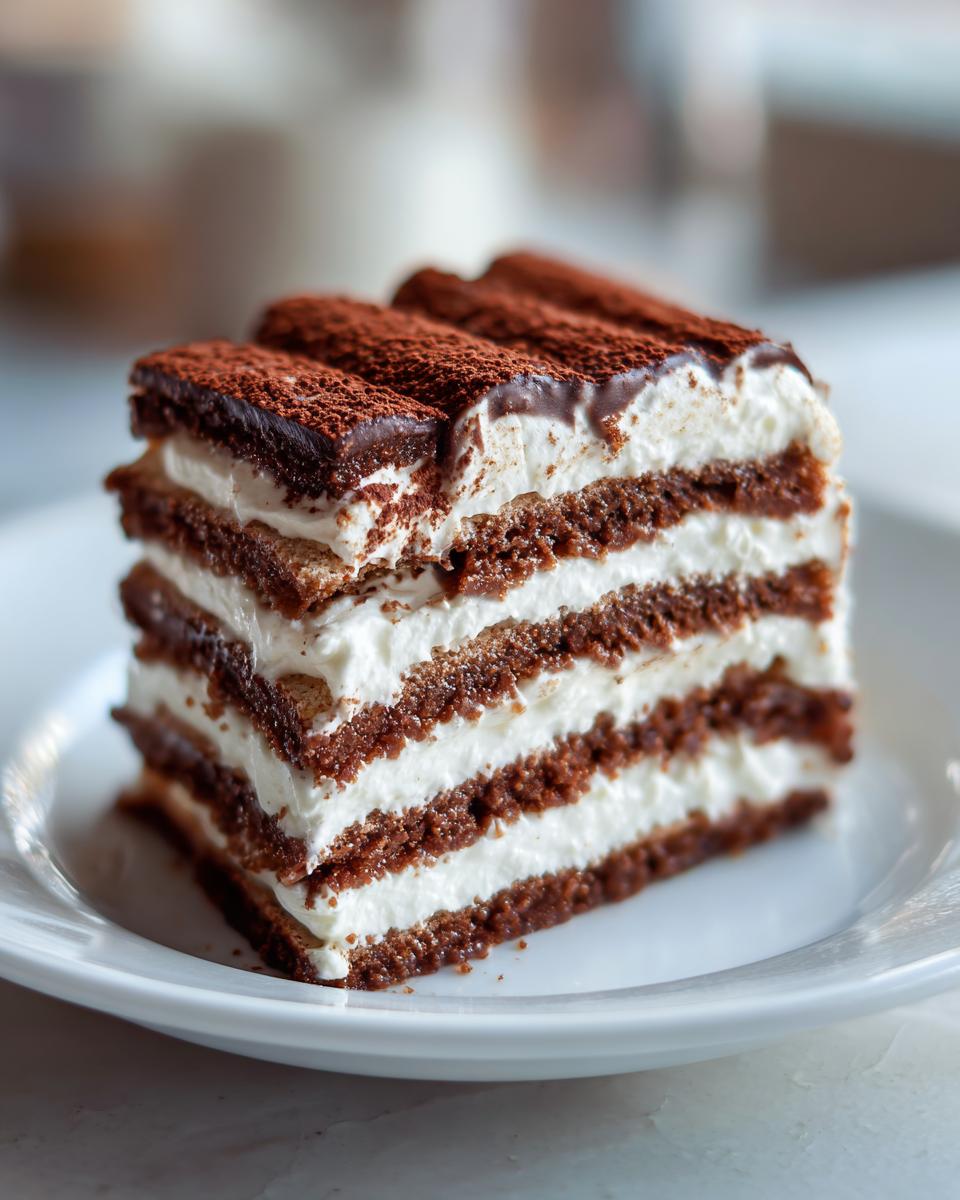
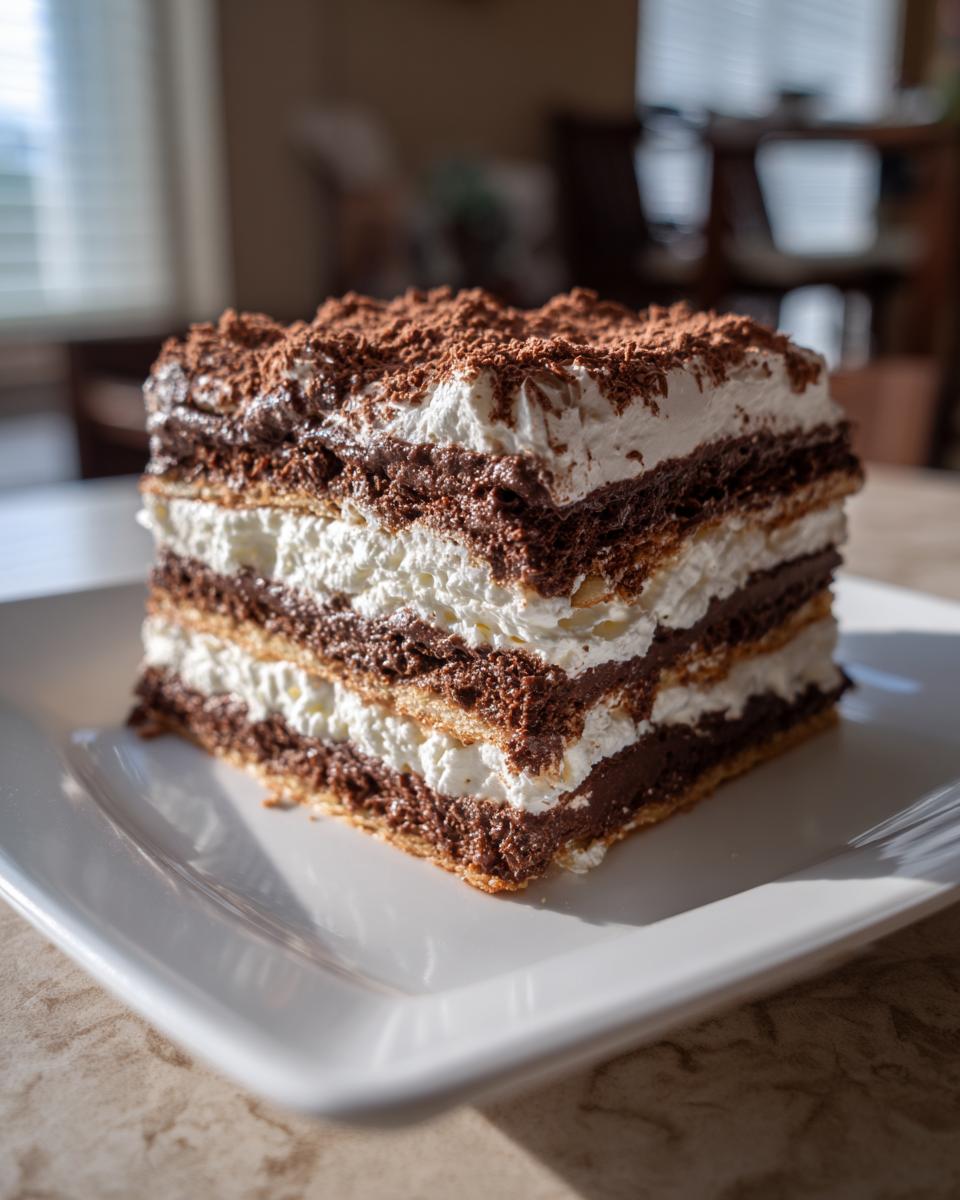
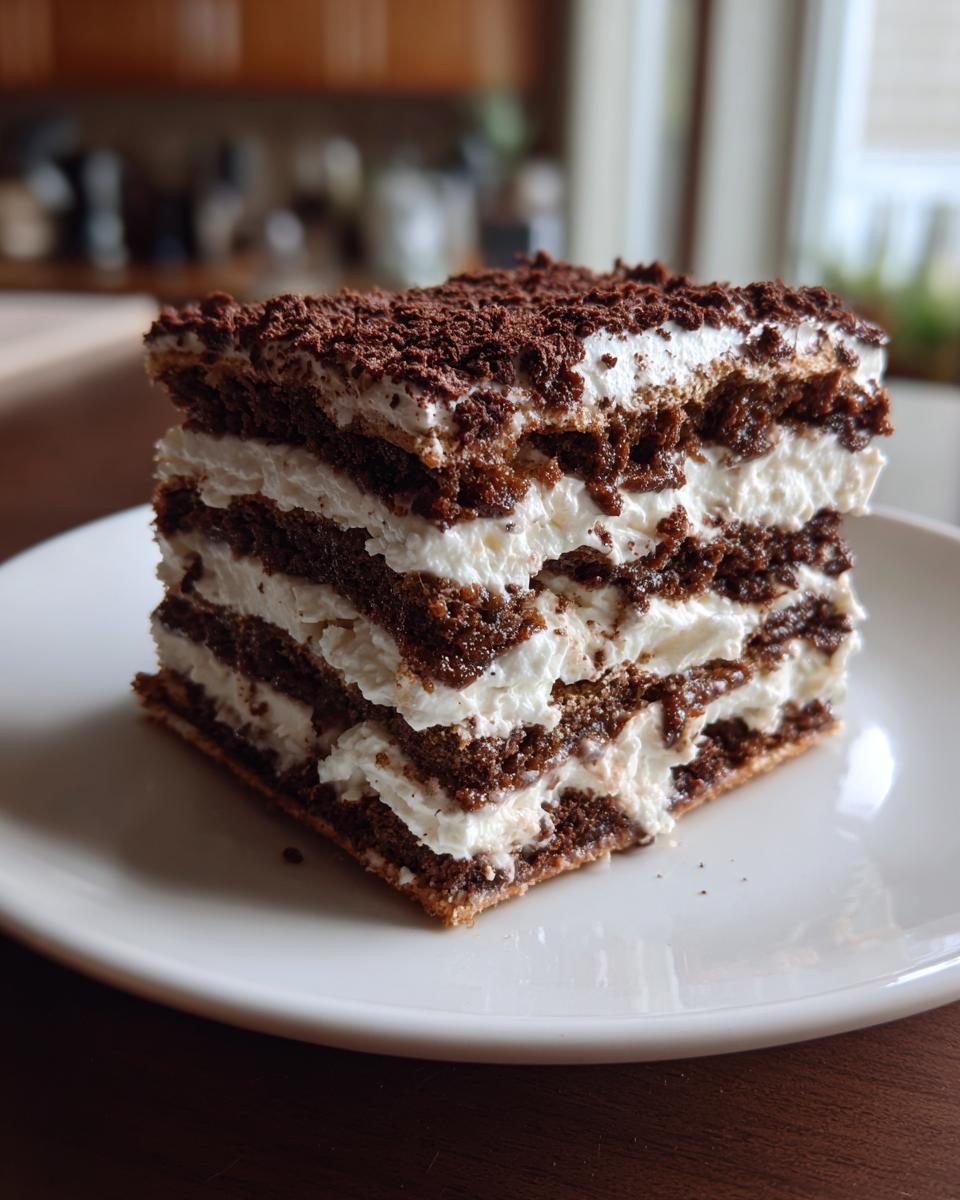
Now for the hardest part: waiting! Fold that overhanging plastic wrap snugly over the top of the cake to keep it fresh. Pop it into the refrigerator for at least 8 hours. Honestly, overnight is even better. This chilling time is super important because it’s when the cookies soften up into that amazing cakey texture and everything melds together. It’s what transforms this simple stack into a glorious icedbox cake!
Serving Your Beautiful Icebox Cake
The moment of truth! When it’s fully chilled and set, carefully invert the whole thing onto a nice serving platter. Gently peel away the plastic wrap – see? Told you it would come out! Now you can slice it up into thick, beautiful pieces. Some people like to add a little extra whipped cream or chocolate shavings on top, but it’s honestly perfect just as it is. Get ready for the applause!
If you’re looking for more no-bake deliciousness, you have to check out my No-Bake Strawberry Icebox Cake. It’s another winner!
Tips for the Best Chocolate Wafer Cake
Okay, so making a fantastic icebox cake is pretty darn easy, but like anything worth doing, a few little tricks can make it truly spectacular. I’ve learned a thing or two over the years in my kitchen, and I want to share them with you so yours turns out absolutely perfect every single time. My grandma always said the best recipes come from a little bit of care and a lot of love, and that’s definitely true here!
First off, cookie freshness is key! You want those chocolate wafers to be crisp when you start so they can absorb all that creamy goodness without getting weirdly mushy. If your cookies seem a little stale, just pop them in a low oven for a few minutes to crisp them up. Also, when you’re whipping that cream, make sure your bowl and beaters are super clean and cold. Cold cream whips up much faster and gets those lovely stiff peaks – it’s such a game-changer! And remember, patience with the chilling time is a virtue. That overnight rest is where the magic happens, transforming those layers into a sliceable, dreamy dessert. More dessert ideas you might love are just a click away!
Variations on the Classic Icebox Cake
While this classic chocolate wafer icebox cake is absolutely divine on its own, the beauty of it is how easily you can play around with it! Once you nail the basic technique, the possibilities are endless. Think of it as your canvas for deliciousness! It’s like my grandma used to say, “A recipe is just a starting point, dear.”
You can swap out those chocolate wafers for other cookies like crisp vanilla wafers or even graham crackers for a slightly different vibe. Feeling adventurous with the cream? Add a tablespoon of cocoa powder for a double-chocolate version, or stir in some lemon or orange zest for a sunny twist. Don’t forget toppings, either! A sprinkle of mini chocolate chips, some fresh berries, or even a drizzle of caramel sauce can totally elevate your icebox cake game. Have fun with it!
Frequently Asked Questions About Icebox Cake
Got questions about this dreamy, no-bake wonder? I totally get it! It’s one of those recipes that feels like magic, and sometimes you just want a little reassurance. Here are some of the most common things folks ask me about this classic icebox cake recipe.
Can I make this icebox cake recipe ahead of time?
Oh, absolutely! In fact, I highly recommend it for the best results. Making your icebox cake ahead of time is actually the whole point! You need at least 8 hours, but overnight is seriously ideal. This gives the cookies plenty of time to soften and mingle with the whipped cream, creating that signature tender, cake-like texture that makes this refrigerated cookie dessert so special.
What are the best cookies for an icebox cake?
For this classic version, chocolate wafer cookies are my absolute go-to because they have just the right crispness and mild chocolate flavor that gets wonderfully tender. But honestly, you can get creative! Graham crackers are a fantastic substitute, and vanilla wafers also work beautifully. Just make sure whatever cookie you choose is relatively thin and crisp so it can absorb moisture and soften up properly. Avoid really soft or chewy cookies, though; they won’t give you that classic icebox cake texture.
How long does an icebox cake last in the fridge?
This whipped cream fridge cake is best enjoyed within about 3-4 days. It’s definitely best on that first or second day when the cookies are perfectly softened but the cream is still super fresh. Keep it well covered with plastic wrap in the refrigerator. Since it’s no-bake, it doesn’t have the same shelf life as a baked cake, but trust me, it usually doesn’t last that long anyway – it tends to disappear pretty quickly!
Can I use store-bought whipped topping instead of whipping my own cream?
You *can*, but I really wouldn’t recommend it if you want the very best texture and flavor. Homemade whipped cream with real heavy cream and powdered sugar has a much richer taste and the perfect consistency that holds up beautifully in the layers. Those stabilized whipped toppings can sometimes have a different texture and a more artificial taste. For this truly classic, delicious icebox cake recipe, taking the extra few minutes to whip your own cream is absolutely worth it!
Nutritional Information for This Refrigerated Cookie Dessert
Just a heads-up, the numbers below are estimates, okay? Since everyone’s pantry is a little different (and I’m not weighing every single sprinkle!), the exact nutritional info can vary. This gives you a general idea of what you’re working with for one slice of our lovely refrigerated cookie dessert.
- Serving Size: 1 slice
- Calories: 350
- Fat: 20g
- Saturated Fat: 12g
- Carbohydrates: 40g
- Sugar: 30g
- Protein: 3g
- Cholesterol: 60mg
- Sodium: 100mg
Share Your Icebox Cake Creations!
Okay, now it’s your turn in the kitchen! I would absolutely LOVE to see your amazing icebox cakes. Did you try a fun variation? Did your family rave about it? Please, share your pictures and your thoughts in the comments below or tag me on social media. And if you give this recipe a whirl, a quick rating helps others find it too! You can also reach out anytime if you have questions!
PrintClassic Chocolate Wafer Icebox Cake
A simple, no-bake layered dessert made with chocolate wafers and whipped cream that softens into a cake-like texture in the refrigerator.
- Prep Time: 20 min
- Cook Time: 0 min
- Total Time: 8 hr 20 min
- Yield: 6 servings 1x
- Category: Dessert
- Method: No-Bake
- Cuisine: American
- Diet: Vegetarian
Ingredients
- 1 package (about 9 ounces) chocolate wafer cookies
- 2 cups heavy whipping cream
- 1/2 cup powdered sugar
- 1 teaspoon vanilla extract
Instructions
- Line an 8×4 inch loaf pan with plastic wrap, leaving an overhang on all sides.
- Arrange a single layer of chocolate wafer cookies on the bottom of the prepared pan. Break cookies as needed to fill any gaps.
- In a large bowl, whip the heavy cream, powdered sugar, and vanilla extract until stiff peaks form.
- Spread about one-third of the whipped cream mixture evenly over the cookie layer.
- Add another layer of chocolate wafer cookies, followed by another layer of whipped cream. Repeat the layers until you have used all the cookies and whipped cream, ending with a layer of whipped cream.
- Fold the overhanging plastic wrap over the top of the cake to cover it completely.
- Refrigerate for at least 8 hours, or preferably overnight, to allow the cookies to soften and the cake to set.
- To serve, invert the cake onto a serving platter, remove the plastic wrap, and slice into thick pieces.
Notes
- For a richer flavor, you can add 2 tablespoons of unsweetened cocoa powder to the whipped cream.
- If you don’t have chocolate wafer cookies, graham crackers or vanilla wafers can be used as a substitute.
- Ensure the cake is well chilled for at least 8 hours for the best texture.
Nutrition
- Serving Size: 1 slice
- Calories: 350
- Sugar: 30g
- Sodium: 100mg
- Fat: 20g
- Saturated Fat: 12g
- Unsaturated Fat: 8g
- Trans Fat: 0g
- Carbohydrates: 40g
- Fiber: 1g
- Protein: 3g
- Cholesterol: 60mg