 Skip to content
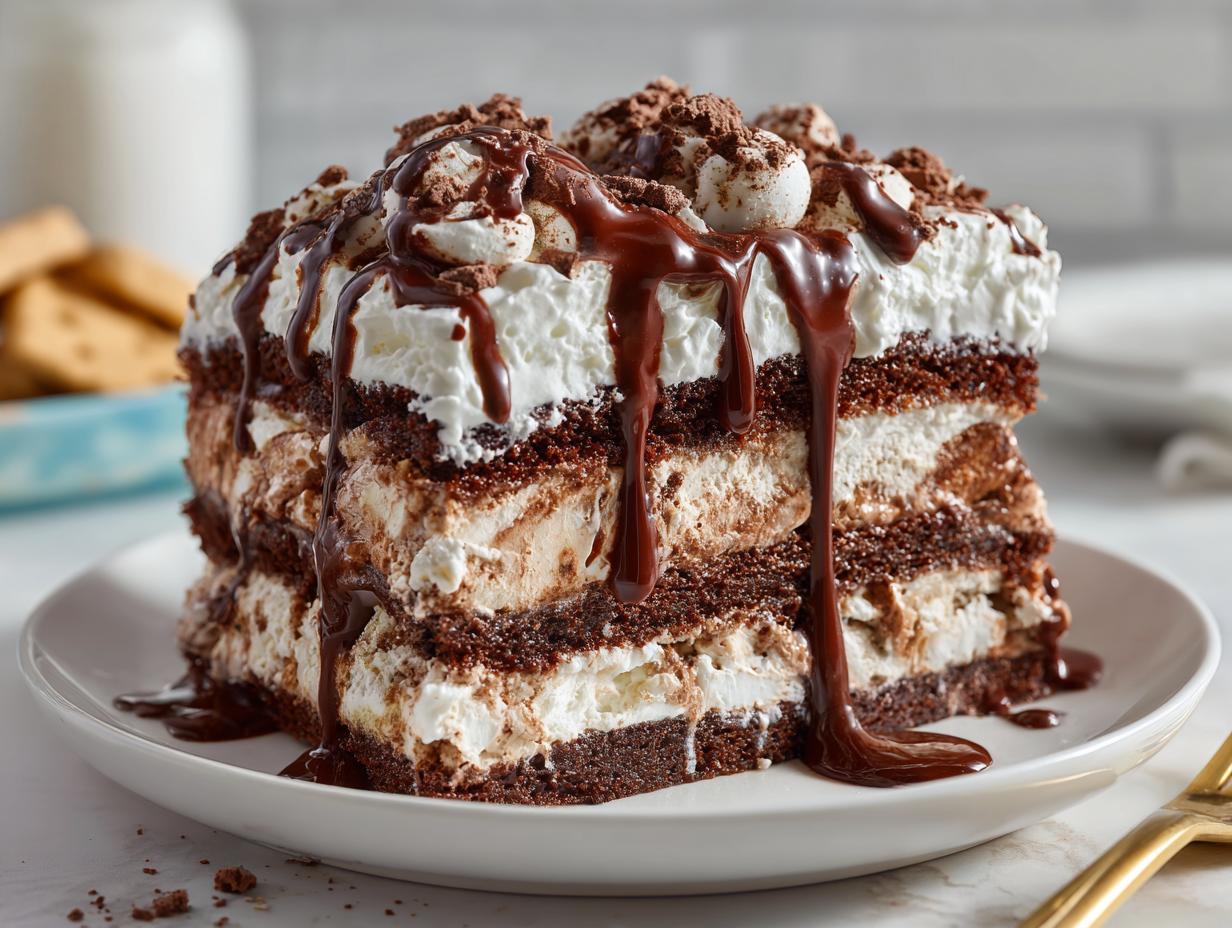

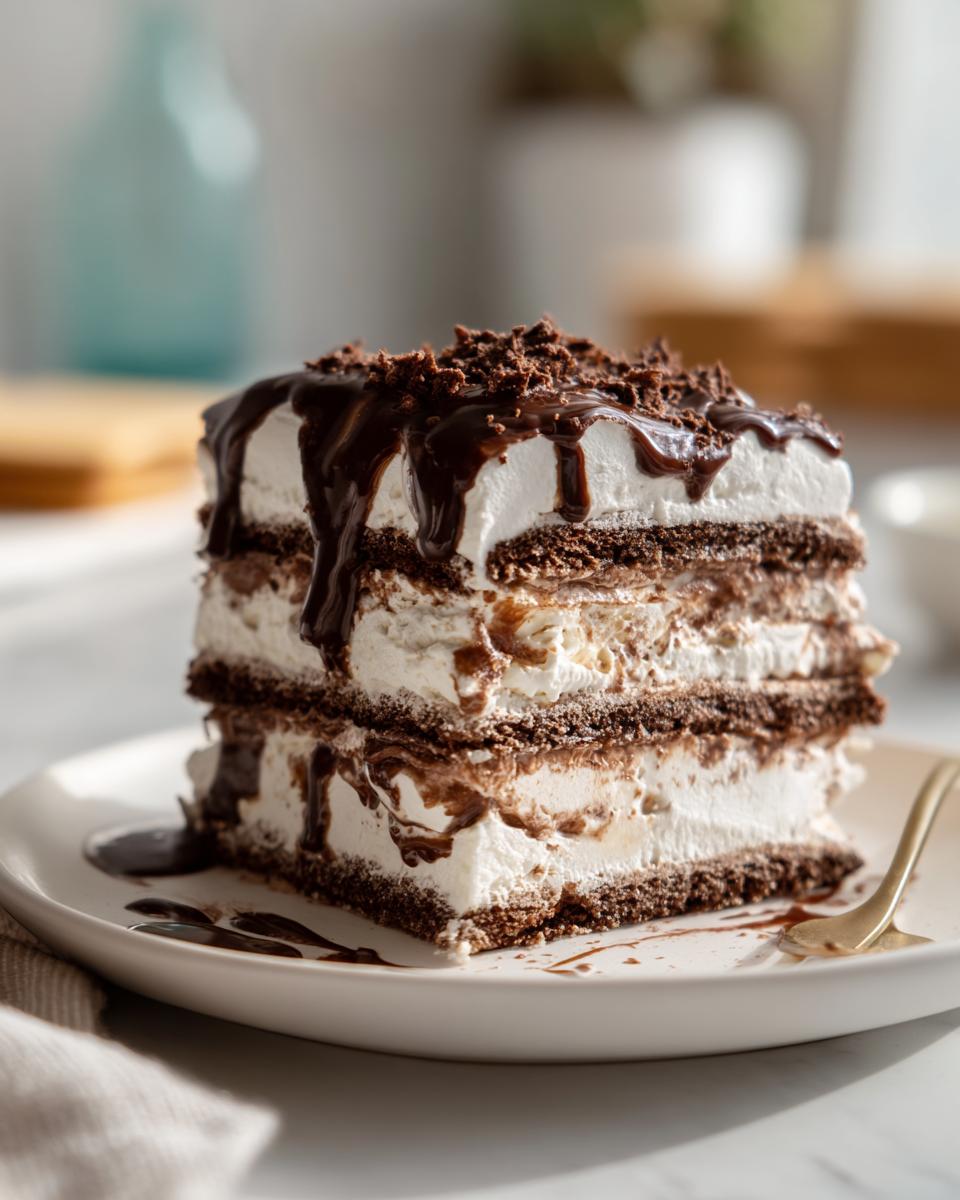
You know those moments when your kid announces at 4 PM that they invited half their class over for dessert tomorrow? That’s exactly how I discovered this lifesaving ice cream sandwich cake. Picture me, standing in my kitchen, staring at an empty counter with a rapidly shrinking window of time—panic mode! But then it hit me: the beauty of this no-bake wonder. Ten minutes of assembly, a few hours in the freezer, and boom—party magic. No oven, no fuss, just layers of dreamy ice cream sandwiches, whipped topping, and rivers of fudge. The kids went wild for it, and honestly? I felt like a superhero parent. This cake’s been our go-to ever since for birthdays, barbecues, and those “oops, I forgot dessert” emergencies.

- Why You’ll Love This Ice Cream Sandwich Cake
- Ingredients for Ice Cream Sandwich Cake
- How to Make Ice Cream Sandwich Cake
- Tips for the Perfect Ice Cream Sandwich Cake
- Variations for Your Ice Cream Sandwich Cake
- Serving and Storing Ice Cream Sandwich Cake
- Ice Cream Sandwich Cake FAQs
- Nutritional Information
- Warm Chocolate Fudge vs. Caramel Drizzle
Why You’ll Love This Ice Cream Sandwich Cake
Okay, let me count the ways this cake will become your new best friend in the kitchen. First off—no oven required! I don’t know about you, but when it’s 90 degrees outside, the last thing I want to do is turn on my oven. This easy freezer cake comes together with just a few store-bought staples and a little patience while it sets. Total game-changer for busy weeknights or last-minute celebrations.
- No baking, no sweating: Just layer, freeze, and serve. Your kitchen stays cool, and you look like a dessert genius.
- Minimal effort, maximum wow: Kids can practically assemble this no bake ice cream cake themselves (mine love “helping” with the sprinkles).
- Crowd-pleasing flavors: Chocolate, vanilla, crunchy Oreos—it’s basically everyone’s favorite ice cream shop in cake form.
- Meal planning superstar: Make it days ahead when you’ve got time, then pull it out when you need it. Works perfectly for those chaotic weeks.
- Freezer-friendly forever: Okay, maybe not forever, but leftovers keep beautifully for up to two weeks—if they last that long!
Seriously, this cake spoils you for other desserts. After this, turning on the oven for a birthday cake might feel like way too much work!
Ingredients for Ice Cream Sandwich Cake
Here’s the beautiful part—you probably already have most of these ingredients lurking in your freezer or pantry! I always grab an extra box of ice cream sandwiches when they’re on sale (trust me, you’ll thank yourself later). Here’s what you’ll need to make this dreamy dessert:
- 12 ice cream sandwiches (I love the classic vanilla-filled ones, but any flavor works)
- 1 (8 oz) container whipped topping, softened (Cool Whip is my go-to, but store brands work great too)
- 1 (12 oz) jar hot fudge sauce (I microwave mine for 15 seconds to make it extra drizzle-able)
Optional toppings because why not?:
- 1/2 cup crushed Oreos (my kids love the extra crunch!)
- 1/4 cup chocolate sprinkles (or rainbow if you’re feeling festive)
See? Five simple ingredients (plus bonus sprinkles!) are all you need for pure dessert magic. And don’t stress about brands—whatever’s on sale works perfectly for this easy-going cake.
How to Make Ice Cream Sandwich Cake
Okay, let’s dive into the fun part—building this masterpiece! The best part? You barely need any actual “skills” to pull this off. Just follow these simple steps, and you’ll have everyone thinking you spent hours in the kitchen (our little secret!).
Step 1: Prepare the Pan
First things first—grab your 9×13-inch pan and line it with parchment paper. This isn’t just busywork, I promise! That parchment liner is your secret weapon against stuck-on ice cream disasters. It gives you those perfect, clean slices when serving. Bonus? You can lift the whole cake out easily for cutting—no awkward scooping from the pan!
Step 2: Layer the Ice Cream Sandwiches
Now comes the satisfying part—unwrap your ice cream sandwiches and lay them snugly in the pan. I use 6 per layer, arranging them like little edible bricks. Pro tip: Press them gently together as you go to avoid gaps where the whipped topping might sneak through later. Trust me, nobody wants whipped cream “rivers” disrupting their perfect layers!
The magic assembly line:
- Layer 1: Ice cream sandwiches, whipped topping, fudge drizzle (don’t be shy!)
- Wait 5 minutes after taking the whipped topping from the freezer—it spreads like a dream when slightly softened.
- Layer 2: Repeat everything! More sandwiches, more whipped clouds, more glorious fudge.
- Top décor: Crushed Oreos? Sprinkles? Maybe both! (This is where kids love to “help.”)
Pop your creation in the freezer for at least 4 hours—I usually make mine the night before parties. The hardest part? Waiting patiently while your freezer works its magic!
Tips for the Perfect Ice Cream Sandwich Cake
Listen, I’ve made this cake more times than I can count—sometimes at 2 AM when a midnight snack craving hits *hard*. Here are my golden rules for foolproof success every time:
Patience is key: Don’t dig in straight from the freezer! Let your cake sit at room temp for 5 minutes before slicing. That little breather keeps your knife from cracking those beautiful layers (lesson learned the hard way with my first crumbly mess!).
Fudge physics: Room-temperature fudge drizzle is your friend. I microwave my jar for 15 seconds—just enough to make it silky without turning it into a molten lava situation. Pro tip? Drizzle from high up for those Instagram-worthy zigzags!
Topping tactics: Gently press sprinkles or crushed Oreos into the whipped topping before freezing. It’s like edible glitter—you want it to stick, not slide right off when you serve. My kids taught me this after our first “sprinkle avalanche” disaster.
Through trial and error (and maybe a few “oops” moments), I’ve learned that the best cakes happen when you relax and have fun with it. Sometimes I swap in caramel sauce instead of fudge, or add a handful of mini chocolate chips between layers. Your freezer, your rules—just don’t tell my kids I’ve been sneaking in peanut butter cups!
Variations for Your Ice Cream Sandwich Cake
Here’s where things get really fun—this cake is like a fluffy white canvas begging for your creative touch! After making the classic version a gazillion times (not exaggerating), I started playing with variations. Turns out, you can switch up just about every layer and end up with something delicious. Here are my family’s favorite spins:
Mint chocolate magic: Swap in mint chocolate chip ice cream sandwiches and drizzle with chocolate syrup instead of fudge. It tastes like a frozen grasshopper pie—my sister begs me to make this for her birthday every year.
Berry blast: Use strawberry ice cream sandwiches and rainbow sprinkles between layers. The tangy berry flavor cuts through the sweetness perfectly. Pro tip? Add a layer of fresh strawberry slices before the final whipped topping for bombshell summer vibes.
Oreo overload: For the ultimate Oreo ice cream cake, use cookies and cream sandwiches, mix crushed Oreos right into the whipped topping, and go heavy on the fudge drizzle. This one disappears faster than I can say “second slice please!”
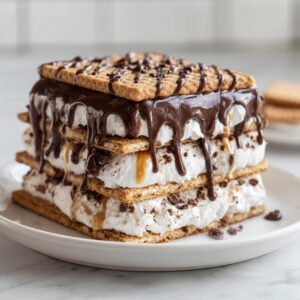
Really, the sky’s the limit—I’ve even done a s’mores version with chocolate sandwiches, marshmallow fluff instead of whipped topping, and graham cracker crumbs. Whatever flavor combo you dream up, just remember: more layers = more happiness!
Serving and Storing Ice Cream Sandwich Cake
Okay, let’s talk about the best part—eating your masterpiece! Here’s how my family enjoys our ice cream sandwich cake without tears or melted messes (we’ve learned through trial and error!). First rule: grab a tall glass of hot water for your knife. Dip it in, wipe it dry, and slice—the warm blade glides through those frozen layers like butter for perfect, clean cuts. Second rule? Serve immediately after slicing so everyone gets that magical mix of slightly softened ice cream and crisp cookie layers.
Now, about leftovers—which, honestly, rarely happen in my house! If you’re lucky enough to have some, pop those slices in an airtight container with parchment between layers (this keeps them from freezing together into one giant ice cream brick). They’ll keep beautifully for up to two weeks in the freezer—just in case you need a sweet emergency stash during meal planning crunch time. Pro tip: These make amazing “ice cream cake pops” if you cut leftovers into bite-sized squares—perfect for sneaky midnight snacks!
Ice Cream Sandwich Cake FAQs
Oh honey, I’ve heard ‘em all—from panicked texts at midnight to my neighbor shouting questions over the fence while assembling this cake! Here are the answers to the big three questions that always come up:
Can I use homemade whipped cream instead of whipped topping?
Sweetie, I love your DIY spirit, but trust me—save the homemade stuff for pie toppings. Whipped topping (like Cool Whip) holds its shape in the freezer, while whipped cream turns into sad, weepy puddles. Been there, scraped that melted mess off my counter… never again!
How far ahead can I make this cake?
Music to busy parents’ ears: up to two days before serving! Just wrap it tight in plastic wrap to avoid freezer smells (nobody wants spaghetti-flavored sprinkles). Pro tip? Write the date on the wrap—otherwise you’ll find mysterious frozen squares months later like I did!
Can I swap in fancy ice cream flavors?
Absolutely! Mint chip, cookie dough, even strawberry work beautifully—just avoid sorbet (it freezes rock-hard as my dentist can attest). My wildest experiment? Peanut butter cup sandwiches with caramel drizzle. The kids still talk about it! Whatever you pick, just keep the sandwiches roughly the same size for even layers.
Nutritional Information
A quick heads up—these nutritional values are just estimates and can vary depending on the specific ingredients and brands you use. That jar of fudge sauce you picked up? Might have slightly different numbers than the one in my pantry! Always check your labels if you’re keeping close track.
Warm Chocolate Fudge vs. Caramel Drizzle
Oh, the great debate in our house—should we crown fudge or caramel as the champion drizzle? Here’s the scoop (pun intended!): that rich chocolate fudge gives you classic ice cream parlor vibes, perfect for chocolate lovers. But caramel? It brings this buttery, toasty sweetness that makes the cake feel extra special—like a gourmet summer birthday cake upgrade. Me? I’m team fudge all the way—there’s something about that deep chocolatey ribbon mingling with the vanilla ice cream that makes me weak in the knees. But honestly? You can’t go wrong with either—just promise me you’ll drizzle with abandon!
PrintIce Cream Sandwich Cake
A quick and easy no-bake dessert made with ice cream sandwiches, whipped topping, and fudge.
- Prep Time: 10 min
- Cook Time: 0 min
- Total Time: 4 hours 10 min
- Yield: 12 servings 1x
- Category: Dessert
- Method: Freezing
- Cuisine: American
- Diet: Vegetarian
Ingredients
- 12 ice cream sandwiches
- 1 (8 oz) container whipped topping
- 1 (12 oz) jar hot fudge sauce
- 1/2 cup crushed Oreos (optional)
- 1/4 cup chocolate sprinkles (optional)
Instructions
- Line a 9×13-inch pan with parchment paper.
- Place 6 ice cream sandwiches in a single layer on the bottom.
- Spread half the whipped topping over the sandwiches.
- Drizzle half the fudge sauce on top.
- Repeat with another layer of sandwiches, whipped topping, and fudge.
- Sprinkle with crushed Oreos and chocolate sprinkles if desired.
- Freeze for at least 4 hours before serving.
Notes
- Use softened whipped topping for easier spreading.
- Let the cake sit at room temperature for 5 minutes before slicing.
- Store leftovers in the freezer for up to 2 weeks.
Nutrition
- Serving Size: 1 slice
- Calories: 320
- Sugar: 28g
- Sodium: 180mg
- Fat: 14g
- Saturated Fat: 8g
- Unsaturated Fat: 4g
- Trans Fat: 0g
- Carbohydrates: 42g
- Fiber: 1g
- Protein: 4g
- Cholesterol: 20mg