 Skip to content
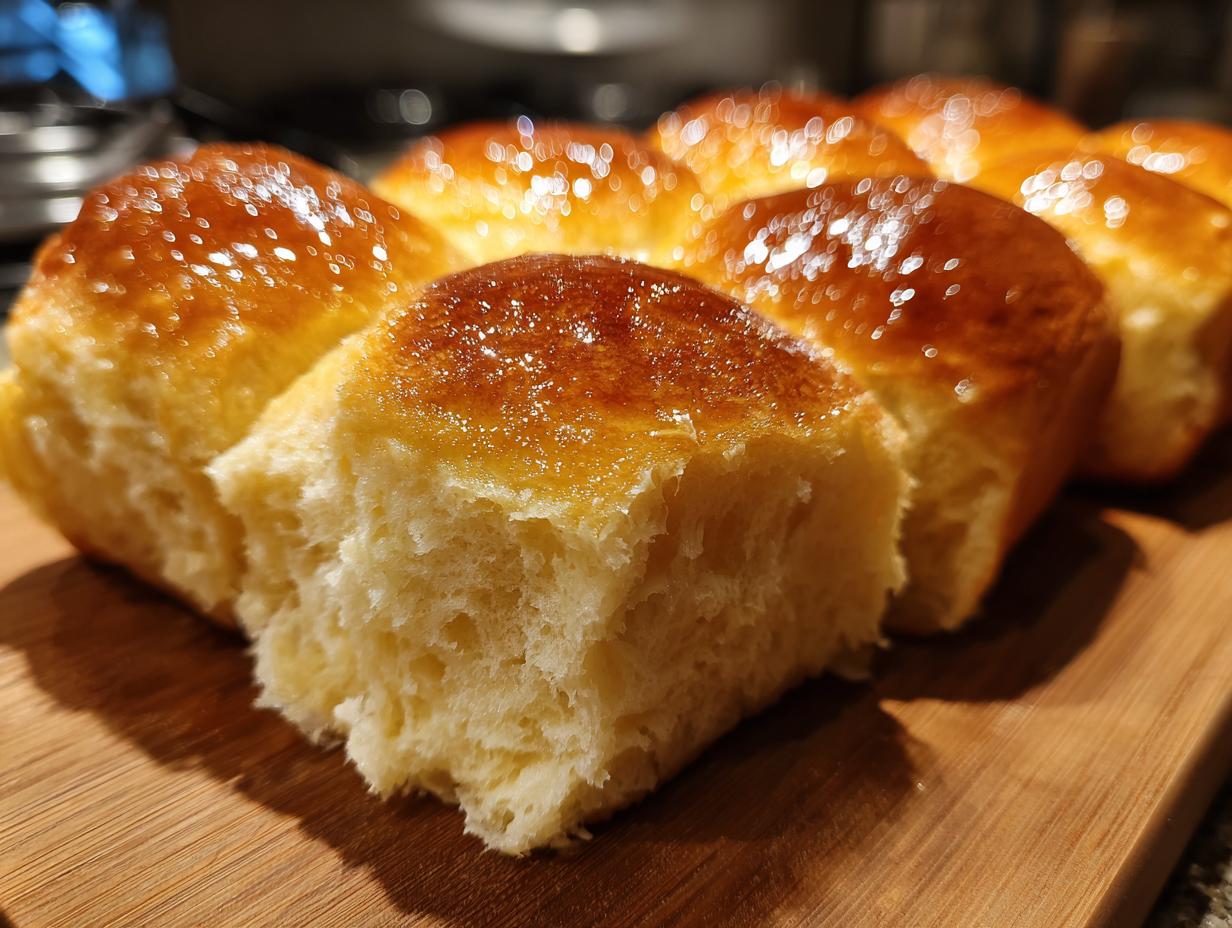

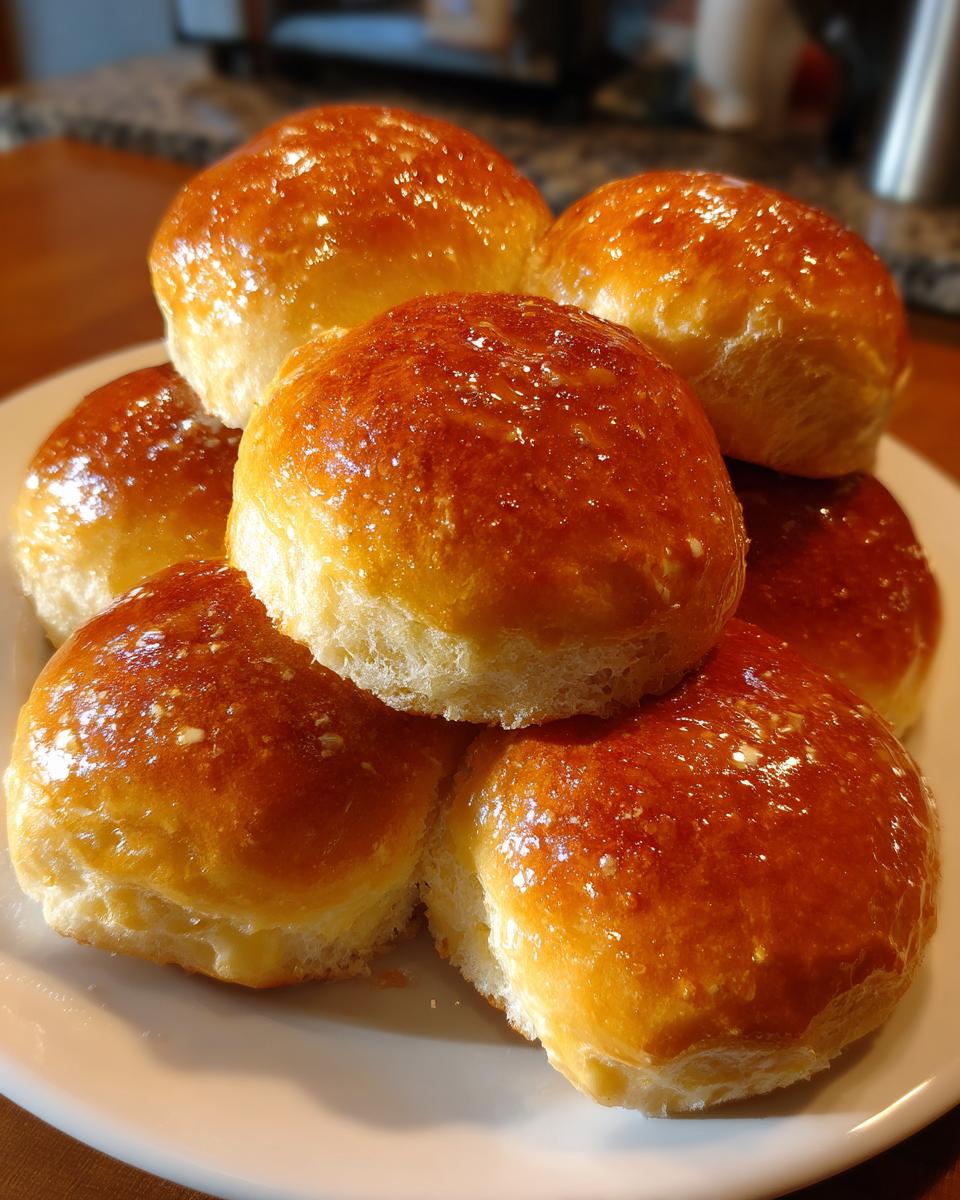
Ah, Thanksgiving! That magical time of year when the kitchen smells like pure comfort and the table groans under the weight of all that deliciousness. And could any Thanksgiving spread truly be complete without a basket of warm, soft dinner rolls? My Grandma used to make the best ones, her kitchen always filled with that incredible aroma. Learning from traditions like hers, and adapting them for our busy lives—like I wrote about on my about page—has taught me so much about making these holiday favorites absolutely perfect. These aren’t just any rolls; they’re wonderfully soft, just the right amount of sweet, and honestly, so easy to whip up even when you’re juggling a million Thanksgiving to-dos. Trust me on this!

- Why You'll Love These Classic Thanksgiving Dinner Rolls
- Gather Your Ingredients for Perfect Dinner Rolls
- Step-by-Step Guide: How to Make Dinner Rolls
- Tips for Baking Perfect Dinner Rolls Every Time
- Make-Ahead and Storage for Your Dinner Rolls
- Serving Suggestions for Your Thanksgiving Classic
- Frequently Asked Questions About Dinner Rolls
- Nutritional Information Estimate
Why You’ll Love These Classic Thanksgiving Dinner Rolls
These aren’t just dinner rolls; they’re little bites of comfort perfect for your Thanksgiving feast! Here’s why you’ll want to make them:
- Super Soft Texture: They’re incredibly tender and cloud-like, just what you want in a holiday roll.
- Just the Right Sweetness: A hint of sugar makes them perfectly balanced – not too sweet, not bland.
- Effortless to Make: Seriously, these are easy enough to fit into your busy holiday baking schedule.
- Crowd-Pleasing Flavor: They’re a classic for a reason – everyone, from your picky eaters to your foodiest friends, will love them.
- Perfect Holiday Pairing: They are the ideal companion for all your favorite Thanksgiving sides and mains.
Gather Your Ingredients for Perfect Dinner Rolls
Okay, let’s get our ducks in a row for these amazing dinner rolls! Having all your ingredients measured out and ready to go makes the whole process so much smoother, especially when holiday cooking is already a bit of a whirlwind. You’ll need:
- 1 cup warm milk (make sure it’s between 105-115°F – too hot and it’ll kill the yeast, too cool and it won’t wake up!)
- 2 ¼ teaspoons active dry yeast (check that expiration date!)
- ¼ cup granulated sugar
- 1 teaspoon salt
- ¼ cup unsalted butter, softened (leave it out on the counter for a bit!)
- 2 large eggs, at room temperature (eggs integrate better when they’re not ice cold!)
- 3 ½ to 4 cups all-purpose flour (we’ll add this gradually until the dough is just right)
- 1 tablespoon unsalted butter, melted (this is for brushing on top when they’re done – pure magic!)
Step-by-Step Guide: How to Make Dinner Rolls
Alright, let’s get down to business! Learning how to make dinner rolls that are just perfect for Thanksgiving is easier than you think, and these instructions will guide you every step of the way. My grandmother always said baking is a labor of love, and these rolls definitely deliver on that love! You can find more details on my blog post too!
Activating the Yeast and Mixing the Dough
First things first, we need to get that yeast happy! In a big bowl, pour in your warm milk, sprinkle over the yeast, and then add the sugar. Give it a gentle stir and let it hang out for about 5 to 10 minutes. You’ll know it’s ready when it gets nice and foamy. Then, stir in the salt and that softened butter until most of it melts. Now, beat in your eggs one at a time until it’s all nicely combined. Slowly start adding about 3 ½ cups of flour. Mix it all up until you have a soft dough that’s just starting to pull away from the sides of the bowl. If it’s feeling a little too sticky, just add a bit more flour, about a quarter cup at a time, until it’s perfect.
Kneading and First Rise for Your Dinner Rolls
Turn that lovely dough out onto a surface you’ve lightly floured. Now comes the fun part – kneading! Work the dough for about 5 to 7 minutes. You’re looking for it to get smooth and elastic. It should feel wonderful in your hands! Once it’s kneaded just right, lightly grease a clean bowl, pop the dough in there, and turn it over so the whole ball is coated. Cover it up with plastic wrap or a clean, damp towel. Find a warm spot for it to double in size – this usually takes about 1 to 1 ½ hours. Patience here makes all the difference!
Shaping and Second Rise
Okay, your dough has had a nice little nap and it’s all puffed up! Gently punch down the dough to get some of the air out. Now, you’ll want to divide it into 12 equal pieces. This is where you get to shape them into little balls. Place these dough balls into your greased 9×13 inch baking pan. Give them a little space, about an inch apart, because they’ll puff up again. Cover that pan back up and let them have another rise for about 30 to 45 minutes, until they look nice and puffy. You’re almost there!
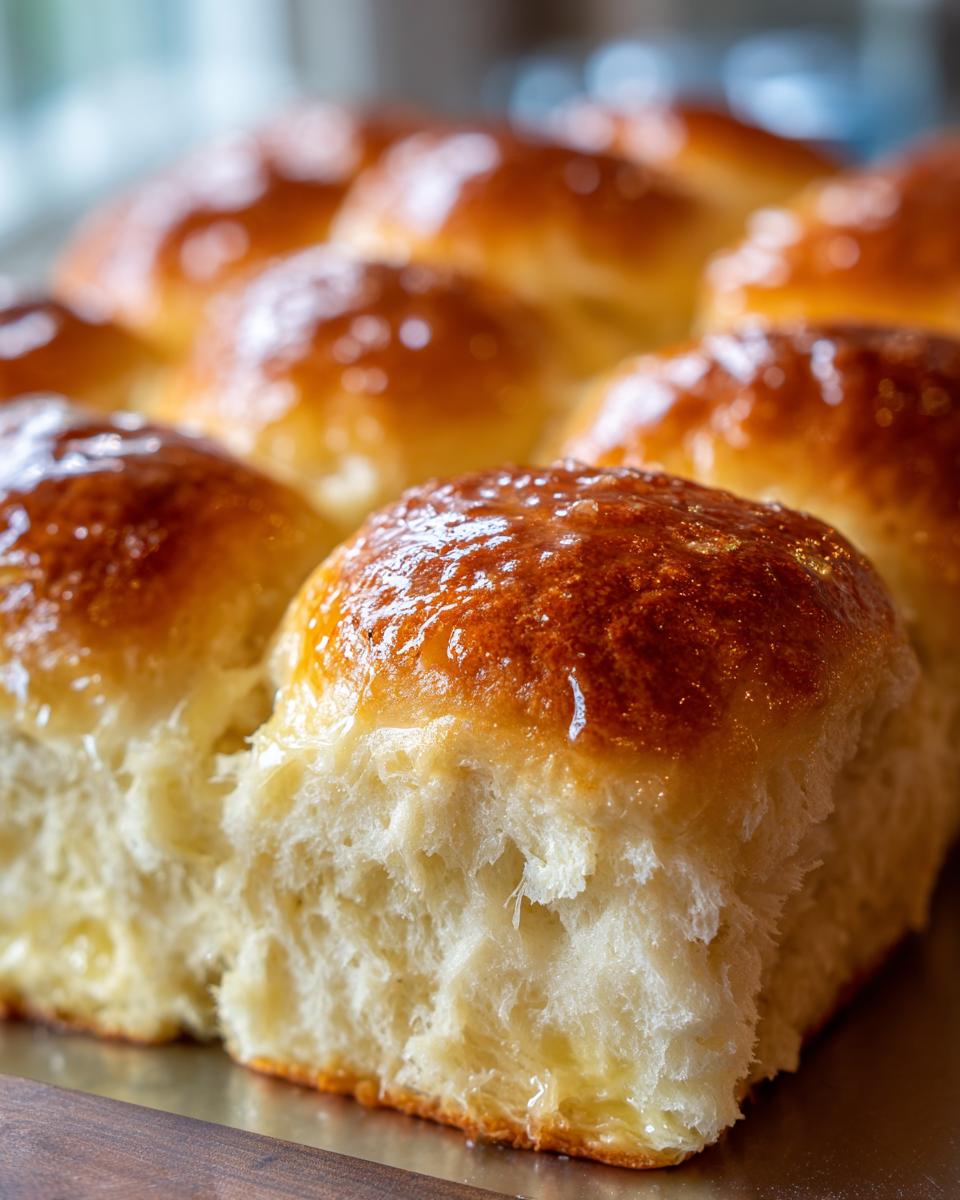
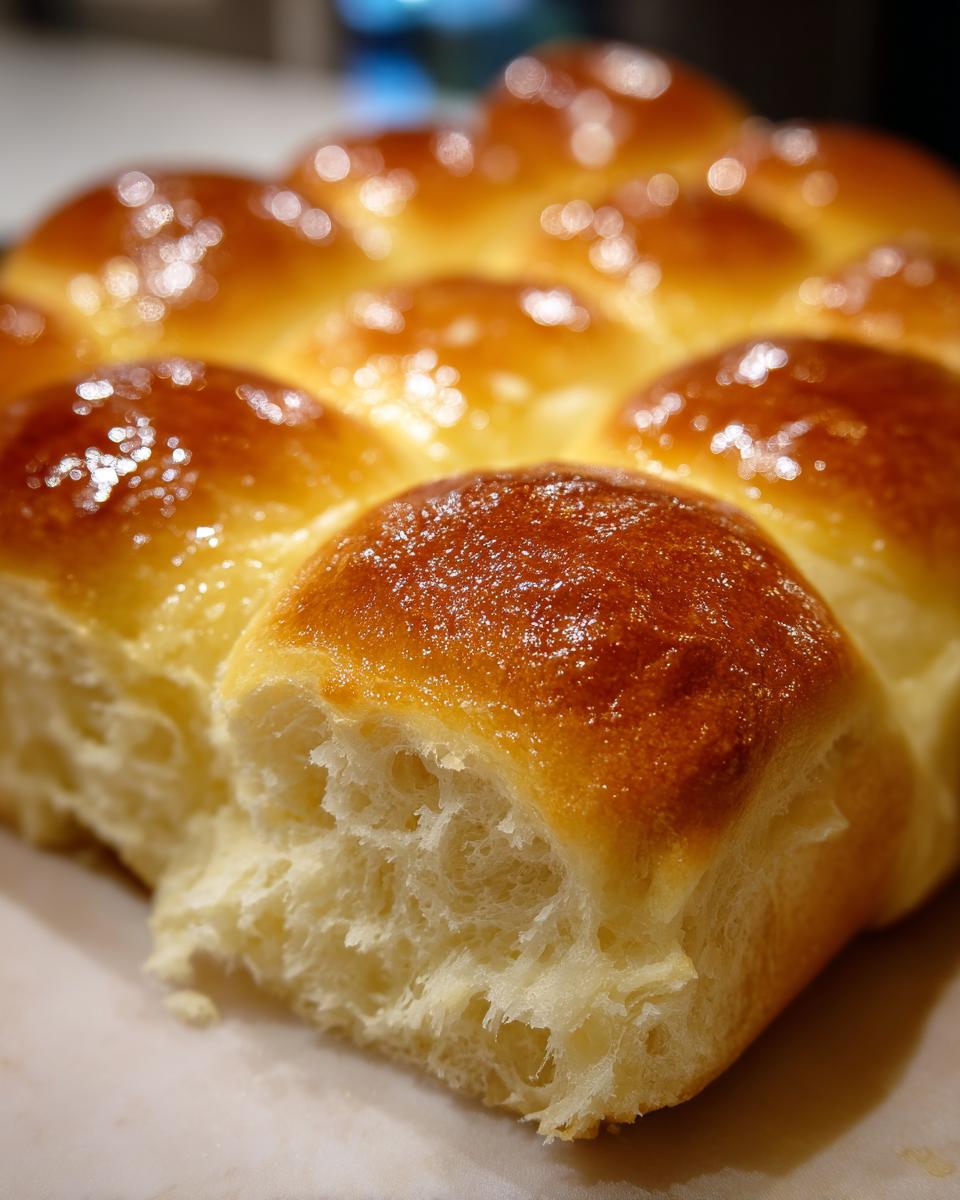
Baking and Finishing Touches for Your Thanksgiving Classic
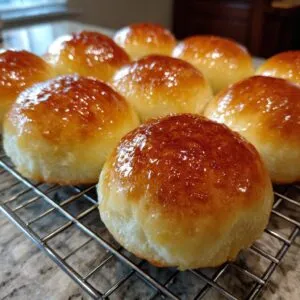
Get your oven preheating to 375°F (190°C). Once the rolls have had their second rise and the oven is nice and hot, it’s time to bake! Slide that pan into the oven and bake for about 15 to 20 minutes. You’re looking for a beautiful golden brown color.
When they come out, while they’re still warm, grab that melted butter I mentioned earlier and generously brush the tops. Oh, the smell in the kitchen at this point is just heavenly! Serve them up right away so everyone can enjoy their soft, buttery goodness.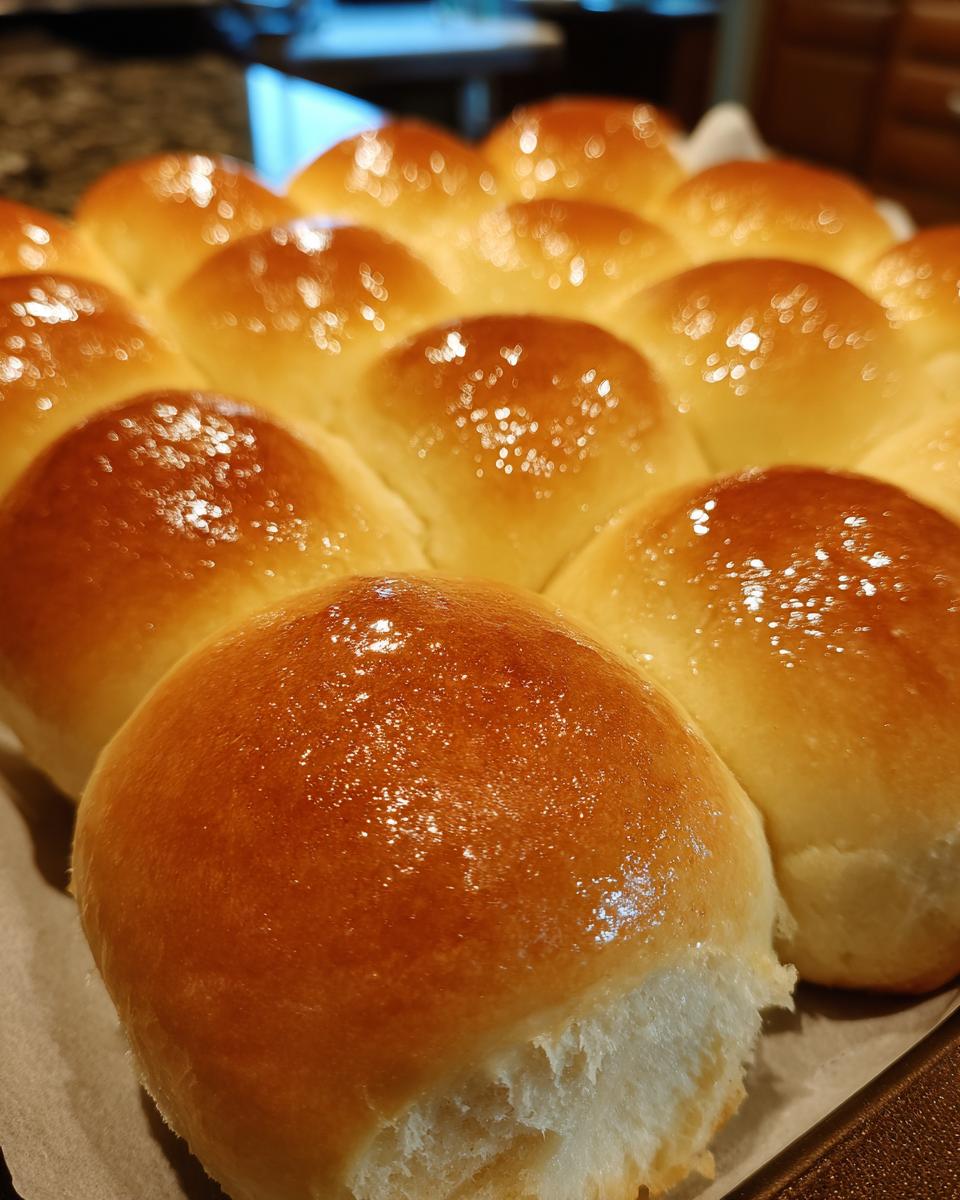
Tips for Baking Perfect Dinner Rolls Every Time
You know, even with the best recipe, sometimes things go a little sideways in the kitchen, right? Especially during the holiday craziness! So, here are a few little nuggets of wisdom I’ve picked up over the years that really help ensure your dinner rolls turn out absolutely perfect, every single time.
- Fresh Yeast is Key: Seriously, check that expiration date on your yeast packet! Old yeast is like a sad party guest – it just won’t get things going. If it doesn’t foam up when you mix it with warm milk and sugar, grab a new one. Trust me, it’s way better than dense, failed rolls!
- Room Temperature is Your Friend: I know it’s tempting to just grab stuff straight from the fridge, but for these rolls, letting your milk, butter, and eggs come to room temperature makes a HUGE difference. They blend together so much more smoothly, and the dough rises beautifully.
- Don’t Go Crazy with Flour: When you’re at the flour-adding stage, remember that dough should be a little sticky. It’s supposed to be! If you add too much flour thinking it’ll be easier to handle, you’ll end up with tougher, drier rolls. Resist the urge to dump in a ton more flour!
- Warmth for Rising: Yeast loves a cozy environment. Find the warmest, draft-free spot in your house for the dough to rise. Sometimes I even pop my oven on for just a minute, turn it off, and let the dough rise in there (with the door slightly ajar).
Make-Ahead and Storage for Your Dinner Rolls
Busy holiday season? No worries! You can totally get ahead with these dinner rolls. You can mix the dough, let it do its first rise, then cover it really well and pop it in the fridge overnight. Just let it sit on the counter for about 30 minutes to an hour before you shape and bake them. Already baked them? Let them cool completely, then wrap them up tightly. They’re great for a day or two on the counter, or you can freeze them for a few weeks!
Serving Suggestions for Your Thanksgiving Classic
These warm, fluffy dinner rolls are the perfect accompaniment to all your Thanksgiving favorites! They’re just begging to be dipped into some rich turkey gravy, piled high with savory stuffing, or just enjoyed alongside a perfectly roasted turkey. They truly complete the holiday plate!
Frequently Asked Questions About Dinner Rolls
Got questions? I’ve got answers! Making dinner rolls, especially for a big holiday meal, can bring up a few curiosities, and I’m happy to share what I’ve learned. Here are some common things people ask:
Can I use bread flour instead of all-purpose flour?
You absolutely can! Using bread flour will give your dinner rolls a chewier texture and a bit more structure. Just be aware that it might absorb liquid a little differently, so you might need to adjust the flour quantity slightly. For that super soft, classic Thanksgiving roll, I usually stick to all-purpose, but bread flour is a great option if you prefer that texture!
Why didn’t my dinner rolls rise?
Oh, this is a common one, and usually it comes down to a couple of things. Make sure your yeast was fresh and truly active before you started – that foamy stage is important! Also, check the temperature of your milk; if it was too hot, it could have killed the yeast, and if it was too cool, it might not have woken up properly. Make sure they had a nice, warm place to rise, too. Sometimes they just need a little extra cozy home!
How do I get softer dinner rolls?
For the softest rolls ever, you’ll want to be gentle with your flour, as we talked about in the tips section. Don’t add too much extra flour, even if the dough feels a little sticky at first. Also, using milk instead of water, as this recipe does, really contributes to a softer crumb. And don’t forget that final brush of melted butter right when they come out of the oven – that’s pure softness right there!
Can I make these rolls without eggs?
Eggs add richness and contribute to the tender texture of these rolls. While you *could* try a vegan substitute like a flax egg or applesauce, it will change the texture and flavor profile significantly. These are really designed to be a classic, rich dinner roll, so I recommend sticking with the eggs if you can!
Nutritional Information Estimate
Just a heads-up, these numbers are estimates and can change based on the exact ingredients you use! This info is to give you a general idea per roll: about 180 calories, 6g of fat (3.5g saturated), 27g carbs, 1g fiber, 4g protein, and 5g sugar. Enjoy these delicious Thanksgiving classics!
PrintClassic Thanksgiving Dinner Rolls
Easy and delicious dinner rolls, perfect for your Thanksgiving table. These soft, slightly sweet rolls are a crowd-pleasing favorite.
- Prep Time: 25 minutes
- Cook Time: 20 minutes
- Total Time: 2 hours 45 minutes
- Yield: 12 rolls 1x
- Category: Baking
- Method: Baking
- Cuisine: American
- Diet: Vegetarian
Ingredients
- 1 cup warm milk (105-115°F)
- 2 ¼ teaspoons active dry yeast
- ¼ cup granulated sugar
- 1 teaspoon salt
- ¼ cup unsalted butter, softened
- 2 large eggs, room temperature
- 3 ½ to 4 cups all-purpose flour
- 1 tablespoon unsalted butter, melted (for brushing)
Instructions
- In a large bowl, combine the warm milk, yeast, and sugar. Let stand for 5-10 minutes until foamy.
- Stir in the salt and softened butter until the butter is mostly melted.
- Beat in the eggs one at a time until well combined.
- Gradually add 3 ½ cups of flour, mixing until a soft dough forms. If the dough is too sticky, add more flour, ¼ cup at a time, until it pulls away from the sides of the bowl.
- Turn the dough out onto a lightly floured surface and knead for 5-7 minutes, or until smooth and elastic.
- Place the dough in a lightly greased bowl, turning to coat. Cover with plastic wrap or a damp cloth and let rise in a warm place for 1 to 1 ½ hours, or until doubled in size.
- Punch down the dough and divide it into 12 equal pieces. Shape each piece into a ball.
- Place the dough balls into a greased 9×13 inch baking pan, about 1 inch apart.
- Cover the pan and let the rolls rise for another 30-45 minutes, or until puffy.
- Preheat your oven to 375°F (190°C).
- Bake for 15-20 minutes, or until golden brown.
- Brush the tops of the warm rolls with melted butter. Serve immediately.
Notes
- For softer rolls, use milk instead of water.
- Ensure your yeast is fresh for proper rising.
- Room temperature ingredients help the dough rise better.
- You can prepare the dough ahead of time and refrigerate it overnight. Let it come to room temperature before shaping.
Nutrition
- Serving Size: 1 roll
- Calories: 180
- Sugar: 5g
- Sodium: 250mg
- Fat: 6g
- Saturated Fat: 3.5g
- Unsaturated Fat: 2.5g
- Trans Fat: 0g
- Carbohydrates: 27g
- Fiber: 1g
- Protein: 4g
- Cholesterol: 30mg