 Skip to content
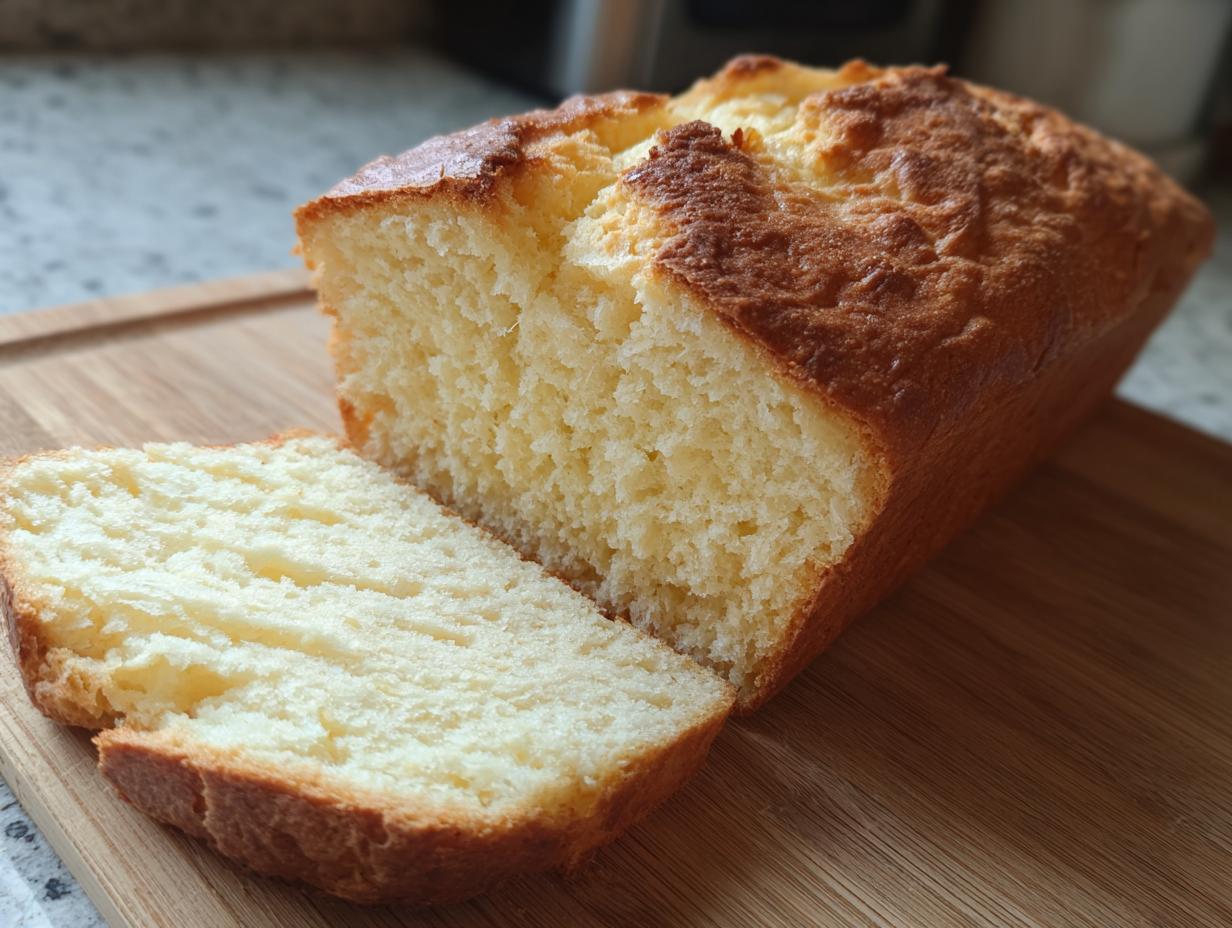

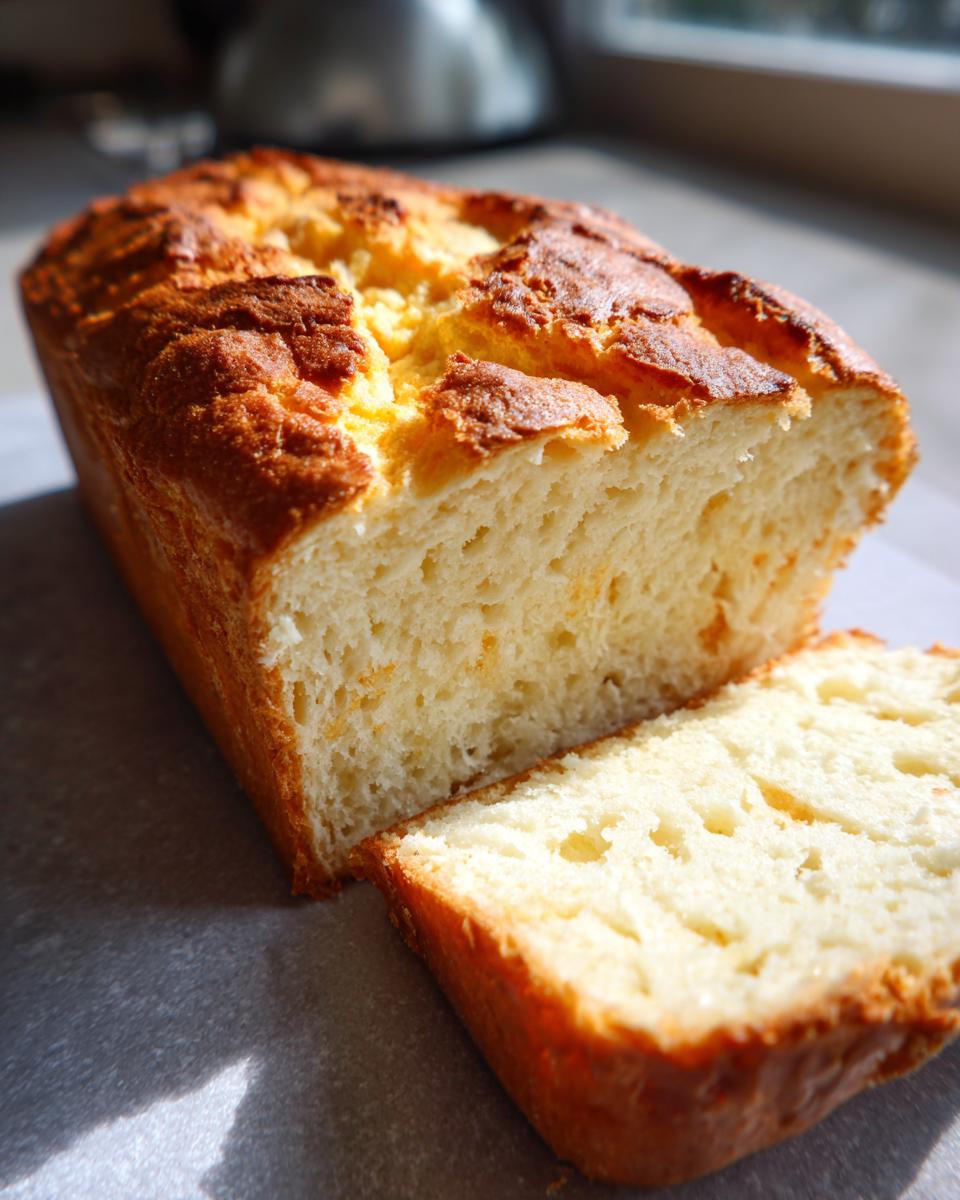
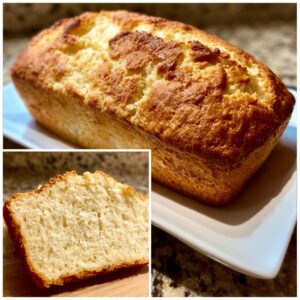
Oh, the sheer joy of a warm, crusty loaf of bread! For so long, if you needed gluten-free bread, you were pretty much stuck with something that felt more like a cardboard brick than actual food. Trust me, I’ve been there! After years of gluten-free baking fails, I finally cracked the code with this recipe. It’s my go-to for a perfectly risen, wonderfully soft loaf that you’d never guess is gluten-free. It brings that cozy, homemade goodness back to my kitchen, and I can’t wait for you to experience it too. It’s honestly a game-changer, just like the delicious discoveries I share on my about page!


- Why You'll Love This Easy Gluten-Free Bread Recipe
- Gather Your Ingredients for the Best Gluten-Free Loaf
- Step-by-Step Guide to Making Homemade GF Bread
- Tips for Gluten-Free Baking Success
- Serving and Storing Your Delicious Gluten-Free Bread
- Frequently Asked Questions About Gluten-Free Bread
- Nutritional Estimate for This Gluten-Free Bread
- Share Your Baking Success!
Why You’ll Love This Easy Gluten-Free Bread Recipe
Seriously, this recipe is a lifesaver for anyone missing good bread! You’ll want to make it again and again because:
- It’s surprisingly easy! Even if you’re new to gluten-free baking, this recipe is super forgiving.
- The texture is spot-on – wonderfully soft inside with a nice crust on the outside. No more dry, crumbly loaves!
- It’s so versatile. Perfect for toast, amazing for sandwiches, or just slathered with butter.
- It actually *rises*! You get that beautiful homemade loaf look and feel we all crave.
Gather Your Ingredients for the Best Gluten-Free Loaf
Alright, let’s get everything ready for our amazing homemade GF bread! Here’s what you’ll need:
- 1 ½ cups warm water (aim for 105-115°F, like a warm bath!)
- 2 ¼ teaspoons active dry yeast
- 1 tablespoon sugar (this helps the yeast wake up!)
- 3 cups gluten-free all-purpose flour blend (make sure it has xanthan gum in it, or add 1 teaspoon yourself!)
- 1 cup tapioca starch
- ½ cup potato starch
- 1 teaspoon salt
- 2 large eggs, at room temperature
- ¼ cup olive oil
- 1 teaspoon apple cider vinegar (this little secret helps with the rise!)
Having all these waiting makes the whole baking process so much smoother. Trust me, once you get a good GF flour blend that works for you, life gets a whole lot easier!
Step-by-Step Guide to Making Homemade GF Bread
Alright, now for the fun part – turning those simple ingredients into a beautiful loaf! It’s not as complicated as you might think, and I’ll walk you through every step, just like I do in my own kitchen. You’ll find all my blog posts helpful, but this recipe is really special.
Activating the Yeast
First things first, grab a big bowl and get your warm water in there. I’m talking warm, not hot – think cozy bathwater temperature. Toss in your yeast and that tablespoon of sugar. Give it a gentle stir and just let it hang out for about 5 to 10 minutes. You’ll know it’s happy and ready to go when it gets all foamy and bubbly on top. That means the yeast is alive and kicking!
Combining Dry and Wet Ingredients
While your yeast is getting happy, let’s get the dry stuff all whisked together in another bowl. Get that gluten-free flour blend, tapioca starch, potato starch, and salt all mixed up really well. Now, back to the yeast mixture – add in your room temperature eggs, olive oil, and that secret weapon, the apple cider vinegar. Stir it all up until it’s just combined. Then, slowly add your dry ingredients to the wet. Mix it all together until you have a smooth batter. Don’t be alarmed if it’s thicker than regular bread dough; it’s supposed to be more like a really thick cake batter – that’s the magic of gluten-free!
The First Rise: Letting Your Gluten-Free Bread Dough Rise
Okay, pour that gorgeous, thick batter into your greased 9×5 inch loaf pan. Smooth the top out with a spatula so it bakes nice and even. Now, loosely cover that pan with some plastic wrap – no need to seal it super tight. Find a nice, warm spot in your kitchen, maybe near a sunny window or over a gently preheating oven (make sure it’s off though!). Let it rise for about 30 to 45 minutes. You’ll see it puff up and nearly double in size. It’s so satisfying to watch!
Baking Your Perfect Gluten-Free Bread
Once your dough has had its cozy rise, it’s time to bake! Preheat your oven to 375°F (190°C). Carefully pop that loaf pan into the preheated oven. Bake it for a good 45 to 55 minutes. You’re looking for a beautiful golden brown crust. The best way to really know it’s done is with a kitchen thermometer – aim for an internal temperature between 200-210°F (93-99°C). That little thermometer is your best friend in gluten-free baking!
Cooling and Slicing Your Homemade GF Bread
This is arguably the hardest part, but so important! As soon as it comes out of the oven, gently remove the bread from the pan – use oven mitts, of course! Place it on a wire rack to cool completely. I know, I know, the smell is heavenly and you want to slice into it right away, but trust me. Letting it cool fully is key to getting those perfect, non-crumbly slices. It helps set the structure inside. Patience is a baker’s virtue, especially with homemade GF bread!

Tips for Gluten-Free Baking Success
Making gluten-free bread can feel like a science experiment sometimes, but trust me, it’s totally doable! My biggest tip? Pay extra attention to your ingredients. Make sure those eggs and liquid ingredients are at room temperature – it really makes a difference in how everything blends together. Cold ingredients can make your batter seize up, and nobody wants a dense loaf!
Also, the flour blend is HUGE. If you’re not using a blend that already has xanthan gum, you absolutely need to add it. It’s what gives structure to gluten-free baked goods, mimicking the job gluten does. You can find lots of great gluten-free flour blends out there, and I’ve had success with a few different ones. Just make sure it works for you! My zucchini bread recipe also has some handy tips that apply to most quick breads, including GF ones!
Don’t be scared by the batter consistency either – it’s supposed to be thick and sticky, almost like a thick cake batter. That’s totally normal. Just make sure your yeast is fresh and active before you start, and that you’re letting it rise in a nice warm place. Those little things really add up to a beautiful loaf!
Serving and Storing Your Delicious Gluten-Free Bread
Oh, the possibilities with this beautiful loaf! It’s fantastic toasted up with a smear of butter or your favorite jam, and it makes the most incredible sandwiches. Imagine hearty fillings nestled between slices that actually hold up! To keep it tasting fresh, store any leftovers in an airtight container at room temperature for up to 3 days. If you know you won’t get through it all that quickly, don’t hesitate to slice it and pop it into the freezer. It thaws out beautifully and is just as good! You can find some great side dish ideas to pair with it too!
Frequently Asked Questions About Gluten-Free Bread
Got questions about whipping up this amazing gluten-free loaf? I’ve got answers!
What if my gluten-free flour blend doesn’t have xanthan gum?
That’s totally fine! Xanthan gum is super important for giving GF bread its structure. If your blend doesn’t have it, just add about 1 teaspoon right in with your other dry ingredients when you mix them up. It’s a baker’s secret weapon for [homemade GF bread]!
Can I make this wheat-free bread recipe without eggs?
Eggs are pretty key for binding and richness in this particular recipe, giving it that lovely lift. While you *can* find vegan GF bread recipes out there, this one really relies on the eggs. Substituting them can change the texture quite a bit, so I’d recommend sticking with them if you can for the best results with this specific [easy gluten-free bread].
Why is my homemade GF bread crumbly?
Oh, crumbly bread is the worst! Usually, that happens if there isn’t enough moisture or binding agent. Make sure you’re using a good GF flour blend with xanthan gum, and double-check that your yeast was active. Also, letting it cool *completely* before slicing is a game-changer – cutting into it too soon can make it fall apart. A properly rested and baked loaf should have a great texture! For more tips on gluten-free baking, check out my other posts!
Nutritional Estimate for This Gluten-Free Bread
Now, I know you’re curious about the numbers! Here’s an estimated breakdown per slice of this delicious gluten-free bread. Keep in mind this is just an approximation, as the exact values can vary a bit depending on the specific brands of flour you use and how generous you are with your slices!
Per slice (approximate):
- Calories: 150
- Fat: 6g
- Saturated Fat: 1g
- Carbohydrates: 25g
- Fiber: 2g
- Protein: 3g
- Sugar: 3g
- Sodium: 200mg
It’s pretty great knowing you can enjoy a slice of fantastic homemade bread with these kinds of numbers. It’s a win-win!
Share Your Baking Success!
I just LOVE hearing from you all! If you give this easy gluten-free bread recipe a try, please let me know how it turned out! Drop a comment below with your experience, rate this recipe, or even share a photo of your beautiful loaf on social media. It makes my day to see your baking triumphs! You can always reach out if you have any questions, too!
PrintEasy Gluten-Free Bread Recipe
A reliable recipe for homemade gluten-free bread that yields a soft, delicious loaf perfect for sandwiches and toast. This recipe is designed to be easy to follow and produce great results.
- Prep Time: 20 min
- Cook Time: 55 min
- Total Time: 75 min
- Yield: 1 loaf 1x
- Category: Baking
- Method: Baking
- Cuisine: American
- Diet: Gluten Free
Ingredients
- 1 ½ cups warm water (105-115°F)
- 2 ¼ teaspoons active dry yeast
- 1 tablespoon sugar
- 3 cups gluten-free all-purpose flour blend (with xanthan gum)
- 1 cup tapioca starch
- ½ cup potato starch
- 1 teaspoon salt
- 2 large eggs, room temperature
- ¼ cup olive oil
- 1 teaspoon apple cider vinegar
Instructions
- In a large bowl, combine warm water, yeast, and sugar. Let stand for 5-10 minutes until foamy.
- In a separate bowl, whisk together the gluten-free flour blend, tapioca starch, potato starch, and salt.
- Add the eggs, olive oil, and apple cider vinegar to the yeast mixture. Stir to combine.
- Gradually add the dry ingredients to the wet ingredients, mixing until a smooth batter forms. The batter will be thick, similar to cake batter.
- Pour the batter into a greased 9×5 inch loaf pan. Smooth the top with a spatula.
- Cover the pan loosely with plastic wrap and let it rise in a warm place for 30-45 minutes, or until it has nearly doubled in size.
- Preheat your oven to 375°F (190°C).
- Bake for 45-55 minutes, or until the crust is golden brown and the internal temperature reaches 200-210°F (93-99°C).
- Remove the bread from the pan and let it cool completely on a wire rack before slicing.
Notes
- Ensure your gluten-free flour blend contains xanthan gum. If it doesn’t, add 1 teaspoon of xanthan gum to the dry ingredients.
- Using a kitchen thermometer is the most accurate way to check for doneness.
- Store cooled bread in an airtight container at room temperature for up to 3 days, or slice and freeze for longer storage.
Nutrition
- Serving Size: 1 slice
- Calories: 150
- Sugar: 3g
- Sodium: 200mg
- Fat: 6g
- Saturated Fat: 1g
- Unsaturated Fat: 5g
- Trans Fat: 0g
- Carbohydrates: 25g
- Fiber: 2g
- Protein: 3g
- Cholesterol: 20mg