 Skip to content
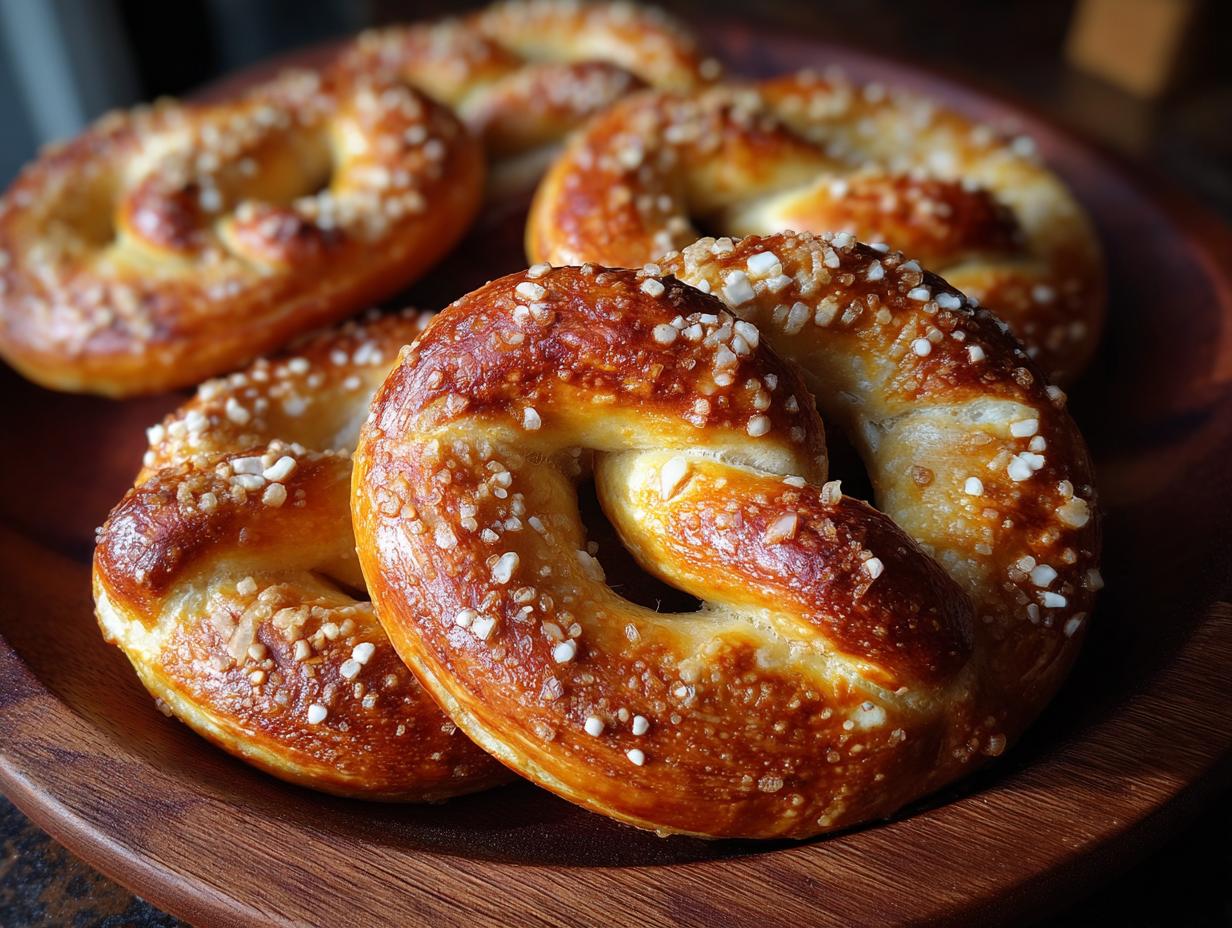

Oh my goodness, can you smell that? That’s the smell of pure joy and Oktoberfest filling your kitchen! Nothing beats the feeling of pulling a batch of perfectly *homemade soft pretzels* straight from the oven. For years, I’ve been obsessed with recreating that magic – that wonderful, chewy interior with that irresistible, crisp, salty crust you only find at a proper beer garden. It reminds me so much of standing in my grandma’s kitchen, even though she was miles away in Ohio! She always said the best food came from a little bit of patience and a whole lot of love. Trust me, making these German-style soft pretzels is totally doable, and it’s going to make any gathering, especially an Oktoberfest celebration, feel extra special. Let’s get baking!


- Why You'll Love This Homemade Soft Pretzel Recipe
- Ingredients for the Perfect Soft Pretzel
- Essential Equipment for Making Soft Pretzels
- Crafting Your Homemade Soft Pretzel: Step-by-Step
- Tips for Achieving the Best Soft Pretzel
- Ingredient Notes and Substitutions for Your Soft Pretzel
- Serving Suggestions for Your German Oktoberfest Snack
- Storage and Reheating Your Soft Pretzels
- Frequently Asked Questions about Soft Pretzels
- Estimated Nutritional Information for a Soft Pretzel
- Share Your Soft Pretzel Creations!
Why You’ll Love This Homemade Soft Pretzel Recipe
Seriously, why wouldn’t you want to whip up a batch of these amazing pretzels? Here’s why this recipe is a total winner:
- Super Easy to Make: Don’t be intimidated! The steps are straightforward, and you’ll be amazed at how simple it is to get that authentic look and taste.
- Authentic German Flavor: Get that classic chewy interior and crisp, salty crust that tastes just like you’re at Oktoberfest. It’s the real deal!
- Perfect for Sharing: These are fantastic for game nights, parties, or just a cozy evening snack. They disappear fast!
- Customizable: While the classic salted pretzel is divine, you can have fun with toppings like sesame seeds or everything bagel seasoning.
- Impress Your Guests: Nothing says “I care” like homemade goodies. These pretzels are guaranteed to wow everyone.
Ingredients for the Perfect Soft Pretzel
Alright, let’s talk ingredients! These are the stars of the show that will give you those amazing, bakery-worthy soft pretzels right in your own kitchen. Don’t skip on the details here, they really do make a difference! You’ll want to have these ready to go before you even think about mixing anything up.
Here’s exactly what you’ll need:
- 1 ½ cups warm water: Make sure it’s between 105-115°F – you don’t want it too hot or too cold for the yeast!
- 1 teaspoon granulated sugar: Just a little bit to wake up that yeast.
- 2 ¼ teaspoons active dry yeast: That’s usually one little packet.
- 4 ½ cups all-purpose flour: Plus a little extra for dusting your counter when we get to kneading.
- 1 teaspoon salt: For flavor in the dough itself.
- 1 tablespoon butter, melted: Adds a richness to the dough.
- 10 cups water: For that crucial boiling bath later on.
- ½ cup baking soda: This is key for that chewy texture and the gorgeous brown crust!
- 1 large egg, beaten with 1 tablespoon water: This is our shiny egg wash that makes the pretzels look so appetizing.
- 2 tablespoons coarse pretzel salt: You can usually find this at most grocery stores, but if not, coarse sea salt works like a charm too! It gives you those perfect salty crunch bites.
Essential Equipment for Making Soft Pretzels
Okay, so before we dive headfirst into pretzel paradise, let’s make sure you’ve got the right gear! Having these tools ready means smooth sailing when you’re in the kitchen. You’ll need a large mixing bowl for the dough, a good rolling pin, a large pot for that magical baking soda bath, and a couple of sturdy baking sheets. Don’t forget some parchment paper to line those sheets (makes cleanup a breeze!) and a slotted spoon for lifting those pretzels in and out of the hot water.
Crafting Your Homemade Soft Pretzel: Step-by-Step
Alright, let’s get our hands doughy and create some amazing homemade soft pretzels! Trust me, this is where the magic really happens. Just follow these steps, and you’ll have those picture-perfect, chewy treats in no time. It’s not as complicated as it looks, promise!
Activating the Yeast for Your Soft Pretzel Dough
First things first, we need to get that yeast happy! In a nice big bowl, mix your warm water (think comfy bathwater temperature, around 105-115°F) with the sugar. Sprinkle the yeast right on top and just let it hang out for about 5-10 minutes. You’ll know it’s ready when it gets all foamy and bubbly on the surface – that means it’s alive and ready to make our dough rise!
Mixing and Kneading the Soft Pretzel Dough
Now for the fun part! Add the flour and salt right into that foamy yeast mixture. Stir it all up with a wooden spoon until it looks like a shaggy dough. Tip that dough out onto a surface that’s just lightly dusted with flour. Now, get ready to knead! You’ll want to push, fold, and turn the dough for about 8-10 minutes. Keep at it until it feels nice and smooth, looking elastic and wonderful. It’s like giving the dough a good workout!
First Rise: Letting Your Soft Pretzel Dough Proof
Pop that smooth dough into a bowl that you’ve lightly greased. Give it a quick turn so the whole ball is coated in a little oil. Then, cover the bowl tightly with plastic wrap. Find a nice, warm spot in your kitchen and let it rest for a whole hour. You’ll know it’s done when it has puffed up and doubled in size – like a happy, doughy cloud!
Shaping the Classic Soft Pretzel
Once your dough has had its glorious rise, give it a gentle punch down to release the air. Then, divide it into 8 equal little pieces. Roll each piece into a long rope, aiming for about 20 inches. This is where we make the pretzel shape! Lay a rope in a U shape, cross the ends over each other twice, and then bring those ends up to stick onto the bottom of the U. Ta-da! You’ve got a pretzel shape. Feel free to practice a few times!
The Boiling Bath: Key to the Chewy Baked Pretzels
This is the secret weapon for making these chewy baked pretzels! In a really big pot, bring 10 cups of water and that ½ cup of baking soda to a rolling boil. Carefully, and I mean carefully, take each pretzel and dip it into the boiling water for about 30 seconds, flipping it halfway through. This step is what gives them that amazing texture and color. Use a slotted spoon to lift them out.

Finishing Touches: Egg Wash and Salt for Your Soft Pretzel
As soon as those pretzels come out of their bath, lay them on your parchment-lined baking sheets. Now, brush the tops generously with your beaten egg wash – this gives them that beautiful golden-brown shine. Immediately sprinkle them with a good amount of that coarse pretzel salt. Don’t be shy with the salt; it’s what makes them taste so incredible!

Baking Your Golden Soft Pretzels
Get your oven preheated to 400°F (200°C). Slide those beautiful, salted pretzels in and let them bake for about 12-15 minutes. You’re looking for that perfect, deep golden-brown color. As soon as they look baked through and have that gorgeous hue, take them out. They’ll smell absolutely divine!
Tips for Achieving the Best Soft Pretzel
Okay, let’s chat about getting these homemade pretzels seriously perfect. It’s all about a few little tricks that make all the difference! First off, that dough consistency is key. You want it to be smooth and elastic, not sticky or dry. If it feels a bit too wet when you’re kneading, just add a whisper more flour, like a tablespoon at a time. And don’t rush that kneading process; it’s what develops that glorious chewy texture we’re all after!
When you’re shaping, make those ropes about 20 inches long. Roll them out nice and even. Remember, the shape doesn’t have to be *perfectly* symmetrical – a little rustic charm is totally part of the fun! Just twist those ends and bring them back to the bottom. For that super chewy bite, don’t skip the quick boil in the baking soda bath; it’s non-negotiable! It makes all the difference. And for the salt? Be generous! That coarse pretzel salt gives you those amazing salty bursts that make a pretzel a *pretzel*. If you want to dive even deeper into delicious pairings, check out some of my great appetizer recipes here, or maybe even whip up some beer cheese to go with these! Baking time is also crucial – watch them closely. You want them golden brown, not dark and burnt. Happy pretzel making!
Ingredient Notes and Substitutions for Your Soft Pretzel
Let’s talk ingredients for a sec, because sometimes, you might not have exactly what the recipe calls for, and that’s totally okay! The most important thing to remember is that each ingredient plays a role in getting that perfect soft pretzel taste and texture. If you can’t find coarse pretzel salt, don’t you worry! Coarse sea salt is a fantastic stand-in. So is kosher salt, just make sure it’s the coarse kind so you get those delightful little salty surprises in every bite. The baking soda in the boiling water? That’s our secret weapon. It helps create that lovely, chewy texture and that gorgeous, deep brown crust. Without it, you’ll just get a softer breadstick. If you happen to be out of active dry yeast, instant yeast works too, you just don’t need to proof it separately; you can mix it right in with the flour.
Serving Suggestions for Your German Oktoberfest Snack
Okay, now that you’ve got these gorgeous, golden soft pretzels, what do you do with them? Oh, the possibilities are endless for your *German Oktoberfest snack* spread! Of course, you absolutely *must* have some good mustard on hand – a spicy brown mustard is classic perfection. And who can resist a warm, gooey cheese dip? Whether it’s a simple cheddar or a fancy beer cheese, it’s a match made in heaven. These pretzels are also amazing alongside other German favorites, or even dipped into some of my tasty meatballs or served with a delightful flatbread for a whole festive feast!

Storage and Reheating Your Soft Pretzels
So, you made these amazing soft pretzels and, somehow, there are leftovers? Lucky you! To keep them tasting their best, let them cool completely before storing. The trick for longer freshness is an airtight container or a zip-top bag. They’re usually delicious for about 2 days this way. Don’t toss them if they’ve lost a little of that fresh crispness – reheating is a game-changer!
For the best results, pop them on a baking sheet in a preheated oven at around 350°F (175°C) for about 5-8 minutes. This brings back that lovely soft interior and a nice, slightly crisp exterior. You can even give them a quick toast in a toaster oven or give them a few seconds in the microwave if you’re in a super-rush, but the oven method is truly superior for that just-baked texture!
Frequently Asked Questions about Soft Pretzels
Got questions about your pretzel-making adventure? I totally get it! It’s easy to get excited about making your own soft pretzels, and sometimes you just need a quick answer. Here are a few things people often ask, and you can find even more baking tips on my blog!
Why aren’t my soft pretzels chewy?
Oh no! If your pretzels aren’t chewy, it’s usually because they didn’t get that crucial bath in the baking soda water. That boiling bath is what gelatinizes the starch on the outside, creating that signature chewy texture. Also, make sure you didn’t over-bake them; over-baking can dry them out. Give it another try, focusing on that boiling step!
Can I freeze homemade soft pretzels?
Yes, you absolutely can! Once your pretzels have cooled completely, you can freeze them in an airtight container or freezer bag for up to a month. They freeze really well! Just reheat them in the oven (directions in my storage section!) to warm them up and bring back that lovely soft texture.
What’s the best salt for soft pretzels?
For that classic, authentic flavor and texture, coarse pretzel salt is the absolute best! It’s a larger, coarser grain that sticks beautifully and gives you those perfect salty bursts. If you can’t find pretzel salt, don’t sweat it – coarse sea salt or even kosher salt (just make sure it’s coarse!) will work wonderfully. Just avoid fine table salt, as it dissolves too quickly.
Can I make soft pretzel dough ahead of time?
You sure can! After the first rise, you can punch down the dough, wrap it tightly, and store it in the refrigerator for up to 2 days. When you’re ready to make pretzels, just let the dough sit at room temperature for about 30 minutes to an hour before shaping and proceeding with the recipe. It makes impromptu pretzel cravings so much easier to handle!
Estimated Nutritional Information for a Soft Pretzel
Just to give you a ballpark idea, each of these delicious soft pretzels comes in at around 250 calories. You’re looking at about 3g of fat, 7g of protein, and 50g of carbohydrates, with roughly 3g of sugar. Remember, these are just estimates, folks! They can totally change a bit depending on the exact ingredients you use and how generous you are with that salt (which, let’s be honest, is part of the fun!). It’s all part of enjoying a good, old-fashioned homemade treat.
Share Your Soft Pretzel Creations!
Okay, you amazing bakers, you’ve done it! You’ve made your very own homemade soft pretzels! How did they turn out? Did you nail that perfect chewy texture? Spill the beans in the comments below! I just love seeing your kitchen triumphs, so please, share your photos or leave a rating. If you had any amazing dipping sauces or creative twists, let me know! You can always reach me directly through my contact page. Happy baking, everyone!
PrintHomemade Soft Pretzels

Learn how to make classic German-style soft pretzels at home. These pretzels have a chewy interior and a crisp, salty crust, perfect for any occasion.
- Prep Time: 25 min
- Cook Time: 15 min
- Total Time: 1 hr 40 min
- Yield: 8 pretzels 1x
- Category: Snack
- Method: Baking
- Cuisine: German
- Diet: Vegetarian
Ingredients
- 1 ½ cups warm water (105-115°F)
- 1 teaspoon granulated sugar
- 2 ¼ teaspoons active dry yeast (1 packet)
- 4 ½ cups all-purpose flour, plus more for dusting
- 1 teaspoon salt
- 1 tablespoon butter, melted
- 10 cups water
- ½ cup baking soda
- 1 large egg, beaten with 1 tablespoon water (egg wash)
- 2 tablespoons coarse pretzel salt
Instructions
- In a large bowl, combine warm water and sugar. Sprinkle yeast over the top and let stand for 5-10 minutes until foamy.
- Add flour and salt to the yeast mixture. Mix with a wooden spoon until a shaggy dough forms.
- Turn the dough out onto a lightly floured surface and knead for 8-10 minutes until smooth and elastic.
- Place the dough in a lightly greased bowl, turning to coat. Cover with plastic wrap and let rise in a warm place for 1 hour, or until doubled in size.
- Punch down the dough and divide it into 8 equal pieces. Roll each piece into a rope about 20 inches long.
- Shape each rope into a pretzel.
- In a large pot, bring 10 cups of water and baking soda to a rolling boil.
- Carefully dip each pretzel into the boiling water for 30 seconds, turning once.
- Remove pretzels with a slotted spoon and place them on a baking sheet lined with parchment paper.
- Brush the tops of the pretzels with the egg wash and sprinkle generously with coarse pretzel salt.
- Bake in a preheated oven at 400°F (200°C) for 12-15 minutes, or until golden brown.
- Let cool slightly before serving.
Notes
- For a chewier pretzel, you can let the shaped pretzels rest on the counter for 10-15 minutes before boiling.
- If you don’t have pretzel salt, you can use coarse sea salt.
- These pretzels are best enjoyed fresh, but can be stored in an airtight container for up to 2 days. Reheat in the oven for a few minutes to refresh.
Nutrition
- Serving Size: 1 pretzel
- Calories: 250
- Sugar: 3g
- Sodium: 700mg
- Fat: 3g
- Saturated Fat: 1g
- Unsaturated Fat: 2g
- Trans Fat: 0g
- Carbohydrates: 50g
- Fiber: 2g
- Protein: 7g
- Cholesterol: 5mg