 Skip to content
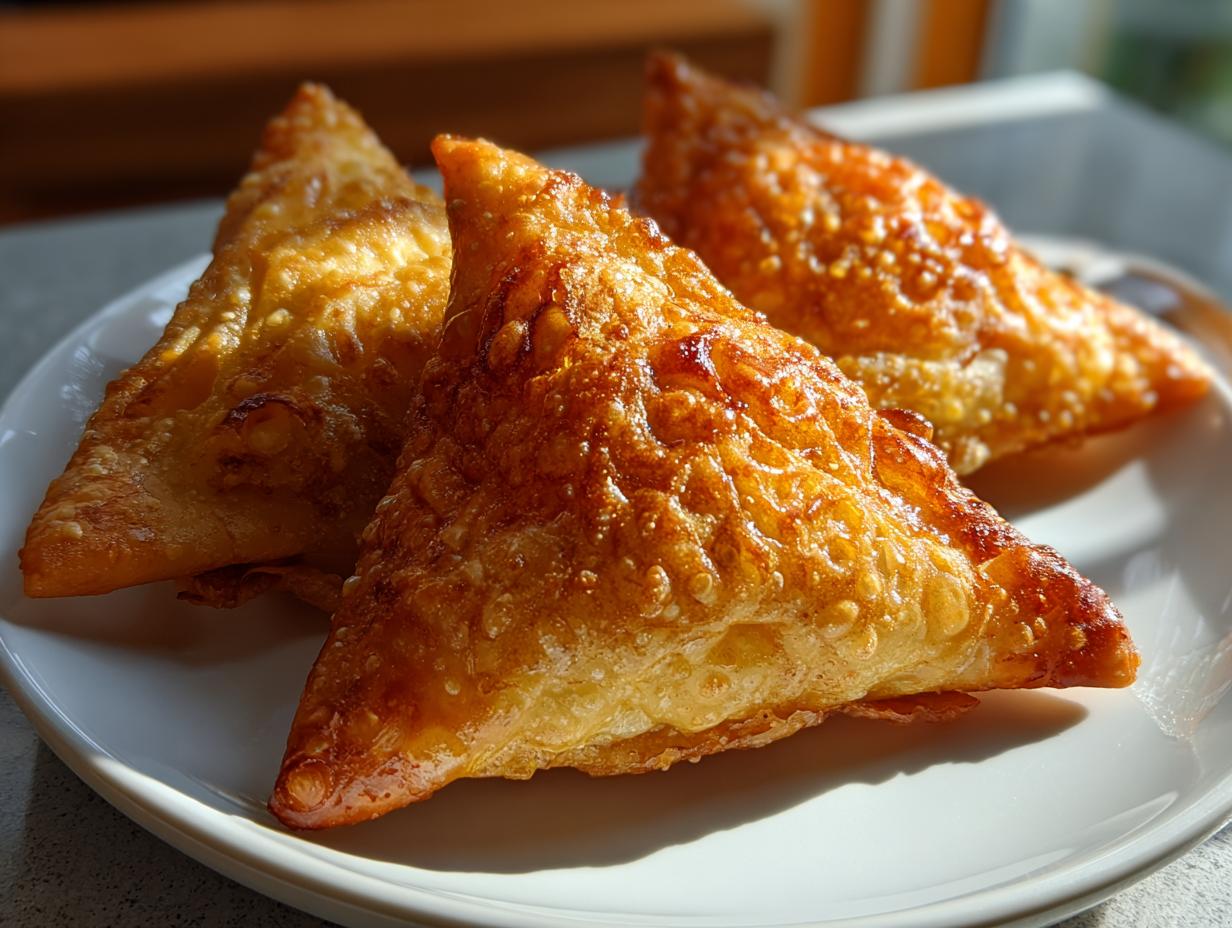

If there’s one smell that instantly transports me back to my grandmother’s kitchen, it’s the warm, spicy aroma of samosas frying. Especially around Diwali, when the whole house would buzz with excitement, she’d be in her element, her hands a whirlwind of dough and spices. And the star of the show? Always, *always* the samosa. There’s just something magical about that crispy, golden pastry encasing a burst of savory potato and pea goodness. Forget those sad, factory-made versions – I’m going to show you how to make samosas at home that rival any sweet shop’s finest. Trust me, it’s easier than you think, and oh-so-worth it!

- Why You'll Love This Samosa Recipe
- Crispy Samosa Dough: The Foundation
- Traditional Samosa Filling: Spiced Potato Perfection
- How to Shape Samosas: The Art of the Triangle
- Frying Samosas for Ultimate Crispiness
- Serving and Enjoying Your Homemade Samosas
- Tips for Samosa Success
- Frequently Asked Questions about Samosas
- Nutritional Information
Why You’ll Love This Samosa Recipe
Get ready to impress your friends and family! You’ll absolutely adore making these samosas because:
- They taste *just like* the real deal from your favorite Indian restaurant!
- We’re talking perfectly crispy, golden shells every single time.
- The filling is bursting with that authentic, comforting spiced potato and pea flavor.
- The shaping might seem tricky, but my steps make it totally doable, even for beginners.
- They’re the ultimate crowd-pleaser for any party, holiday, or just because it’s Tuesday!
Crispy Samosa Dough: The Foundation
Okay, listen up! The secret to a *truly* amazing samosa isn’t just the filling, it’s all about that dough. You want it to bake up shatteringly crisp, not chewy or greasy. That’s why this dough needs to be firm and stiff – think of it like building a sturdy little house for all that delicious filling. When you mix it, don’t be tempted to add too much water! We’re going for a dough that holds its shape and feels solid. My little trick for extra flakiness? Make sure your ghee or oil is nicely rubbed into the flour until it looks like coarse breadcrumbs before you even think about adding water. It really makes a difference, I promise!
If you love whipping up snacks for gatherings, you’ll definitely want to check out more appetizers and snacks on my blog!
Ingredients for Crispy Samosa Dough
Here’s what you’ll need to get that perfect samosa crust:
- 2 cups all-purpose flour
- 1/2 teaspoon salt
- 4 tablespoons ghee or oil
- 1/2 cup water (approximately)
Traditional Samosa Filling: Spiced Potato Perfection
Now for the heart and soul of our samosa – that incredible spiced potato and pea filling! This isn’t just mashed potatoes, folks. We’re talking a symphony of flavors here. That perfect balance comes from a careful mix of simple spices: earthy turmeric, warm coriander, a touch of fiery red chili, and that essential cozy hug from garam masala. I remember spending ages trying to get it just right; my first attempts were either too bland or way too spicy! The trick is to sauté those spices briefly before adding the potatoes and peas. That blooming process really wakes them up and infuses the filling with so much depth. And for texture? Make sure your potatoes are just tender, not mushy. You still want a little bit of bite in there, you know? It’s that combination of the soft potatoes, the sweet peas, and the aromatic spices that makes this filling sing. If you’re looking for more ideas for sides to go with this, I’ve rounded up some of my favorites over on my side dishes page!
Ingredients for the Traditional Samosa Filling
Here’s what goes into making that amazing filling:
- 3 medium potatoes (boiled and mashed)
- 1/2 cup green peas (fresh or frozen)
- 1 tablespoon oil
- 1 teaspoon cumin seeds
- 1/2 teaspoon turmeric powder
- 1 teaspoon coriander powder
- 1/2 teaspoon garam masala
- 1/2 teaspoon red chili powder (or to taste)
- 1 teaspoon grated ginger
- 1-2 green chilies (finely chopped, optional)
- Salt to taste
- 2 tablespoons chopped fresh cilantro
How to Shape Samosas: The Art of the Triangle
Alright, this is where the magic really happens! Shaping the samosas into those perfect little triangles might seem a bit intimidating at first, but trust me, it’s totally doable once you get the hang of it. Think of it like folding a tiny, delicious envelope. First, take one of those firm dough balls we made, and roll it out into a thick oval shape – not too thin, we want it sturdy! Then, slice that oval right down the middle. Now, take one of the half-moons and run a tiny bit of water along that straight, cut edge. This is our glue! Bring the two ends of that straight edge together, pressing firmly to form a cone shape. Make sure it’s sealed well! Now, carefully spoon some of that cooled, spiced potato filling into your cone. Don’t overstuff it, or it’ll be impossible to close! Before you seal it up, run a little water along the inner edges of the cone’s opening. Pinch those edges together, really sealing it up, and press down to get that classic triangle shape. Voila! Keep practicing, and soon you’ll be a samosa-shaping pro!
Frying Samosas for Ultimate Crispiness
Okay, we’ve done the hard work – dough is made, filling is perfect, shapes are lovely. NOW for the grand finale: frying! This is where the magic happens, turning those pale pastries into golden, crispy delights. The absolute *key* here is oil temperature. You don’t want it screaming hot, or the outside will burn before the inside is even warm. We’re talking medium-low heat, my friends. This ensures the samosas cook through gently and get that beautiful, even golden-brown color all over. It might take a little longer, maybe 10-15 minutes per batch, but trust me, that slow fry is what gives you that incredible crunch that doesn’t get soggy. Don’t overcrowd the pan either; give them space to sizzle and puff up! It’s the same principle I use for my crispy Brussels sprouts – gentle heat equals maximum crisp!
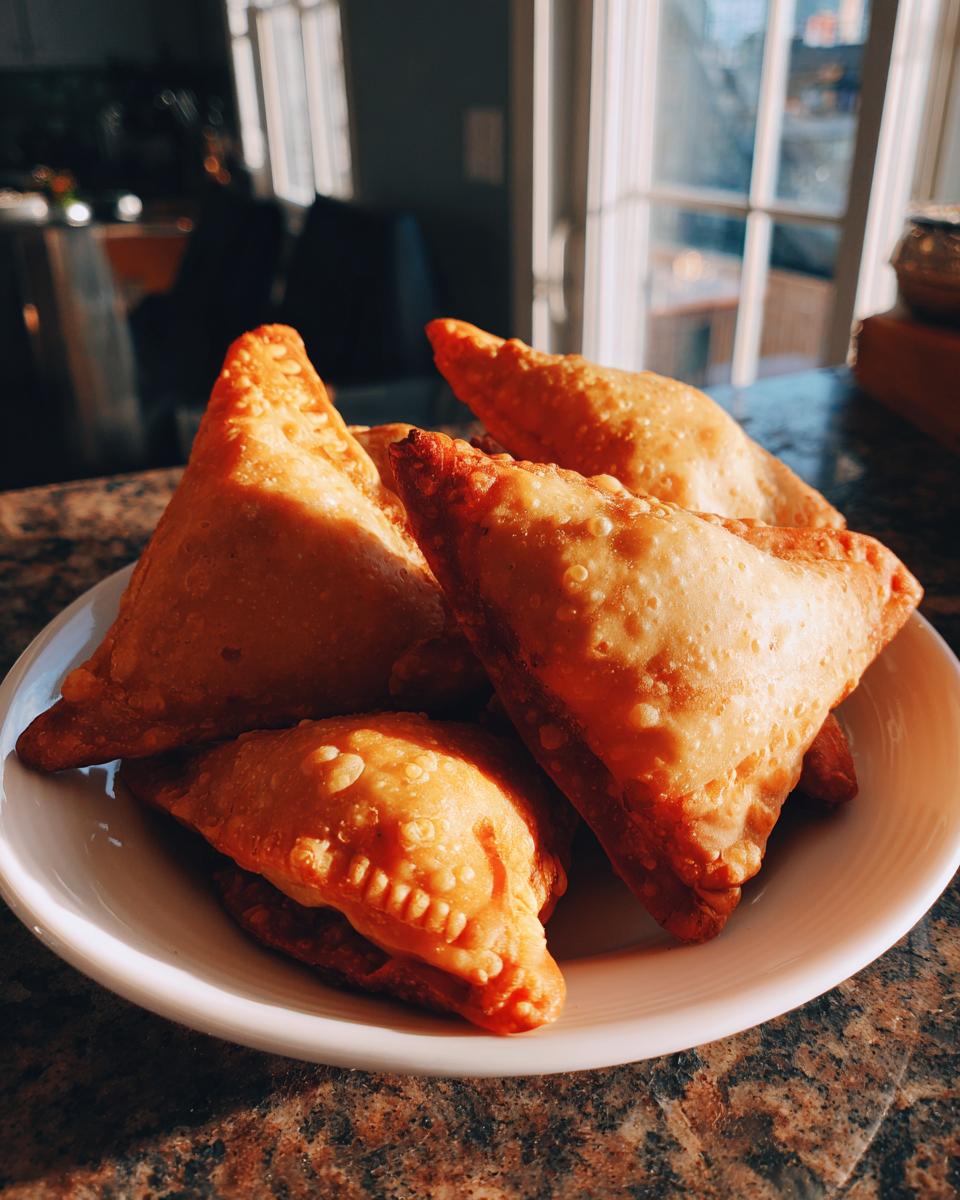
Serving and Enjoying Your Homemade Samosas
Now that you’ve got these beautiful, golden samosas, it’s time to dig in! They are absolutely divine served hot and fresh, straight from the oil. Personally, I love pairing them with a trio of chutneys – a tangy tamarind chutney for a sweet and sour kick, a vibrant mint-coriander chutney for that fresh zing, and maybe even a spicy chili sauce if you’re feeling brave! They’re also wonderful with a simple yogurt dip or even my easy homemade guacamole recipe if you’re feeling a bit adventurous with your pairings.

Tips for Samosa Success
Alright, let’s wrap this up with my top tips for samosa perfection! First off, that dough *has* to be stiff – if it’s too soft, they won’t get that signature crispiness. Make sure your potato filling isn’t too wet, or you’ll end up with a soggy bottom, and nobody wants that! When you’re frying, remember what I said about the oil temperature: medium-low is your best friend. It might take a little longer, but it’s the only way to get that beautiful golden crunch. And don’t cram too many into the pan at once; give them room to bubble and crisp up nicely!

Frequently Asked Questions about Samosas
Got questions about making these perfect little pockets of joy? I’ve got you covered!
Can I bake samosas instead of frying them?
You absolutely can bake them, but they won’t have that same signature crispy, slightly oily texture that makes a fried samosa so irresistible. If you do bake them, brush them generously with oil or melted butter and bake at around 375°F (190°C) until golden brown. They’ll be tasty, but honestly, frying is the way to go for that authentic crunch!
How do I store uncooked samosas?
If you’ve made ahead, just place the shaped, uncooked samosas on a baking sheet lined with parchment paper, making sure they aren’t touching. You can freeze them like this until they’re solid, then transfer them to a freezer-safe bag or container. Fry them directly from frozen, adding a few extra minutes to the cooking time.
What can I use if I don’t have ghee?
No ghee? No problem! You can easily use vegetable oil or even melted butter in place of ghee for the dough. Some people swear by adding a bit of solidified shortening for extra flakiness, so feel free to experiment!
Why are my samosas not crispy?
This usually comes down to a few things: if your frying oil wasn’t hot enough, or if the dough was too soft to begin with. Make sure you fry them on medium-low heat for a good amount of time, and ensure your dough is nice and firm. Also, don’t overcrowd the pan; give those little guys space to puff up and get crispy!

Nutritional Information
Just a quick heads-up, all this deliciousness comes with an estimated nutritional value. For one glorious, crispy samosa, you’re looking at around 250 calories, about 15g of fat (with 5g saturated), 25g of carbohydrates, 3g of fiber, and 5g of protein. Keep in mind, this can totally change depending on exactly how much oil you use for frying and the specific ingredients in your filling!
PrintCrispy Samosa Recipe

Learn to make authentic, crispy samosas with a flavorful potato and pea filling. This recipe guides you through making the perfect dough, preparing the spiced filling, and shaping the signature triangle pastries, ideal for any celebration.
- Prep Time: 45 min
- Cook Time: 30 min
- Total Time: 75 min
- Yield: 12-15 samosas
- Category: Appetizer
- Method: Frying
- Cuisine: Indian
- Diet: Vegetarian
Ingredients
- For the Dough: 2 cups all-purpose flour, 1/2 teaspoon salt, 4 tablespoons ghee or oil, 1/2 cup water (approximately)
- For the Filling: 3 medium potatoes (boiled and mashed), 1/2 cup green peas (fresh or frozen), 1 tablespoon oil, 1 teaspoon cumin seeds, 1/2 teaspoon turmeric powder, 1 teaspoon coriander powder, 1/2 teaspoon garam masala, 1/2 teaspoon red chili powder (or to taste), 1 teaspoon grated ginger, 1-2 green chilies (finely chopped, optional), Salt to taste, 2 tablespoons chopped fresh cilantro
- For Frying: Oil for deep frying
Instructions
- Make the Dough: In a large bowl, combine flour and salt. Add ghee or oil and rub it into the flour until the mixture resembles coarse crumbs. Gradually add water and knead into a firm, stiff dough. Cover with a damp cloth and let it rest for 30 minutes.
- Prepare the Filling: Heat 1 tablespoon of oil in a pan. Add cumin seeds and let them splutter. Add turmeric powder, coriander powder, garam masala, and red chili powder. Stir for a few seconds. Add the mashed potatoes and green peas. Add salt, grated ginger, and chopped green chilies (if using). Mix well and cook for 2-3 minutes. Stir in fresh cilantro. Let the filling cool completely.
- Shape the Samosas: Divide the dough into equal small balls. Take one ball and roll it into a thick oval shape. Cut it in half. Take one half-circle, moisten the straight edge with water, and join the two ends to form a cone. Fill the cone with the potato mixture. Moisten the edges of the cone opening with water and pinch them together to seal, forming a triangle shape. Repeat with the remaining dough and filling.
- Fry the Samosas: Heat oil in a deep pan over medium-low heat. Carefully slide the samosas into the hot oil, ensuring not to overcrowd the pan. Fry them on medium-low heat, turning occasionally, until they are golden brown and crispy on all sides. This process takes about 10-15 minutes per batch.
- Serve: Remove the samosas from the oil and drain them on paper towels. Serve hot with your favorite chutney or sauce.
Notes
- For extra crispy samosas, ensure the dough is stiff and fry them on medium-low heat.
- You can add other ingredients to the filling like finely chopped onions or paneer.
- If you are short on time, consider using a meal planning service to help organize your cooking.
Nutrition
- Serving Size: 1 samosa
- Calories: 250
- Sugar: 2g
- Sodium: 300mg
- Fat: 15g
- Saturated Fat: 5g
- Unsaturated Fat: 10g
- Trans Fat: 0g
- Carbohydrates: 25g
- Fiber: 3g
- Protein: 5g
- Cholesterol: 10mg