 Skip to content
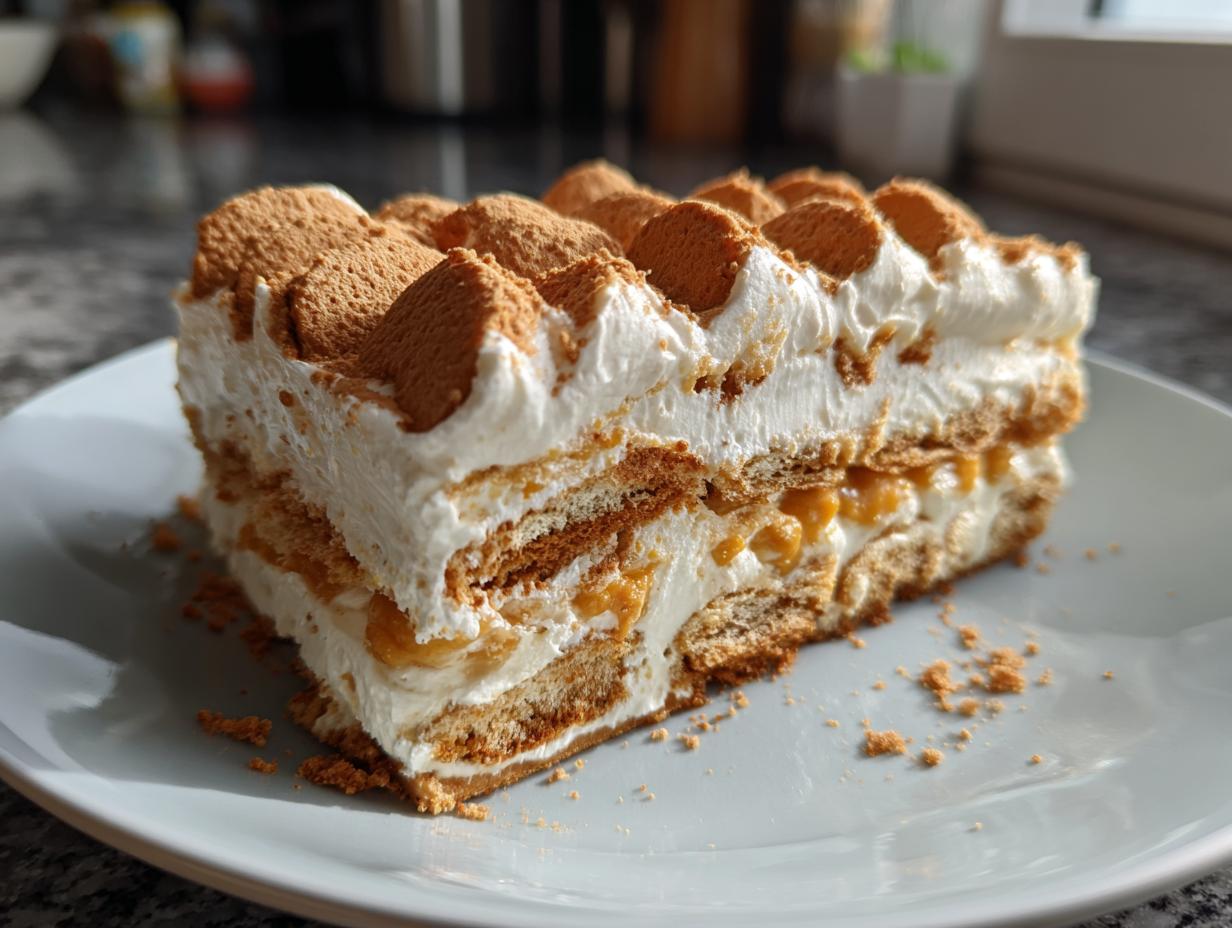

Oh, have I got a treat for you! As the days get cooler and the leaves start to turn, my mind just goes straight to all things pumpkin and cozy. And the BEST part? We don’t even need the oven for this one! This Pumpkin Icebox Cake is my absolute go-to when I need something delicious, comforting, and totally fuss-free for fall gatherings or just a sweet weeknight treat. You know how much I love sharing simple, joyful recipes that actually work for real life, right? Well, this no-bake wonder is proof! It’s made with layers of creamy pumpkin goodness and those yummy gingersnap cookies that get all soft and cake-like overnight. Trust me, it’s a lifesaver when you want a showstopper without all the baking stress. I’ve tested this a million times in my own kitchen, so you know it’s going to turn out perfectly!

- Why You'll Love This Pumpkin Icebox Cake
- Gather Your Ingredients for the Perfect Pumpkin Icebox Cake
- Step-by-Step Guide to Making Your Pumpkin Icebox Cake
- Tips for the Best Pumpkin Icebox Cake
- Serving and Storing Your Delicious Pumpkin Icebox Cake
- Frequently Asked Questions About Pumpkin Icebox Cake
- Nutritional Information for Pumpkin Icebox Cake
- Share Your Pumpkin Icebox Cake Creations!
Why You’ll Love This Pumpkin Icebox Cake
Honestly, this cake is a dream for so many reasons. Here’s why it’ll become your new favorite:
- Super Easy to Make: Seriously, no baking involved! Just mix, layer, and chill. It’s perfect for when you want something special without the fuss.
- Make-Ahead Magic: This is the ultimate when you’re hosting. You whip it up the day before, so all you have to do on party day is slice and serve!
- Cozy Fall Flavors: That creamy pumpkin and warm spice combo is just pure autumn comfort in every bite. It tastes like fall exploded into a delicious dessert!
- Crowd-Pleaser: Whether it’s Thanksgiving dessert or a casual fall get-together, everyone goes crazy for this. It’s always a hit!
Gather Your Ingredients for the Perfect Pumpkin Icebox Cake
Okay, let’s talk about what you need to make this glorious Pumpkin Icebox Cake. It’s pretty straightforward, and you probably have most of it in your pantry already! You’ll want to grab:
-
1 (3.4 ounce) package instant vanilla pudding mix: Make sure it’s the instant kind, not the cook-and-serve! It’s what gives us that wonderfully smooth filling without any fuss.
-
1 ½ cups cold milk: Just regular milk works fine here, any kind you have on hand.
-
1 (15 ounce) can pumpkin puree: This is important – you want the pure pumpkin, NOT pumpkin pie *filling*. That stuff already has sugar and spices, and we’re adding our own perfectly calibrated pumpkin flavor!
-
1 teaspoon pumpkin pie spice: This is the heart of that cozy fall flavor. If you love a little extra pumpkin spice kick, feel free to bump it up to 2 teaspoons – I sometimes do!
-
1 teaspoon vanilla extract: A little bit of vanilla always makes baked goods, even no-bake ones, taste richer.
-
8 ounces cream cheese, softened: This is key! Make sure it’s *really* softened. I usually leave it on the counter for about an hour before I start. It makes it so much easier to get a lump-free, creamy filling.
-
1 cup powdered sugar: Also known as confectioners’ sugar. This sweetens up that cream cheese beautifully.
-
1 (8 ounce) container frozen whipped topping, thawed: Like the cream cheese, make sure this is thawed but still nice and cold. It adds that lightness and volume we love in icebox cakes.
-
24 gingersnap cookies: These are my favorite for this cake! They have just the right amount of spice and snap that softens up perfectly. If you can’t find them, don’t sweat it, graham crackers are a great substitute too. We’ll chat more about that later!
-
Optional: whipped cream and crushed gingersnaps for topping: Totally up to you, but a little extra whipped cream and a sprinkle of cookie crumbs on top makes it look extra special!
Step-by-Step Guide to Making Your Pumpkin Icebox Cake
Alright, let’s get this amazing Pumpkin Icebox Cake put together! It’s really as simple as mixing, layering, and chilling. This is seriously the best no bake pumpkin dessert for Thanksgiving because it handles itself in the fridge. Just follow along, and you’ll have a perfect dessert ready to go! If you’re looking for other great fall flavors, check out my pumpkin spice granola – it’s a breakfast game-changer!
Preparing the Creamy Pumpkin Filling
First things first, let’s whip up that dreamy pumpkin filling. Grab a big bowl and whisk together your instant vanilla pudding mix, the cold milk, that can of pumpkin puree, your pumpkin pie spice, and the vanilla extract. Give it a good whisk until it’s all combined and starting to get a little thicker. In a *separate* bowl, beat your softened cream cheese with the powdered sugar until it’s super smooth and creamy. No lumps allowed! Then, gently fold that fluffy whipped topping into the cream cheese mixture. You want it to be smooth and light, so don’t overmix. Once that’s good to go, carefully fold the pumpkin pudding mixture into the cream cheese mixture. Fold gently until everything is just combined. It should look wonderfully smooth and fragrant!
Assembling Your Pumpkin Icebox Cake Layers
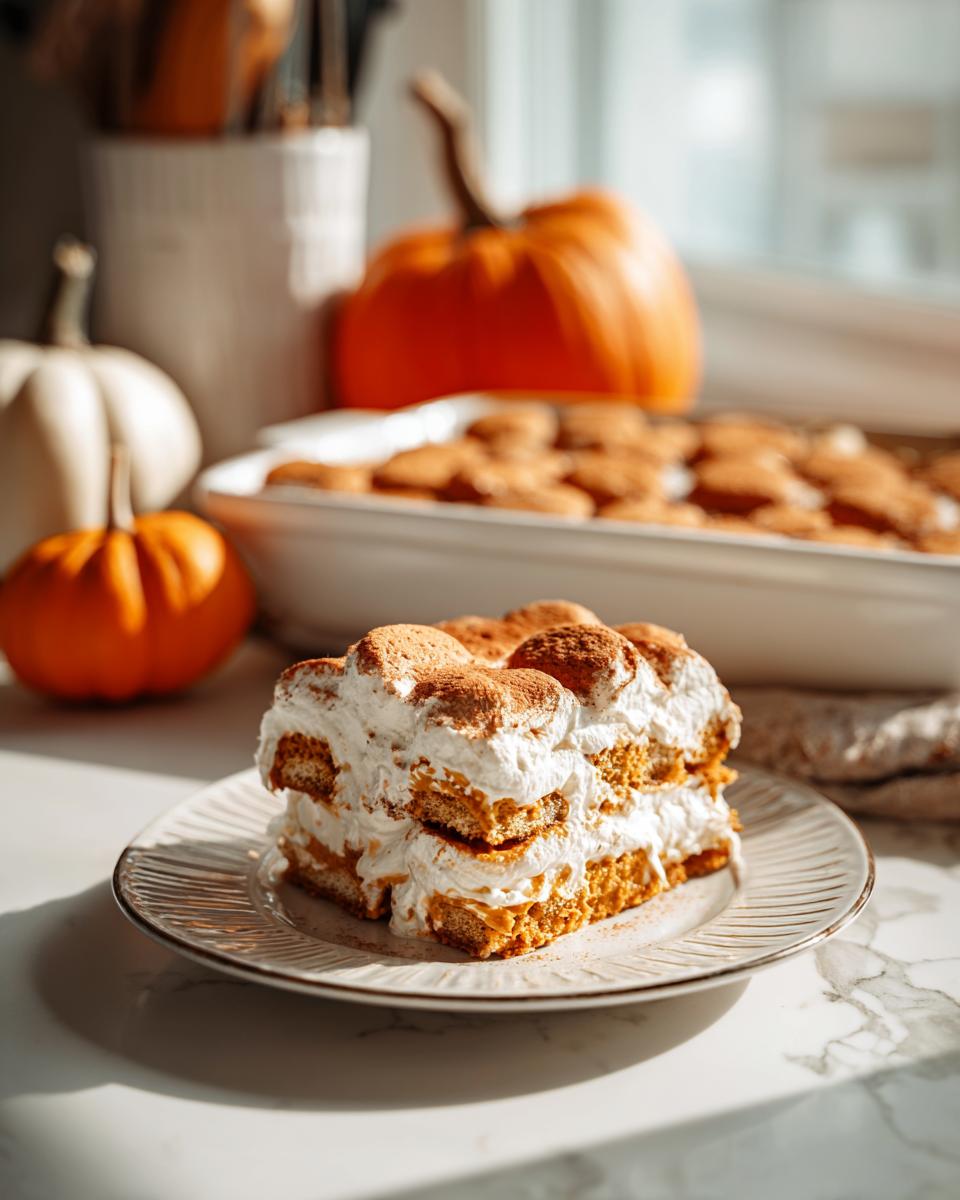
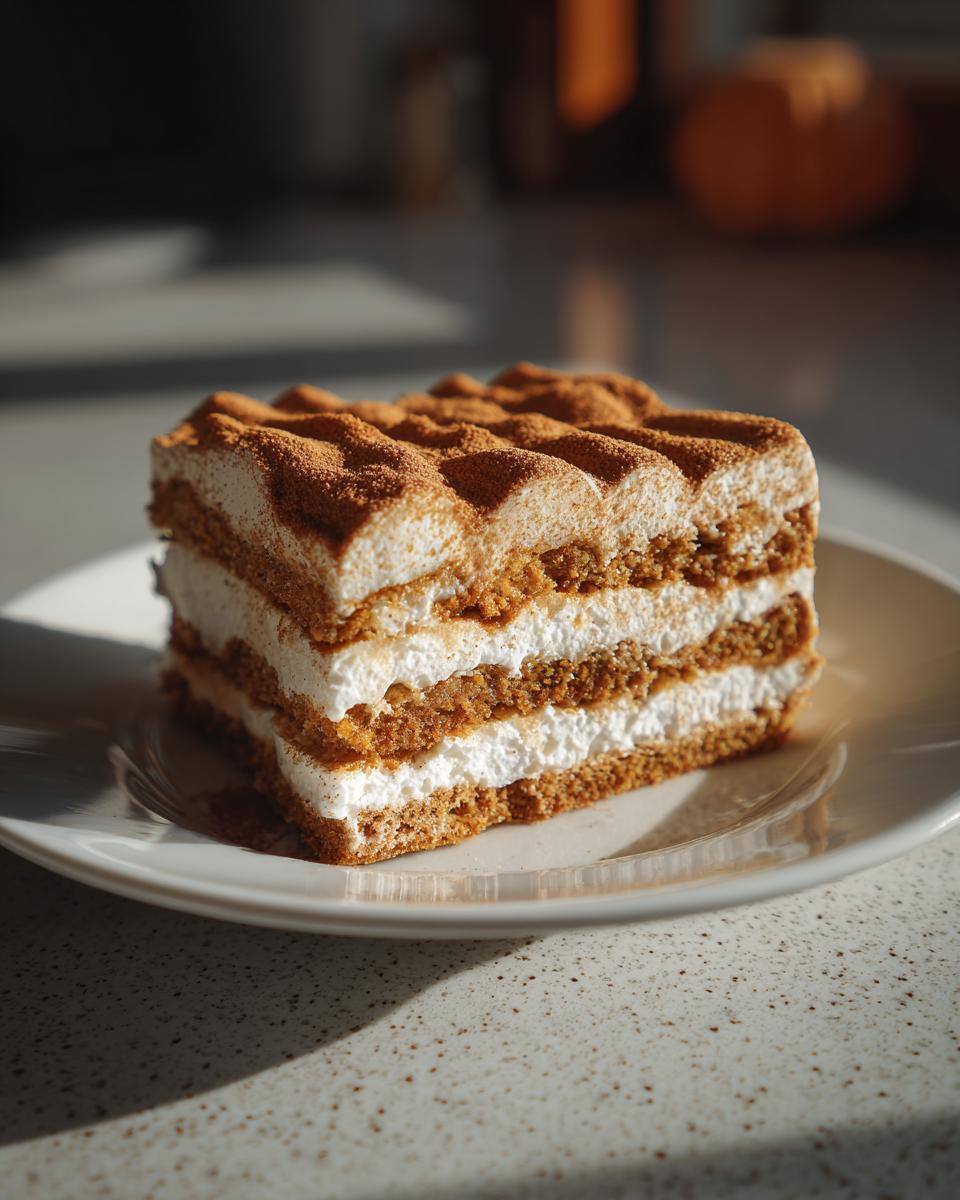
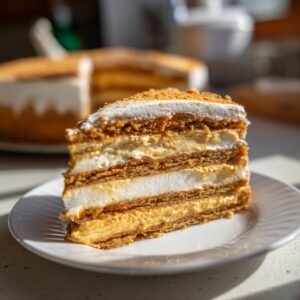
Now for the fun part – building this gorgeous layered pumpkin dessert! Grab your 9×13 inch baking dish. Spread a nice thin, even layer of your pumpkin cream mixture right on the bottom. This is like the foundation! Then, lay down your gingersnap cookies. Don’t worry if you have to break a few to fit snugly – just cover that cream layer as best you can without huge gaps. Next, spoon about a third of the remaining pumpkin cream mixture over the cookies. Spread it out gently. You’ll repeat this: another layer of cookies, then another third of the pumpkin cream. Finish it all off with the last layer of cookies, and then top that with the final, glorious layer of the pumpkin cream mixture. Doesn’t it already look amazing?
The Crucial Chilling Time for Your Pumpkin Icebox Cake
Okay, this is probably the most important step, so listen up! Once your cake is all layered and beautiful in the dish, you need to cover it up super tightly with plastic wrap. We want to keep all that goodness sealed in. Now, resist the urge to dig in! This cake needs to chill in the refrigerator for at least 8 hours, but honestly, overnight is even better. This is where the magic happens – the cookies soften up beautifully, absorbing some of the moisture from the filling, transforming into a tender, cake-like texture. It’s the secret to why this is called an *icebox cake*. If you’re wondering how long to chill icebox cake overnight, the answer is simply, make sure you give it the full time! Trust the process; it makes all the difference for that perfect, sliceable result.

Tips for the Best Pumpkin Icebox Cake
You know, even though this cake is super simple, a few little tricks can make it absolutely perfect every time. Seriously, it’s the little things that elevate it from just good to *wow*!
First off, let’s talk about those cookies. I’m a huge fan of the gingersnap vs graham layers debate, and for this cake, gingersnaps really win for me because their spice complements the pumpkin so well. But if you can’t find them, or if you just prefer them, graham crackers are a totally valid substitute! They’ll give you that classic icebox cake texture and flavor. Just know the spice profile will be a little milder.
Achieving that perfect, creamy texture is all about the chilling time – seriously, don’t rush it! That overnight chill for your make ahead pumpkin dessert bar is crucial. It lets those cookies really absorb the moisture and become tender, melty, and cake-like. If you cut it too soon, it’ll be a little… mushy. And nobody wants that!
For presentation, I love topping it with some extra whipped cream just before serving, maybe a few extra crushed gingersnaps for a little crunch, or even a light dusting of cinnamon. It just makes it look so inviting! If you’re curious about other fall favorites, you should totally check out my pumpkin spice granola – it’s fantastic with yogurt! And if you love apples, my easy apple crisp is another winner for cozy fall flavors.
Serving and Storing Your Delicious Pumpkin Icebox Cake
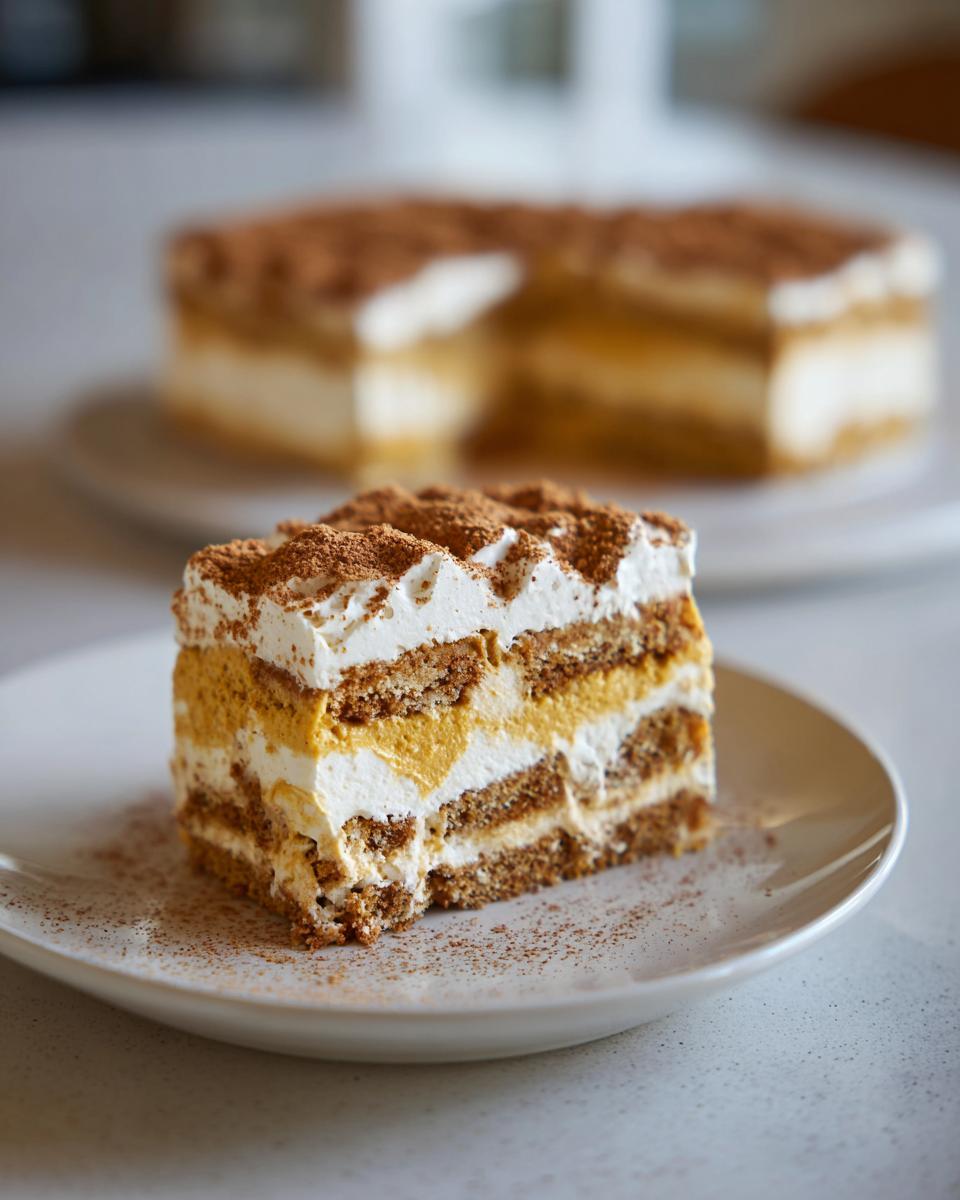
Alright, once that Pumpkin Icebox Cake has had its all-important sleep in the fridge, it’s time for the best part: enjoying it! When you’re ready to serve, just take it out and get ready for the compliments. I like to add a little something extra on top – maybe some fluffy homemade whipped cream, or a sprinkle of crushed gingersnaps for a little contrast in texture. A tiny dusting of cinnamon or extra pumpkin pie spice can be lovely too, just to remind everyone what amazing flavors are inside. If you want it to look extra fancy, a little swirl of cream cheese frosting wouldn’t hurt either, though it’s truly delicious just as it is!
Now, if you happen to have any leftovers (which is rare in my house!), storing it is super simple. Just cover the dish tightly with plastic wrap or pop on a lid. It’ll stay perfectly delicious in the refrigerator for about 3 to 4 days. The cookies will continue to soften a bit more each day, so it actually gets even more cake-like as time goes on. Since it’s a no-bake dessert, there’s no need to worry about reheating it – it’s best served chilled!
Frequently Asked Questions About Pumpkin Icebox Cake
Got questions about this delicious pumpkin icebox cake? I’ve got answers! It’s a pretty forgiving recipe, but a little guidance never hurts, right?
Can I use graham crackers instead of gingersnaps for my pumpkin icebox cake?
Oh, absolutely! If you can’t find gingersnaps or just prefer them, graham crackers are a totally fantastic substitute. They’ll give you that classic icebox cake texture, and while they don’t have that punchy ginger spice, they still pair wonderfully with the pumpkin cream. So go ahead and swap them out – it’ll still be delicious!
How long does the pumpkin icebox cake need to chill to be sliceable?
This is super important for getting that perfect, sliceable fridge cake texture! You really need to let it chill in the refrigerator for at least 8 hours, but trust me, overnight is best. This gives the cookies enough time to soften up and absorb all that creamy goodness, turning them into a texture that’s more like cake than cookies. Rushing this step means you might get a… well, a bit of a loose dessert instead of nice, clean slices!
Can I make this pumpkin icebox cake ahead of time for a party?
Yes, yes, and YES! This is one of my favorite things about this gingersnap pumpkin icebox cake – it’s practically designed for making ahead. You can totally put it all together the day before your party or holiday gathering. Just make sure it’s covered tightly in the fridge. It actually gets even better overnight as those flavors meld together and the cookies soften perfectly. It’s a stress-free host’s dream!
Nutritional Information for Pumpkin Icebox Cake
Just a heads-up, the nutritional info for this yummy pumpkin icebox cake is based on an estimated serving size. Keep in mind that these numbers can change a bit depending on the specific brands of ingredients you use, like the whipped topping or even the cookies you choose. But for a general idea, each slice usually comes in around 350 calories, with about 18g of fat and 45g of carbs. It’s a nice, satisfying dessert that really hits the spot!
Share Your Pumpkin Icebox Cake Creations!
I just LOVE hearing from you all! Have you made this amazing pumpkin icebox cake? Did you try it with gingersnaps or go for graham crackers? I’d be thrilled if you left a comment below, maybe even gave it a star rating – it really helps people find these recipes! And if you made it for a special occasion or just a cozy night in, I’d be over the moon if you shared a pic on social media. Tag me so I can see your beautiful creations! You can also reach out directly through my contact page. Happy baking (or, you know, no-baking)!
PrintPumpkin Icebox Cake
A no-bake layered dessert with pumpkin cream and gingersnap cookies that softens overnight for an easy make-ahead treat.
- Prep Time: 20 min
- Cook Time: 0 min
- Total Time: 8 hr 20 min
- Yield: 8 servings 1x
- Category: Dessert
- Method: No-Bake
- Cuisine: American
- Diet: Vegetarian
Ingredients
- 1 (3.4 ounce) package instant vanilla pudding mix
- 1 ½ cups cold milk
- 1 (15 ounce) can pumpkin puree
- 1 teaspoon pumpkin pie spice
- 1 teaspoon vanilla extract
- 8 ounces cream cheese, softened
- 1 cup powdered sugar
- 1 (8 ounce) container frozen whipped topping, thawed
- 24 gingersnap cookies
- Optional: whipped cream and crushed gingersnaps for topping
Instructions
- In a large bowl, whisk together the instant vanilla pudding mix, cold milk, pumpkin puree, pumpkin pie spice, and vanilla extract until well combined and slightly thickened.
- In a separate bowl, beat the softened cream cheese and powdered sugar until smooth.
- Gently fold the whipped topping into the cream cheese mixture until no streaks remain.
- Fold the pumpkin mixture into the cream cheese mixture until fully combined.
- Spread a thin layer of the pumpkin cream mixture on the bottom of a 9×13 inch baking dish.
- Arrange a layer of gingersnap cookies over the cream mixture, breaking them as needed to fit.
- Spread about one-third of the remaining pumpkin cream mixture over the cookies.
- Repeat the layers of cookies and cream mixture two more times, ending with a layer of cream mixture.
- Cover the dish tightly with plastic wrap and refrigerate for at least 8 hours, or preferably overnight, to allow the cookies to soften.
- Before serving, top with additional whipped cream and crushed gingersnaps, if desired.
Notes
- For a stronger pumpkin flavor, you can use 2 teaspoons of pumpkin pie spice.
- If you don’t have gingersnaps, graham crackers can be used as a substitute.
- Ensure the cream cheese is fully softened to avoid lumps in the filling.
- Chilling time is crucial for the cookies to soften and create a cake-like texture.
- This dessert is a great make-ahead option for holidays and gatherings.
Nutrition
- Serving Size: 1 slice
- Calories: 350
- Sugar: 30g
- Sodium: 250mg
- Fat: 18g
- Saturated Fat: 10g
- Unsaturated Fat: 8g
- Trans Fat: 0g
- Carbohydrates: 45g
- Fiber: 2g
- Protein: 4g
- Cholesterol: 30mg