 Skip to content

Oh, when that Hanukkah menorah starts shining, my kitchen immediately starts smelling like oil and potatoes—the absolute best smell! I know many of you are digging out those sacred recipe cards, just like I do when I pull out my grandmother’s notes. For me, no holiday celebration feels complete without those perfectly golden, crispy potato latkes sizzling away in the pan. It’s more than just food; it’s remembering the miracle! Trust me when I say I’ve perfected this recipe over the years of testing, and I’m going to show you how to get the ultimate crispy fried latkes that taste just like Grandma Anna’s, without that dreaded soggy, greasy layer underneath. Get ready; this is the one you’ll use forever.

- Why This Potato Latkes Recipe Honors Tradition and Delivers Crispness
- Step-by-Step Instructions for Crispy Fried Potato Latkes
- Pro Tips for Making the Best Potato Latkes Every Time
- Serving Suggestions for Your Potato Latkes
- Storage and Reheating Your Potato Latkes
- Frequently Asked Questions About Potato Latkes Recipe
- Understanding the Nutrition in Homemade Potato Latkes
- Share Your Experience Making These Potato Latkes
Why This Potato Latkes Recipe Honors Tradition and Delivers Crispness
When we gather for Hanukkah, we aren’t just making street snacks; we are connecting straight back to the miracle of the oil, and that means frying is non-negotiable! My secret for these phenomenal Hanukkah potato pancakes is all about battling moisture. If your potatoes are wet, your latkes will steam instead of fry, and that’s just a tragedy in the making. Grandma always called that squeezing step a ritual—it’s how we honor the tradition properly.
This method focuses on getting every drop of water out, which guarantees that beautiful, lacy, golden-brown exterior that cracks when you bite into it. Honestly, my favorite part is hearing the sizzle when the first spoonful hits that hot oil; it sounds like happiness to me!
Essential Ingredients for Perfect Potato Latkes
You only need a handful of simple pantry items, but the type matters! You absolutely must use Russet potatoes—they have the low moisture and high starch we need for structure. You’ll need about three large ones, plus one medium yellow onion. Don’t skip the eggs; they are the glue holding the whole thing together. For the binder, use 1/4 cup of either all-purpose flour or, if you want a deeper tradition touch, matzo meal. Make sure you season generously with salt and pepper before mixing!
Step-by-Step Instructions for Crispy Fried Potato Latkes
Alright, now for the magic! This is where you earn those crispy fried latkes. We’re moving fast here because once the potatoes are grated, they start to oxidize and get watery, so speed is our friend. Get your oil heating before you even start grating, if you can swing it. The instructions look long, but honestly, once you get the rhythm down, it’s just rinse, grate, squeeze, mix, and fry!
Remember that this method honors the tradition of making perfect potato latkes so they don’t end up soaking up extra oil. You want frying, not simmering!
Preparation: Grating and Drying the Potato Latkes Mixture
First thing first: peel your potatoes and that onion. Use the big, coarse side of your box grater—or if you’re using your food processor, make sure that grating disc is locked in place. Grate them right into a big bowl. Now comes the part my grandma *insisted* upon: drying them out!
Get a clean kitchen towel—I mean, really clean, maybe one you only use for dairy or frying—and put all that grated goodness right in the middle. Twist that towel up tight, like you’re wringing out a soggy mop, and squeeze! Squeeze with all your might! You have to force out every single drop of liquid you can manage. If you skip this, you’ll end up with pancakes that fry unevenly and taste heavy, not light and crispy. My expert tip? Sometimes, I use a potato ricer over a bowl if I’m feeling extra fancy; it gets even more water out than just a towel squeeze.
Once you’ve wrung out all you can, toss the dry potato and onion mixture into a clean bowl. Quickly mix in your two eggs, your flour or matzo meal, salt, and pepper. Mix gently, just until everything is coated. Don’t go crazy beating it; overmixing just makes those potatoes release more water again.
Frying Technique for Golden Potato Latkes
Time for the hot oil! You need about an inch of vegetable or canola oil in a heavy skillet—cast iron is the absolute best for holding temperature steady, I promise. You want that oil hitting exactly 350°F (175°C). If you don’t have a thermometer, here’s the trick: drop one lonely little piece of potato mixture in. If it immediately starts bubbling happily all around it, you’re good to go! If it just sits there looking sad, the oil isn’t hot enough and your latkes will be greasy.
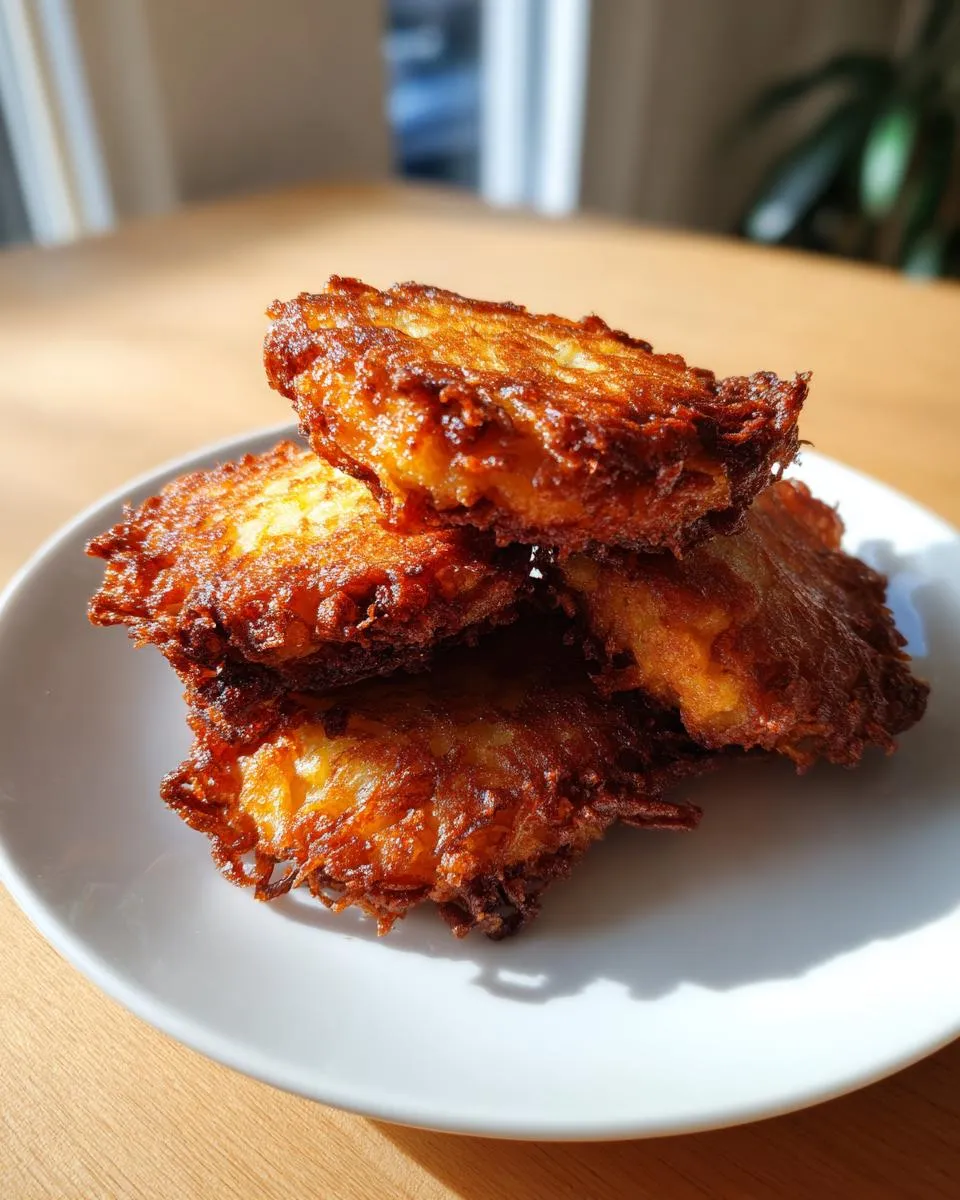
Working quickly, drop heaping tablespoons of your mix into the oil, but don’t crowd the pan! You need space between them so the temperature stays up. Flatten them down a bit with the back of your spoon so they are about half an inch thick. Let them happily sizzle for about three to five minutes until they are deep, deep golden brown. Flip them carefully and fry the second side until equally golden. As soon as they come out, they go straight onto a wire rack over paper towels to drain. That heat and that rack are your defense against soggy potato latkes.

Pro Tips for Making the Best Potato Latkes Every Time
Making the perfect batch of potato latkes takes a little finesse, but knowing these few secrets from my years frying them up will make you look like a total pro. Keeping them warm without letting them go soggy is a major balancing act! If you have a crowd, take the finished latkes out of the oil and place them on a wire rack set over a baking sheet. Pop that baking sheet into a very low oven—around 200°F—while you finish the rest of the batch. This keeps them hot and lets whatever little bit of oil is left drain away without trapping steam. If you have leftovers, you’ll want to check out my tips on reheating potato latkes!
You’re making memories here, not just fried pancakes, so don’t stress too much if the first batch looks a little funny. That first batch is just to test your oil temperature, really. Enjoy the process!
Ingredient Notes and Substitutions for Potato Latkes
We talked about Russets being the top choice, but if you’re stuck, Yukon Golds work okay; just know they might be a tiny bit less starchy, so you might need an extra teaspoon of that flour or matzo meal. Speaking of which, I often choose matzo meal because it seems to give an extra bit of delicate crunchiness, but flour gets the job done beautifully too. Remember, the key isn’t the binder itself, but making sure you don’t use too much.
Another thing: If you are grating a huge pile of potatoes, they will turn gray really fast once they are sitting out. If you have to prep ahead, mix the potatoes right away with the lemon in the recipe, or toss them in cold water, then drain and press them *right* before they hit the oil. We want beautiful golden potato latkes, not sad brown ones!

Serving Suggestions for Your Potato Latkes
Okay, we’ve done the hard work, and your kitchen smells like the best kind of holiday magic. Now you have to decide how you’re going to eat these treasures! You absolutely must serve these piping hot, right out of the pan. I’m talking instantly!
The classic pairings are classics for a reason, right? A big dollop of cold, sharp sour cream next to a spoonful of sweet, chunky applesauce is the perfect temperature and flavor contrast for these savory potato latkes. It truly completes the experience of this traditional Jewish holiday dish. If you’re feeling adventurous, sometimes I’ll swap out the applesauce for a smoky onion relish, but honestly, the classic duo never fails to make everyone smile!

Storage and Reheating Your Potato Latkes
You probably won’t have many leftovers because these disappear fast—trust me! But if you do manage to save some of these perfect potato latkes, storing them correctly is so important so you can enjoy them again later. If you plan to use them within a couple of days, just put them in an airtight container in the fridge.
If you want to freeze them for the future, that’s easy too! Let the latkes cool completely first, then lay them out in a single layer on a baking sheet lined with parchment paper. Freeze them until they are hard, and then you can transfer them to a freezer bag. This keeps them from sticking together in a giant pancake brick!
Now, how do we bring them back to life? We want crispiness, so we are skipping the microwave completely! The microwave just turns them soft and sad, and we worked too hard for sad latkes. Skip that completely.
The best way to reheat is in a single layer on a baking sheet in the oven. Set your oven to about 375°F. Pop the frozen or fully defrosted potato latkes in there for about 10 minutes, maybe flipping them halfway through, until they are hot all the way through and that crispy exterior is back. It takes just a few minutes longer if they are coming straight from the freezer. When you smell that lovely potato smell again, you know they’re ready to serve!
Frequently Asked Questions About Potato Latkes Recipe
When I first started making these, I had a mountain of questions too! Frying feels intimidating, but once you get the hang of these tricks, you’ll be whipping up perfect potato latkes every single time. Don’t worry about making mistakes; that’s how we learn the best home-cooking secrets.
Why do my potato latkes turn out greasy instead of crispy?
Ninety-nine percent of the time, this comes down to oil temperature! If your oil isn’t hot enough—meaning it needs to be right around 350°F—the potatoes just soak up the liquid instead of sealing up and crisping. That’s why squeezing those potatoes so dry in the prep stage is crucial. Less water means quicker frying, which means less oil absorption. It’s a simple, delicious formula!
Can I make the shredded potato mixture ahead of time?
You absolutely can! This is a great trick for keeping stress low before guests arrive for your Hanukkah potato pancakes meal. You can squeeze the mix dry and keep it refrigerated for up to four hours. Just know that the mixture will brown a little bit while it sits, but it won’t affect the taste! Make sure you give it one final good squeeze right before you fold in the egg and flour.
What is the difference between using flour versus matzo meal?
For me, they both make fantastic potato latkes! Matzo meal generally gives you a slightly lighter, more delicate crust, which I love when I’m aiming for maximum crispiness. Flour is a bit denser once fried. Either one works perfectly fine as the binder to hold the shredded potato and onion together so they don’t fall apart in the hot oil. Just stick to the recipe amount and you’ll be golden!
Do I need to use Russet potatoes specifically?
I really do recommend Russets! They are high in starch and lower in water content than, say, waxy potatoes. Starch helps bind the latke together when fried, giving you that wonderful contrast—crispy outside, tender inside. If you have to substitute, Yukon Golds are the second-best option, but you must be extra careful while squeezing out the excess moisture.
Understanding the Nutrition in Homemade Potato Latkes
Now, listen, because I have to be honest with you all here at Carla’s Cooking. I’m a home cook, not a nutritionist trying to sell you a specific meal planning system or anything related to those weight loss programs. When you’re making something as wonderfully traditional and joy-inducing as potato latkes, we have to remember that these are fried treats made to celebrate oil!
Because we are frying these beauties in oil, the final nutritional breakdown can really swing wildly depending on how much oil the potato latkes absorb during that crucial frying stage. Also, if you use matzo meal versus flour, or pile on extra salt, that changes things!
So, really take this next bit as a friendly heads-up: The information I put in the full recipe chart is my very best *estimate* based on standard measurements and average oil retention. It is not a medical guarantee! If you’re tracking calories for a keto meal plan delivery or watching sodium intake closely, you must treat those numbers as a very rough guide. When you make something this delicious, sometimes you just have to focus on the happy memories instead of the fat grams, don’t you think?
Share Your Experience Making These Potato Latkes
I truly hope these instructions help you create the most incredible, crispy potato latkes for your family this holiday season. Making the potato mixture, pressing out the water, watching them sizzle—it’s all part of the tradition I learned from my grandmother!
Now, I need to hear all about it! Did you stick with flour or go for the matzo meal? Were they the crispiest fried latkes you’ve ever made? Please drop a rating right below the recipe card—five stars if they brought smiles to the table! If something was tricky, or if you have a family story connected to your Hanukkah potato pancakes, leave a comment. I read every single one, and I love knowing I helped bring a little bit of that warm, happy kitchen feeling to your home. Happy holidays, everyone!
PrintCrispy Potato Latkes for Hanukkah

Make traditional, crispy potato latkes just like Grandma used to, perfect for your Hanukkah celebration. These fried pancakes are golden brown outside and tender inside.
- Prep Time: 20 min
- Cook Time: 25 min
- Total Time: 45 min
- Yield: About 18 latkes 1x
- Category: Side Dish
- Method: Frying
- Cuisine: Jewish
- Diet: Vegetarian
Ingredients
- 3 large Russet potatoes (about 2 pounds)
- 1 medium yellow onion
- 2 large eggs, lightly beaten
- 1/4 cup all-purpose flour or matzo meal
- 1 teaspoon salt
- 1/4 teaspoon black pepper
- Vegetable oil or canola oil, for frying (about 1 inch deep in the skillet)
Instructions
- Peel the potatoes and onion. Grate them using the coarse side of a box grater or a food processor fitted with a grating disc.
- Place the grated potato and onion mixture into a clean kitchen towel or several layers of cheesecloth. Wrap tightly and squeeze out as much liquid as possible. This step is key for crispy latkes. Discard the liquid.
- Transfer the dried potato and onion mixture to a medium bowl.
- Add the beaten eggs, flour (or matzo meal), salt, and pepper to the bowl. Mix gently until just combined. Do not overmix.
- Pour about 1 inch of oil into a large, heavy-bottomed skillet (cast iron works well) and heat over medium-high heat until the oil reaches 350°F (175°C). If you do not have a thermometer, test the oil by dropping a tiny piece of potato mixture in; it should sizzle immediately.
- Working in batches, drop heaping tablespoons of the potato mixture into the hot oil, flattening them slightly with the back of the spoon to form pancakes about 1/2 inch thick. Do not overcrowd the pan.
- Fry for 3 to 5 minutes per side, until deep golden brown and crispy. Adjust the heat as needed to maintain the oil temperature; if the oil is too cool, the latkes will be greasy.
- Use a slotted spoon or spatula to remove the latkes from the oil. Place them on a wire rack set over a baking sheet lined with paper towels to drain excess oil.
- Serve immediately with applesauce and sour cream. You can keep finished latkes warm in a 200°F oven while you fry the remaining batches.
Notes
- For the crispiest results, squeeze the grated potato and onion mixture until it is very dry.
- If you are using this recipe for meal planning, consider preparing the dry potato mixture ahead of time and storing it in the refrigerator for up to 4 hours before frying.
- Maintain a consistent oil temperature between 350°F and 365°F for the best texture.
Nutrition
- Serving Size: 2 latkes
- Calories: 180
- Sugar: 1
- Sodium: 250
- Fat: 12
- Saturated Fat: 2
- Unsaturated Fat: 10
- Trans Fat: 0
- Carbohydrates: 16
- Fiber: 2
- Protein: 4
- Cholesterol: 50