 Skip to content
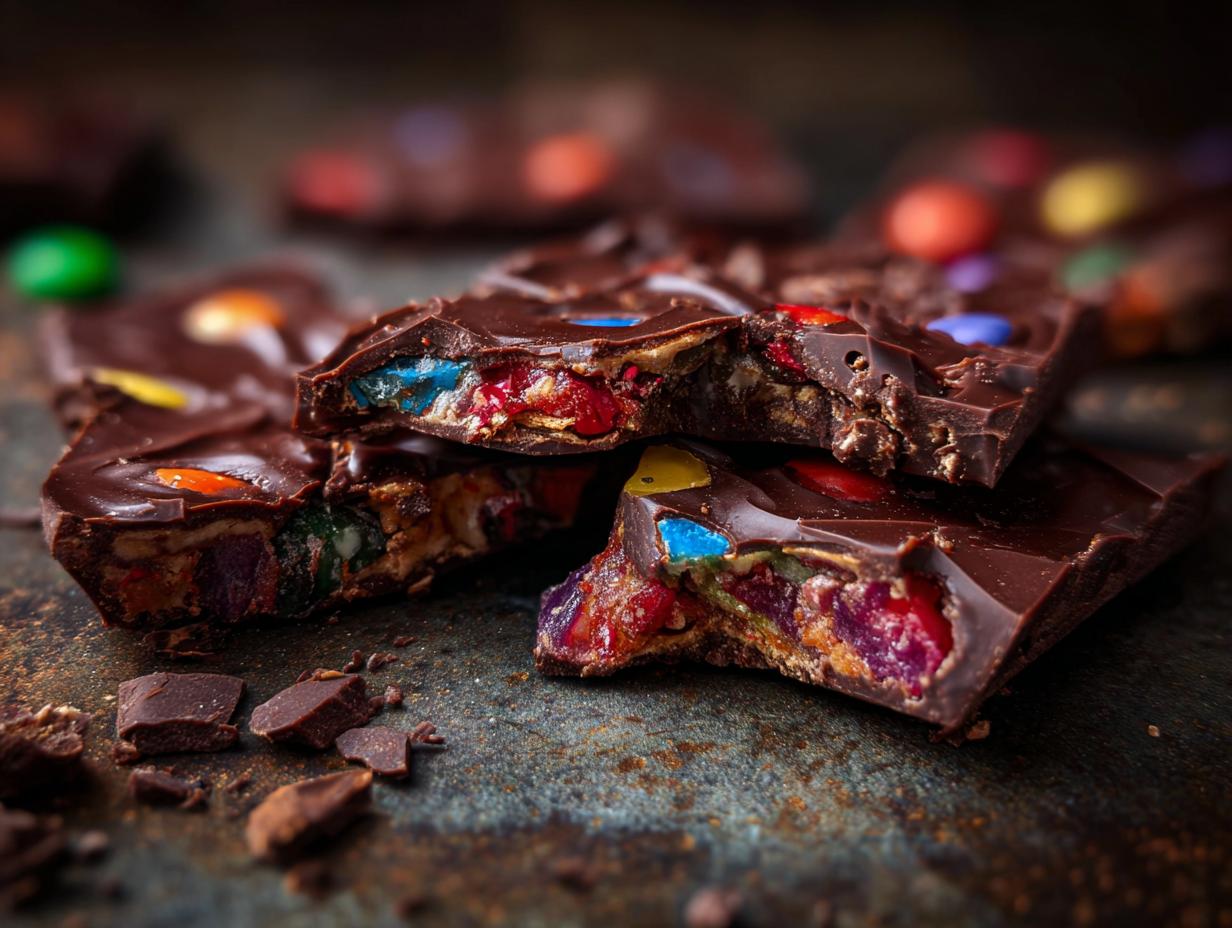

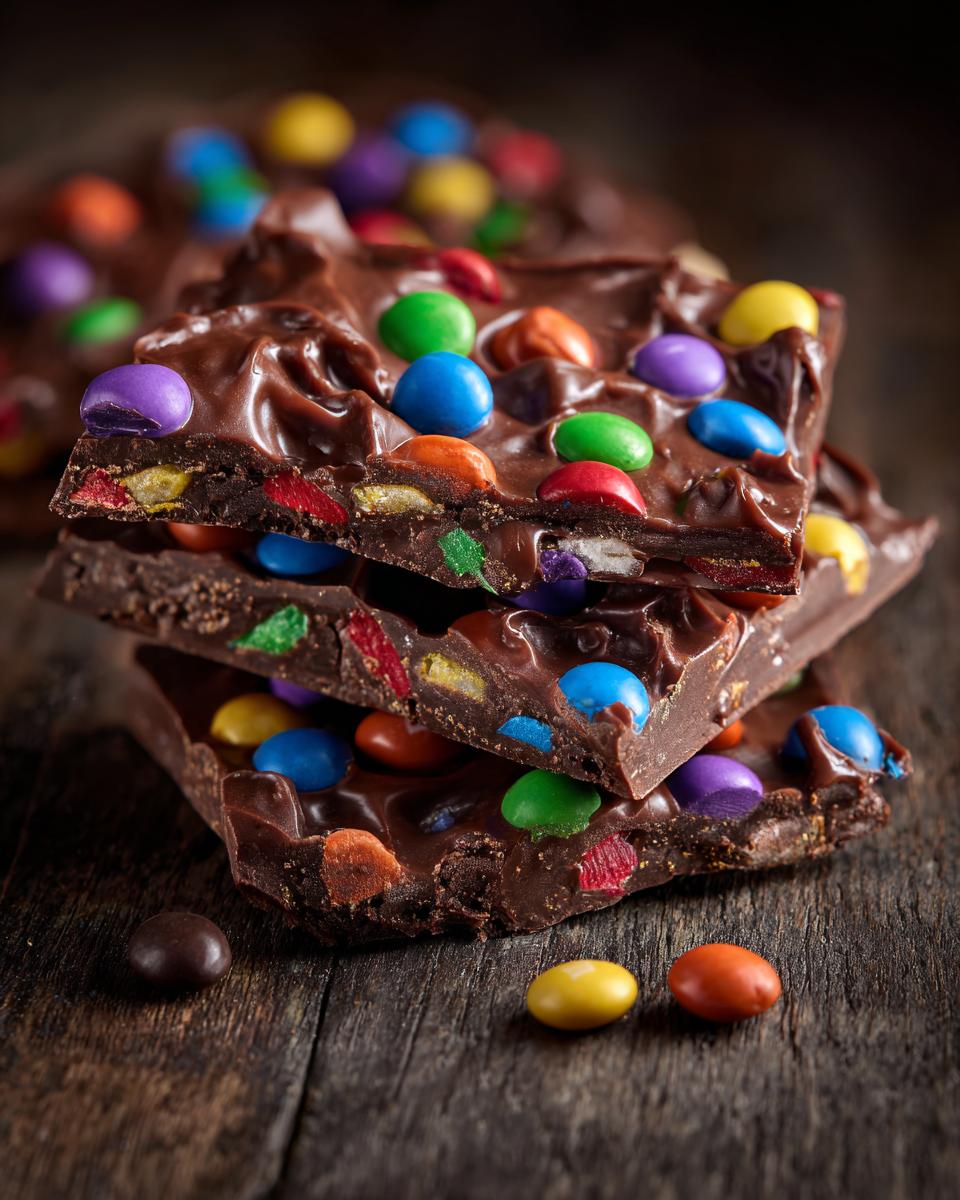
Oh my gosh, you guys, get ready for some serious Halloween fun because we’re making Halloween candy bark! It’s seriously the easiest, most colorful treat you’ll whip up all season. You know how I am – I just love filling my kitchen with smiles, just like my Grandma used to do back in Ohio. For me, food is all about connection and joy, and this super simple, no-bake bark is perfect for using up all those little candy treasures after trick-or-treating or just for a fun party snack. You can find out more about my kitchen philosophy over on my About page, but trust me, this recipe is all about keeping things delicious and stress-free!

- Why You'll Love This Halloween Candy Bark
- Gather Your Ingredients for Halloween Candy Bark
- Simple Steps to Make Delicious Halloween Candy Bark
- Tips for the Best Halloween Candy Bark
- Variations for Your Halloween Candy Bark
- Make-Ahead and Storage for Halloween Candy Bark
- Frequently Asked Questions about Halloween Candy Bark
- Estimated Nutritional Information
- Share Your Halloween Candy Bark Creations!
Why You’ll Love This Halloween Candy Bark
Seriously, this Halloween candy bark is a lifesaver and so much fun:
- It’s unbelievably easy – like, spread, sprinkle, set easy!
- No oven needed! It’s a total no-bake win.
- You can use *any* candy you love – it’s your bark, your rules!
- Perfect for parties or just busting a candy stash.
- It looks super festive and impressive with minimal effort.
- Great way to use up all those stray Halloween candies!
Gather Your Ingredients for Halloween Candy Bark
Okay, let’s get our little Halloween party started with just a few simple things! You’ll need about 12 ounces of semi-sweet chocolate chips – I like semi-sweet because it balances everything out, but feel free to play around! Then, grab about 1 cup of your favorite assorted Halloween candies. Think candy corn, some mini M&Ms, maybe a few crushed pretzels for that salty crunch, and definitely some fun sprinkles or even those silly candy eyeballs if you’ve got ‘em! Just give them a quick chop so they’re not too chunky. That’s really it – so simple!
Simple Steps to Make Delicious Halloween Candy Bark
Alright, get ready to feel like a candy wizard! Making this Halloween candy bark is honestly… dare I say… therapeutic? It’s so quick, you’ll be amazed. You just need a baking sheet, some parchment paper to make cleanup a breeze (my favorite kind of step!), and then we get to the fun part. Seriously, this recipe is so straightforward, it’s perfect for even the busiest weeknights, or a super fun activity to do with the kids. If you’re looking for more easy holiday treats, check out my Halloween Snack Mix – it’s another winner!
Melting Chocolate for Your Halloween Candy Bark
First things first: the chocolate! Nobody wants burnt chocolate bits, right? So, grab your chocolate chips and a microwave-safe bowl. Pop them in for 30 seconds, stir really well, and then keep going in 30-second bursts, stirring *each* time. It might seem slow, but it’s the best way to get it perfectly smooth without scorching. If you’re feeling fancy or a bit nervous, a double boiler works wonders too. Oh, and my secret little helper? A tiny teaspoon of vegetable or coconut oil makes it extra smooth and dreamy. Totally optional, but it’s a game-changer!
Decorating Your Halloween Candy Bark
Once your chocolate is looking all glossy and melty, pour it onto that parchment-lined baking sheet. Grab a spatula and spread it out into a nice, even layer. Don’t stress if it’s not perfectly uniform – rustic is the name of the game here! As soon as it’s spread, rain down your chopped candies all over the top. Make it colorful! Then, gently press them down with your spatula or even your fingers – this makes sure they stick like glue and don’t go flying off later. Easy peasy!
Cooling and Breaking Your Halloween Candy Bark
Now for the hardest part: waiting! You’ve got two options: let it sit on the counter until it’s totally firm (this takes a little longer, maybe an hour or so), or pop it in the fridge for about 15-20 minutes. Either way, once it’s hard enough that it’s not gooey, pick it up. You can score it gently with a knife if you want, or just go for it and break it into those perfect, irregular, chunky bark pieces! Each piece will be a surprise. It’s that simple – you’ve just made gorgeous Halloween candy bark!


Tips for the Best Halloween Candy Bark
Okay, after making enough Halloween candy bark to fill a pumpkin patch, I’ve picked up a few tricks! First off, don’t be afraid to mix and match your candies. I love a good blend of sweet (like candy corn!), salty (pretzels are a must!), and crunchy (M&Ms!). Also, if your chocolate seems a little stiff when melting, a tiny splash of coconut oil or even vegetable oil helps make it super smooth and spreadable – trust me on this one! And here’s a pro tip from my kitchen adventures: work quickly once the chocolate is melted. The toppings need something warm to stick to! For more of my kitchen wisdom, check out my blog!
Variations for Your Halloween Candy Bark
Alright, let’s get creative with this Halloween candy bark! You know how much I love tweaking recipes to make them my own. For the base, you can totally switch up the chocolate – creamy milk chocolate, rich dark chocolate, or even sweet white chocolate all work like a charm. Don’t stop there! Try adding some chopped nuts for extra crunch, or go wild with edible glitter for some serious sparkle. You can even swap out the Halloween theme for other holidays; imagine a red and green bark for Christmas or pastels for Easter! The possibilities are endless and so much fun to experiment with!
Make-Ahead and Storage for Halloween Candy Bark
You know, this Halloween candy bark is actually perfect for making ahead! I usually whip up a big batch a few days before our neighborhood Halloween party. Once it’s all hardened and broken, just store it in an airtight container. Keep it at cool room temperature if possible. If your house gets a little warm, or if you want to be extra sure it doesn’t get melty, pop it in the fridge. Just be aware that the fridge can sometimes make candy a bit sticky, so an airtight container is key, maybe with a bit of parchment paper between layers to stop it from sticking together.
Frequently Asked Questions about Halloween Candy Bark
Got questions about this spooky-good Halloween candy bark? I’ve got answers! You all ask some great things when you’re in the kitchen, and I love helping you make the best treats possible. For more details on all things spooky chocolate, you can check out my Halloween Chocolate Bark page!
Can I use any kind of chocolate for this recipe?
Absolutely! While I love semi-sweet for this holiday chocolate bark, feel free to use milk chocolate, dark chocolate, or even white chocolate. Just remember that different chocolates melt a little differently, so keep an eye on it during the melting process to avoid burning. Each type will give your bark a unique flavor!
How do I make sure my candy sticks to the chocolate?
The trick is to work fast! Once you’ve spread your melted chocolate, sprinkle your candies on right away while the chocolate is still warm and melty. Gently pressing them down helps, too – just a little nudge will do. If your chocolate starts to set up too quickly, you can pop it back in the microwave for just 10-15 seconds to loosen it up again.
What happens if my chocolate gets thick or seize?
Oh no, seized chocolate is a bummer! This usually happens if a tiny bit of water gets into the chocolate or if it gets overheated. If it gets too thick, a teaspoon of oil (like coconut or vegetable oil) can sometimes help smooth it out again. If it’s really gone wrong, it’s best to start fresh with a new batch of chocolate – it happens to the best of us in the kitchen!
How should I store leftover Halloween candy bark?
Once your bark is fully hardened, store it in an airtight container at cool room temperature. If your house tends to be warm, the fridge is your friend! Just make sure it’s sealed tight so it doesn’t absorb any weird smells. This no-bake Halloween treat stays good for about a week, if it even lasts that long!

Estimated Nutritional Information
Alright, let’s talk numbers! Because this Halloween candy bark is so customizable with different chocolates and candies, these values are just an estimate, okay? On average, a serving (about 1 ounce) has around 150 calories, a good dose of fat (about 9g, with 5g being saturated), and roughly 18g of carbs, including maybe 1g of fiber. You’ll also get about 2g of protein. Remember, the exact amounts will totally depend on the specific goodies you mix in!
Share Your Halloween Candy Bark Creations!
Whew, we made it! Now I want to see what amazing Halloween candy bark you’ve whipped up! Did you go wild with the toppings? Maybe you discovered a new favorite candy combo? Please, tell me all about it in the comments below – I love hearing your stories and seeing your delicious creations! And if you loved this recipe, a quick star rating would mean the world to me. Happy baking… or, well, happy not-baking!
PrintHalloween Candy Bark

A simple, no-bake Halloween treat made with melted chocolate and your favorite assorted candies. Perfect for using up leftover Halloween candy or creating a festive party snack.
- Prep Time: 10 min
- Cook Time: 0 min
- Total Time: 30 min
- Yield: 16 servings 1x
- Category: Dessert
- Method: No-Bake
- Cuisine: American
- Diet: Vegetarian
Ingredients
- 12 ounces semi-sweet chocolate chips
- 1 cup assorted Halloween candies, chopped (e.g., candy corn, M&Ms, sprinkles, pretzels, gummy worms)
Instructions
- Line a baking sheet with parchment paper.
- Melt the chocolate chips. You can do this in a microwave-safe bowl in 30-second intervals, stirring between each, until smooth. Alternatively, use a double boiler. Be careful not to overheat the chocolate.
- Pour the melted chocolate onto the prepared baking sheet.
- Spread the chocolate into a thin, even layer using a spatula.
- Immediately sprinkle the assorted Halloween candies evenly over the melted chocolate.
- Gently press the candies into the chocolate to help them adhere.
- Let the bark sit at room temperature until firm, or refrigerate for about 15-20 minutes until hardened.
- Once firm, break the bark into irregular pieces.
Notes
- For a smoother melt, add a teaspoon of vegetable oil or coconut oil to the chocolate chips before melting.
- You can customize the chocolate base by using milk chocolate, dark chocolate, or white chocolate.
- Feel free to add other toppings like nuts, crushed cookies, or edible glitter.
Nutrition
- Serving Size: 1 ounce
- Calories: 150
- Sugar: 15g
- Sodium: 10mg
- Fat: 9g
- Saturated Fat: 5g
- Unsaturated Fat: 4g
- Trans Fat: 0g
- Carbohydrates: 18g
- Fiber: 1g
- Protein: 2g
- Cholesterol: 5mg