 Skip to content

Oh, the smell of freshly baked naan! Seriously, is there anything better when you’re craving some amazing Indian food? Forget that stiff, dry stuff you sometimes get out. We’re talking about the real deal here – soft, chewy, with those perfect little char marks that just scream deliciousness. Making naan at home used to feel like a huge undertaking, maybe something you’d only get from a top-rated Indian meal delivery service, but trust me, it’s totally doable! My journey with this recipe started like so many others, with a memory of my Grandma Carla’s kitchen. She could make anything taste incredible, and while she didn’t make naan *exactly* like this, her philosophy of simple, honest ingredients always stuck with me. This version is my way of bringing that incredible, soulful flavor and texture right to your table, super fast. It’s SO easy, you’ll wonder why you ever waited! You can learn more about my kitchen philosophy and my own journey here.

- Why You'll Love This Naan Recipe
- Ingredients for Your Homemade Naan
- Step-by-Step Guide to Making Naan
- Tips for Perfect Homemade Naan
- Ingredient Notes and Substitutions for Naan
- Serving Suggestions for Your Naan
- Storing and Reheating Your Homemade Naan
- Frequently Asked Questions About Naan
- Nutritional Information for This Naan Recipe
- Share Your Homemade Naan Creations!
Why You’ll Love This Naan Recipe
Get ready to fall head over heels for this homemade naan. It’s seriously the best! Here’s why:
- Super Easy to Make: You don’t need to be a pro baker. The instructions are totally foolproof, and you’ll have amazing naan in no time.
- Ready in a Flash: From mixing to bubbling on your stove, this naan is done in under an hour. Perfect for a weeknight craving!
- Incredible Texture: It’s the dream combo – wonderfully soft, delightfully chewy, and just a little bit puffy.
- Amazing Flavor: Freshly baked naan with a hint of garlic butter? Yes, please! It completely elevates any meal.
- So Versatile: Perfect for scooping up your favorite curries, dipping into sauces, or even just enjoying on its own.
Ingredients for Your Homemade Naan
Gathering your ingredients is the first real step to making this glorious naan. Don’t worry, it’s all pretty standard stuff you probably already have in your pantry! These measurements make about 4 lovely naans, just perfect for sharing (or not!).
- For the Dough:
- 1 teaspoon active dry yeast – Make sure it’s fresh!
- 1 teaspoon granulated sugar – This gives the yeast a little party fuel.
- 1/4 cup warm water (around 105-115°F) – Not too hot, not too cold, just right!
- 1 1/2 cups all-purpose flour, plus more for dusting – The main event! Keep some extra handy for rolling.
- 1/2 teaspoon salt – For flavor, of course.
- 1/4 cup plain yogurt – This makes it tender and yummy.
- 2 tablespoons milk – Adds extra softness.
- 1 tablespoon vegetable oil, plus more for greasing – Just a little in the dough, and more for coating the bowl.
- For Finishing:
- 2 tablespoons melted butter, for brushing – Oh, the best part!
- 1 clove garlic, minced (optional) – If you’re a garlic lover like me, you won’t skip this!
Step-by-Step Guide to Making Naan
Okay, let’s get this naan party started! Making this Indian flatbread really isn’t complicated at all. It’s mostly about letting the dough do its thing. Just follow along, and you’ll have warm, fresh naan in no time. Don’t worry if your first few aren’t perfectly shaped – they’ll still taste amazing! Think of it like making other quick breads, but with that authentic Indian flair, similar to how you might whip up a burrata caprese flatbread or even a cottage cheese flatbread.
Activating the Yeast for Your Naan Dough
First things first, let’s wake up that yeast! Grab a little bowl, pour in your warm water, and sprinkle in the yeast and sugar. Give it a gentle stir and then just let it sit for about 5 to 10 minutes. You’ll know it’s happy and ready to go when it gets all foamy and bubbly on top. If it doesn’t foam, your water might have been too hot or too cold, or the yeast is old. No worries, just start again with fresh yeast!
Mixing and Kneading the Naan Dough
Now, grab a big bowl and whisk together your flour and salt. Make a little well in the center and pour in that foamy yeast mixture, the yogurt, milk, and that tablespoon of oil. Start mixing everything with a fork or your hands until it just starts to come together into a shaggy dough. Then, turn it out onto a lightly floured surface. My secret? I always kind of gauge when to stop kneading by how it feels. You want it to be smooth and elastic, bouncing back when you poke it gently. Knead for about 5-7 minutes until it feels just right – not sticky, but definitely not dry.
First Rise: Letting Your Naan Dough Proof
Once your dough is all smooth and lovely, lightly grease a clean bowl with a little more oil. Pop the dough in there and turn it around so it’s coated. Cover the bowl tightly with plastic wrap or a clean kitchen towel, and then find a nice warm spot for it to hang out. It needs about 1 to 1.5 hours to basically double in size. This is where all the magic happens for that soft, pillowy texture!
Shaping and Rolling Your Naan
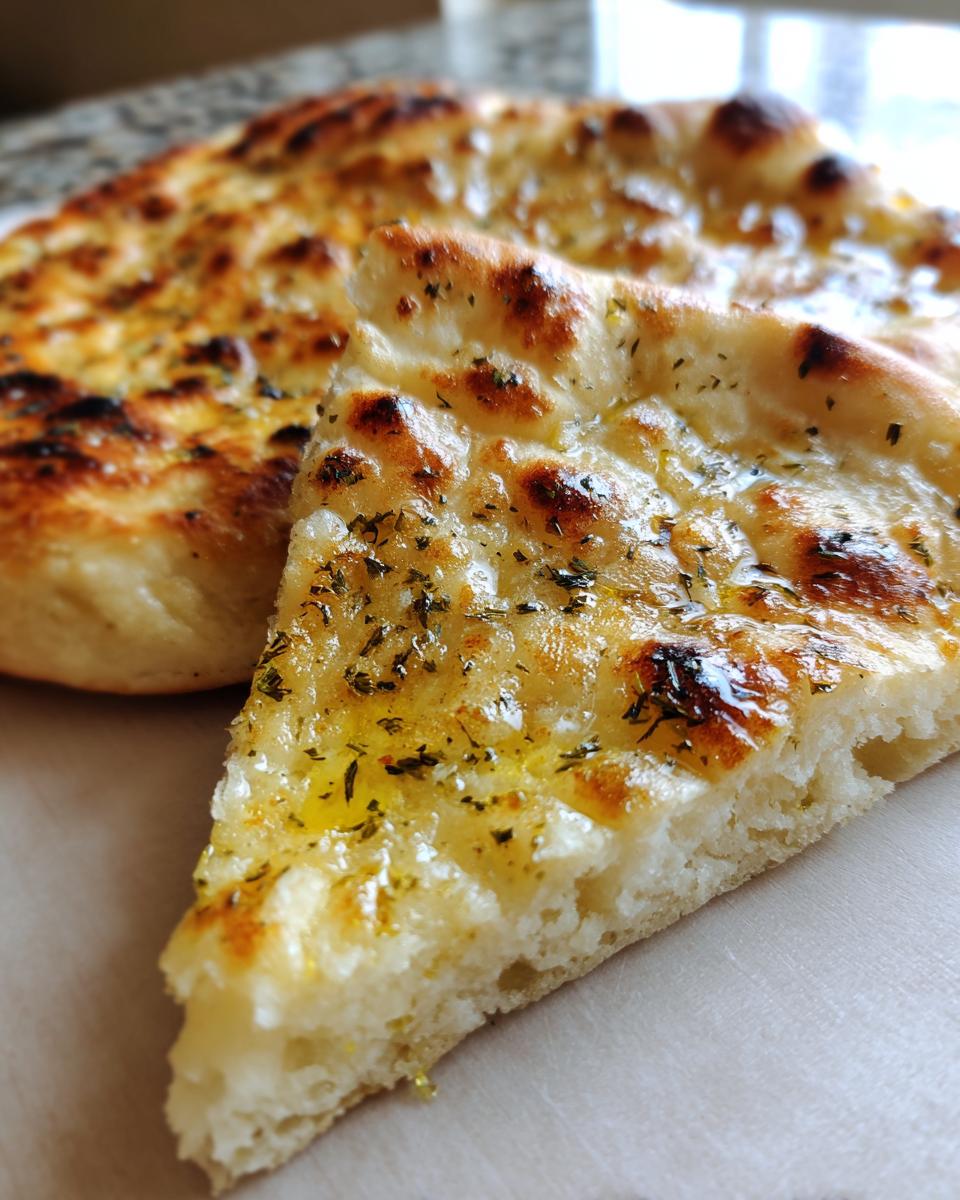
After the dough has had its cozy nap and risen nicely, gently punch it down to get the air out. Then, divide it into about 4 equal pieces. Roll each piece into a smooth ball. Pop them on your floured surface again, dust them lightly with more flour, and roll each one out into an oval or teardrop shape. Try to get them about 1/4 inch thick. Don’t stress too much about perfect shapes; we’re going for rustic charm here!
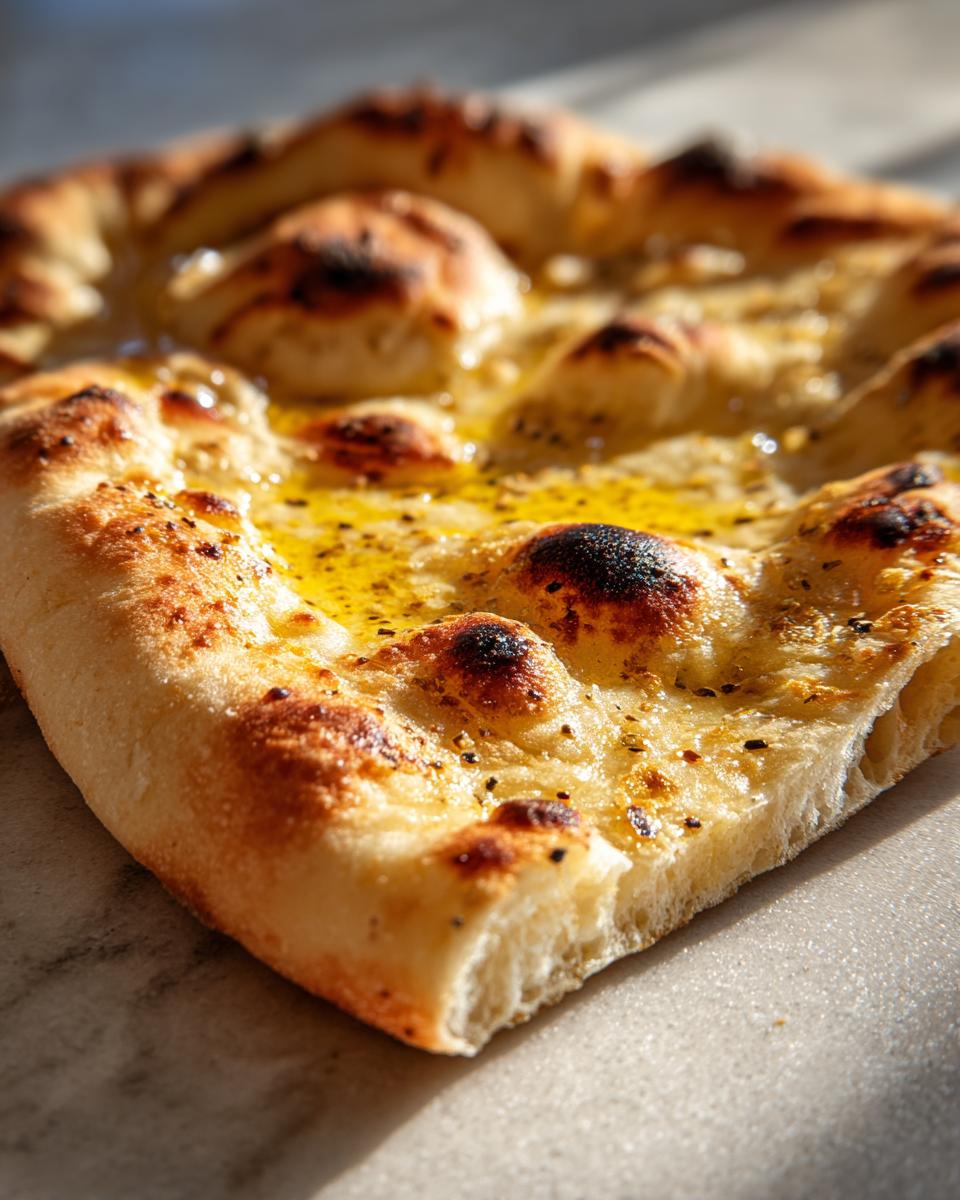
Cooking the Naan: Skillet vs. Oven Method
Alright, time to cook! You have two fantastic options. For the skillet method, heat up a cast-iron skillet or a good griddle over medium-high heat. Make sure it’s nice and hot! Lay your rolled-out naan onto the hot skillet. It’ll start to puff up and get those gorgeous brown spots in about 2-3 minutes. Flip it over and cook the other side. If you’re using the oven, preheat it to a screaming hot 450°F (230°C) with a baking stone or an inverted baking sheet inside. Carefully place the naan onto the hot surface and bake for about 3-5 minutes until it’s nice and puffy with some lovely charred bits. Getting that heat high is key for the best blisters!
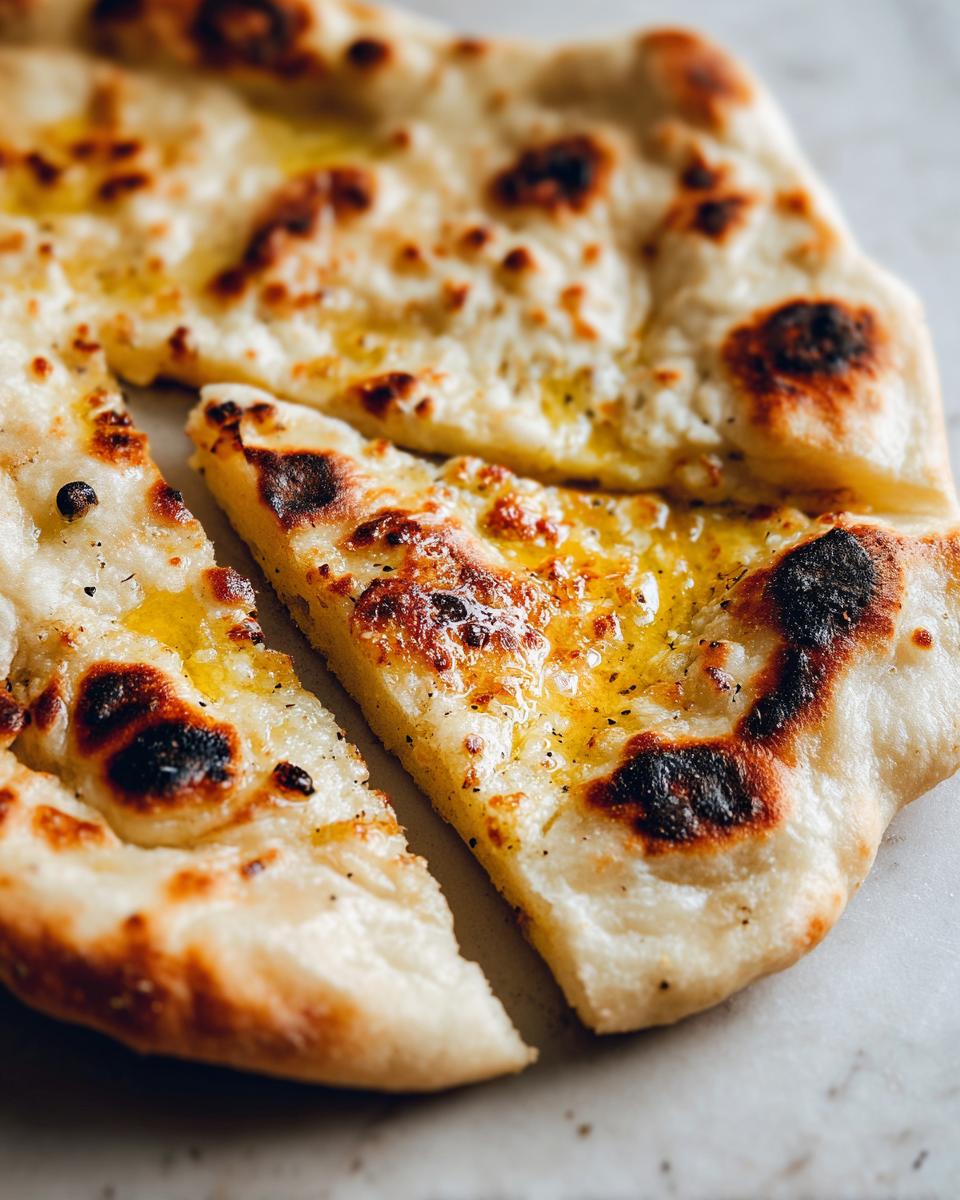
Finishing Touches: Butter and Garlic
As soon as your naan comes off the heat, it’s time for the best part! Brush it generously with that melted butter. If you’re feeling adventurous and love garlic, mix some minced garlic into the melted butter before slathering it on. This is where you get that incredible garlic naan flavor that’s just divine. It makes everything taste even that much better, especially when you’re pairing it with something like garlic shrimp skewers!

Tips for Perfect Homemade Naan
Making naan at home is totally rewarding, and a few little tricks can make it even more amazing. I’ve messed up enough times to learn a thing or two, and I want to share those secrets with you so your naan comes out perfect every single time!
Achieving the Perfect Naan Texture
The secret to that tender, chewy naan is all in the dough. Make sure you don’t skimp on the kneading – that’s what develops the gluten and gives it that wonderful elasticity. Also, don’t be tempted to add too much extra flour when you’re rolling; a little stickiness is okay and usually means a softer bread! The yogurt and milk really help too, keeping it soft and moist.
Troubleshooting Common Naan Problems
If your naan turns out tough, you likely over-kneaded or used too much flour. Next time, be gentler and use just enough flour to handle it. If your dough isn’t rising, check your yeast and water temperature – they’re usually the culprits. Uneven cooking? Make sure your pan or oven is truly hot before you start!
Ingredient Notes and Substitutions for Naan
Let’s chat about a couple of ingredients in this naan recipe because sometimes you just don’t have exactly what’s called for, right? No worries! The plain yogurt is key for that tender, slightly tangy crumb, but if you’re out, sour cream is a great stand-in. Just use the same amount. If you don’t have either, you can add an extra tablespoon of milk and maybe a tiny splash of lemon juice for a bit of tang. And for the milk, any kind works, but if you want to make it extra special, buttermilk adds a wonderful richness!
Serving Suggestions for Your Naan
Honestly, this homemade naan is amazing with almost anything! It’s perfect for mopping up every last bit of a rich, creamy butter chicken or a spicy lentil dal. But don’t stop there! It’s also fantastic alongside other global flavors, maybe even dipping into a hearty chicken tortilla soup or alongside some grilled dishes. Basically, if it’s saucy or delicious, your naan will be its best friend!
Storing and Reheating Your Homemade Naan
This naan is truly best right out of the pan, all warm and buttery! But if you happen to have leftovers (which is rare in my house!), don’t toss them. Just wrap them up tightly in some plastic wrap or pop them into an airtight container once they’ve cooled down completely. They’ll stay good for about a day. To reheat, a quick pass in a dry skillet over medium heat or about 30 seconds in the microwave brings them right back to life. You want them warm and a little soft again, not crispy!
Frequently Asked Questions About Naan
Got questions about whipping up this amazing Indian flatbread? I get it! Making naan at home is super satisfying, but sometimes a little clarification helps turn good into *great*. Here are some things folks often ask:
Can I make naan without yeast?
You *can* try a recipe that uses baking powder instead of yeast for a quick-rise naan, but honestly, yeast is what gives this homemade naan that wonderful chewy texture and subtle flavor. Skipping it will result in a flatter, more cracker-like bread. For this recipe, yeast is really the star!
What’s the best way to get blisters on my naan?
Ah, the blistered naan! That’s all about HEAT. Make sure your skillet or oven is super hot before the dough touches it. A very hot, dry cast-iron skillet or a hot baking stone in the oven works wonders. Keeping the dough hydrated also helps it puff up nicely!
How long does homemade naan last?
This soft yeast bread is truly best enjoyed fresh and warm right after you make it. If you do have leftovers, store them in an airtight container at room temperature for about a day. They’ll still be good, but they do lose that fresh-from-the-pan softness after a while.
Can I freeze naan dough?
Yes, you absolutely can freeze the naan dough! Once it has finished its first rise and you’ve punched it down, you can tuck it into a greased, airtight container or a freezer bag. When you’re ready to use it, just thaw it in the refrigerator overnight, and then let it come to room temperature for about 30 minutes before shaping and cooking.
Nutritional Information for This Naan Recipe
Just a little heads-up on the numbers! Since we’re all using slightly different ingredients and cooking methods, these are just estimates for one of these yummy naans. You know, a rough idea! Freshly made naan like this is usually around 250 calories, with about 10g of fat, 7g of protein, and 35g of carbs per serving. It’s always good to remember that these can change a bit!
Share Your Homemade Naan Creations!
I absolutely LOVE seeing your creations! If you make this easy homemade naan, please let me know how it turned out. Leave a comment below, give it a rating if you feel so inclined, or better yet, share a photo with me on social media! You can always reach out with any questions too. And don’t forget to check out the blog for more delicious recipes!
PrintEasy Homemade Naan Bread

Learn how to make soft, chewy, and slightly blistered naan bread at home. This recipe is perfect for accompanying your favorite Indian dishes.
- Prep Time: 20 minutes
- Cook Time: 15 minutes
- Total Time: 35 minutes
- Yield: 4 servings 1x
- Category: Side Dish
- Method: Skillet/Oven
- Cuisine: Indian
- Diet: Vegetarian
Ingredients
- 1 teaspoon active dry yeast
- 1 teaspoon granulated sugar
- 1/4 cup warm water (105-115°F)
- 1 1/2 cups all-purpose flour, plus more for dusting
- 1/2 teaspoon salt
- 1/4 cup plain yogurt
- 2 tablespoons milk
- 1 tablespoon vegetable oil, plus more for greasing
- 2 tablespoons melted butter, for brushing
- 1 clove garlic, minced (optional)
Instructions
- In a small bowl, combine the yeast, sugar, and warm water. Let it sit for 5-10 minutes until foamy.
- In a large bowl, whisk together the flour and salt.
- Add the foamy yeast mixture, yogurt, milk, and 1 tablespoon of vegetable oil to the flour mixture. Mix until a shaggy dough forms.
- Turn the dough out onto a lightly floured surface and knead for 5-7 minutes until smooth and elastic.
- Lightly grease a clean bowl with vegetable oil. Place the dough in the bowl, turning to coat. Cover with plastic wrap and let it rise in a warm place for 1-1.5 hours, or until doubled in size.
- Punch down the dough and divide it into 4 equal portions. Roll each portion into a ball.
- On a lightly floured surface, roll out each ball into a thin oval or teardrop shape, about 1/4 inch thick.
- Heat a cast-iron skillet or griddle over medium-high heat. You can also use a preheated oven at 450°F (230°C) with a baking stone or an inverted baking sheet.
- Cook the naan for 2-3 minutes per side directly on the skillet until puffed and golden brown with some charred spots. If using an oven, bake for 3-5 minutes until puffed and browned.
- While the naan is still hot, brush generously with melted butter. If desired, mix minced garlic into the melted butter before brushing.
- Serve immediately.
Notes
- For a richer flavor, you can substitute milk with buttermilk.
- If you don’t have yogurt, you can use an equal amount of sour cream or an extra tablespoon of milk.
- To achieve the characteristic blisters, ensure your skillet or oven is very hot.
- This naan is best enjoyed fresh, but leftovers can be stored in an airtight container for a day. Reheat gently in a skillet or oven.
Nutrition
- Serving Size: 1 naan
- Calories: 250
- Sugar: 3g
- Sodium: 300mg
- Fat: 10g
- Saturated Fat: 3g
- Unsaturated Fat: 7g
- Trans Fat: 0g
- Carbohydrates: 35g
- Fiber: 2g
- Protein: 7g
- Cholesterol: 10mg