 Skip to content

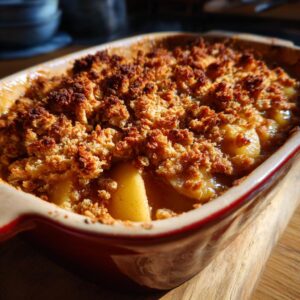
I’ll never forget the first time I helped my grandma make her Easy Apple Crisp in her farmhouse kitchen just outside of Toledo. The crisp Ohio air would whistle through the screen door while the smell of cinnamon and apples filled the whole house. She’d hand me the wooden spoon and say, “Carla, honey, this is where memories are made.” That simple combination of sliced apples, sugar, and oats has been my comfort food ever since. Now when autumn leaves start falling, I dust off this foolproof recipe—it’s so simple even first-time bakers nail it, and always earns a starring role on our Thanksgiving dessert table.


Why You’ll Love This Easy Apple Crisp
Trust me, this isn’t just another dessert recipe—it’s your new go-to for all those times when you need something delicious without the fuss. Here’s why it’s my favorite:
- Crazy quick prep: From peel to oven in 15 minutes flat—perfect for those nights when you’re scrambling to get dinner on the table.
- Pantry superhero: Flour, oats, sugar—you probably have everything right now (no special grocery runs!).
- Play with your food: Swap in walnuts, add cardamom, or drizzle caramel…it’s practically begging for your personal touch.
- Crowd magic: Kids? Grandparents? Picky neighbors? Nobody can resist that cinnamon-scented crumble.
I’ve made this during busy weeks and chaotic Thanksgivings alike—it’s the dessert that always saves the day.

Ingredients for Easy Apple Crisp
One of the best things about this recipe? You likely have most of these ingredients sitting in your kitchen right now. I always measure everything out before I start – it makes the whole process feel like a little dance where each step flows perfectly into the next. Here’s what you’ll need:
For the Apple Filling:
- 6 cups thinly sliced apples (about 5 medium – I always use Granny Smith for that perfect tartness, but Honeycrisp works beautifully too)
- 1 tablespoon fresh lemon juice (just enough to keep those apples from browning – trust me, it makes a difference!)
- 1/2 cup granulated sugar (don’t skimp – this balances the tart apples)
- 1 teaspoon ground cinnamon (my secret? I always sniff the jar first – cinnamon should smell sweet and spicy)
- 1/4 teaspoon ground nutmeg (freshly grated if you’re feeling fancy)
For the Oat Crumble Topping:
- 1 cup old-fashioned rolled oats (not quick oats – we want that lovely texture!)
- 1/2 cup all-purpose flour (spoon and level it – no packed flour allowed!)
- 1/2 cup packed brown sugar (pack it down firmly in your measuring cup)
- 1/4 teaspoon fine sea salt (just enough to make all the flavors pop)
- 1/2 cup (1 stick) cold unsalted butter, cubed (and I mean cold – straight from the fridge)

How to Make Easy Apple Crisp
Okay friends, let’s get baking! This is where the magic happens – turning those simple ingredients into a bubbling, cinnamon-scented masterpiece. I’ve made this dozens of times (seriously, I lost count after last Thanksgiving), and I’ve got all the little tricks to ensure yours turns out perfect. Follow these steps, and you’ll have everyone begging for seconds!
Preparing the Apple Filling
First, grab those beautiful apples – I like to slice them about 1/4 inch thick. Wanna know my secret for even slices? Keep the skin on until you’re done slicing (it gives you something to hold onto!), then peel the slices if you prefer. Toss them immediately with the lemon juice – this stops them from turning brown and adds just the right zing. Now sprinkle in the sugar and spices. My tip? Give it a taste test – the apples should taste slightly sweeter than you’d want the final crisp to be (baking mellows the flavors).
Making the Oat Crumble Topping
Oh, this is the fun part! Dump your dry ingredients into a big bowl and whisk them together. Now for the butter – it must be cold, like just-out-of-the-fridge cold. I use my pastry cutter to work the butter in, but clean fingers work just as well (and let’s be honest, playing with the crumble is the best part!). Stop when the mixture looks like coarse crumbs with some pea-sized bits of butter – these melt in the oven to create those irresistible crispy pockets.
- Preheat your oven to 375°F (190°C) – this gives the crisp that perfect golden crust.
- Layer your apples in a 9×13 baking dish – no need to grease it, the butter in the topping does that for you!
- Sprinkle the oat topping evenly over the apples. Pro tip: Press it down lightly in spots to create some extra crispy chunks.
- Bake for 35-40 minutes until the topping is golden brown and you see thick, bubbly juices around the edges. Your kitchen will smell amazing!

Skillet variation: For an extra special presentation (and even baking!), use a 10-inch cast iron skillet. Just watch the timing – it might bake 5 minutes faster because the skillet holds heat so well.
Best Apples for Easy Apple Crisp
Choosing the right apples makes all the difference in your crisp! After years of picking apples at Ohio’s farmers’ markets (and sampling way too many slices), here’s what I’ve learned: firm, tart varieties hold up best during baking. My go-to is Granny Smith—their bright acidity balances the sweet topping perfectly. When I’m feeling fancy, Honeycrisp adds wonderful juiciness without turning to mush.
I avoid softer apples like Red Delicious (they collapse into applesauce!) and Macintosh (too watery). Though one October, I mixed in some Jonathan apples from a local orchard – their spicy kick created my most memorable crisp ever. The trick? Use at least one firm variety as your base to ensure that perfect tender-but-not-soggy texture we all love.
Tips for the Perfect Easy Apple Crisp
After years of making this crisp (and eating the “mistakes”), I’ve collected all the best tricks to guarantee yours turns out perfect every single time. These are my go-to tips straight from my recipe-stained notebook:
- Sweetness check: Before baking, taste your apple mixture. If it’s too tart, add 1-2 more tablespoons sugar. Too sweet? A squeeze of lemon juice balances it perfectly.
- Sogginess defense: If your apples are extra juicy, toss them with 1 tablespoon flour or cornstarch – this thickens those glorious juices without gumminess.
- Doneness test: Look for steady bubbles around the edges and a deeply golden topping. A knife should slide easily into the apples (but they shouldn’t be mushy!).
- Crowd solution: Double the recipe in a 12×17″ sheet pan – just increase baking time by 5 minutes. Thanksgiving miracle!
- Time-saver: Prep the dry topping mix weeks ahead and freeze it – just grab and sprinkle when ready to bake. Lifesaver for holiday madness!
My biggest tip? Let it rest 10 minutes after baking – I know it’s hard to wait, but this lets the juices thicken into that perfect syrupy goodness. Now grab that ice cream!
Serving and Storing Easy Apple Crisp
Here’s the best part – digging in! For that classic experience, serve your Easy Apple Crisp warm (think fresh-from-the-oven cozy) with a big scoop of vanilla ice cream melting over the top. The hot crisp meets cold cream situation? Absolute magic. Whipped cream works great too – my grandma always had a can of the good stuff ready for spontaneous dessert emergencies.
Leftovers? Happily, they’ll keep covered in the fridge for 3 days. Just reheat individual portions in the microwave for 30 seconds (careful, that filling gets hot!). For larger servings, pop it in a 300°F oven for 10-15 minutes to bring back that just-baked crispness. Honestly, I’ve caught my husband eating it cold straight from the pan – no judgement here!
Easy Apple Crisp Variations
One of the things I love most about this recipe is how easily you can make it your own! Here are my favorite ways to mix it up when I’m feeling adventurous (or just trying to use what’s in my pantry):
- Nutty delight: Toss 1/2 cup chopped pecans or walnuts into the oat topping – the toasty crunch takes it to another level!
- Spice adventure: Swap cinnamon for pumpkin pie spice in autumn, or try adding a pinch of cardamom for something unexpectedly delicious.
- Pear perfect: Use half apples and half firm pears when you want a more delicate flavor. Bonus: pears need no peeling!
For my friends avoiding gluten, use your favorite gluten-free flour blend in the topping – it works perfectly! I’ve even heard from readers who use gluten-free meal delivery services that this crisp makes their weekly dessert rotation.
Nutrition Information
Now let’s talk numbers – but don’t worry, I’m not one of those calculators-and-spreadsheets types! Here’s the gist: A serving of this Easy Apple Crisp gives you that perfect balance of cozy carbs and just enough butter to make it taste like a hug. Nutrition varies based on your specific ingredients, but you can expect about 320 calories and 12g of fat per generous scoop. And let’s be real – when it’s this delicious, the numbers are just a fun fact to mention between bites of warm, cinnamon-kissed apples!
Frequently Asked Questions
I get so many questions about this Easy Apple Crisp recipe—everyone wants to make it just right! Here are the answers to the most common ones that pop up in my kitchen (and my inbox):
Can I make this apple crisp ahead of time?
Absolutely! That’s why it’s my go-to Thanksgiving dessert. You can prep the whole thing a day in advance—just cover it tightly and refrigerate overnight. When you’re ready, bake it straight from the fridge (add 5 extra minutes to compensate for the chill). The oat topping stays perfectly crisp, and those apples get even more flavorful!
What’s the best thickener for the apple filling?
I swear by 1 tablespoon of all-purpose flour—it blends right in with the sugar and spices, giving you that perfect syrupy consistency without any grittiness. Some folks prefer cornstarch (use 2 teaspoons instead), but I find flour gives that old-fashioned apple crisp texture my grandma loved.
Skillet or baking dish—which is better?
Oh, the great debate! My 9×13 baking dish is perfect for feeding a crowd, but when I’m feeling fancy, my cast iron skillet gives that adorable presentation and extra-crispy edges. Just remember: a 10-inch skillet holds roughly the same amount as a 9×9 pan, so adjust your recipe accordingly if using something bigger!
Can I freeze apple crisp?
You bet—wrap it tightly after baking and cooling (I use foil then plastic wrap). It keeps beautifully for 3 months! Thaw overnight in the fridge, then reheat at 350°F for about 15 minutes. Pro tip: freeze individual portions—they make the BEST midnight snacks!
Easy Apple Crisp
A simple fall dessert with a crunchy oat topping, perfect for beginners and Thanksgiving.
- Prep Time: 15 min
- Cook Time: 40 min
- Total Time: 55 min
- Yield: 6 servings 1x
- Category: Dessert
- Method: Baking
- Cuisine: American
- Diet: Vegetarian
Ingredients
- 6 cups sliced apples (Granny Smith or Honeycrisp)
- 1 tbsp lemon juice
- 1/2 cup granulated sugar
- 1 tsp cinnamon
- 1/4 tsp nutmeg
- 1 cup rolled oats
- 1/2 cup all-purpose flour
- 1/2 cup brown sugar
- 1/4 tsp salt
- 1/2 cup cold butter, cubed
Instructions
- Preheat oven to 375°F (190°C).
- Toss apples with lemon juice, granulated sugar, cinnamon, and nutmeg. Spread in a baking dish.
- Mix oats, flour, brown sugar, and salt in a bowl. Cut in butter until crumbly.
- Sprinkle topping over apples. Bake for 35-40 minutes until golden and bubbly.
- Serve warm with ice cream.
Notes
- Use firm apples to avoid mushiness.
- Make ahead and reheat before serving.
- Add nuts to the topping for extra crunch.
Nutrition
- Serving Size: 1 serving
- Calories: 320
- Sugar: 32g
- Sodium: 120mg
- Fat: 12g
- Saturated Fat: 7g
- Unsaturated Fat: 4g
- Trans Fat: 0g
- Carbohydrates: 55g
- Fiber: 4g
- Protein: 3g
- Cholesterol: 30mg