 Skip to content

There’s just something magical about the holidays, isn’t there? For me, it all starts with the smells–cinnamon, gingerbread, and that unmistakable cool, minty scent of peppermint. And when you combine that with creamy chocolate? Pure perfection! My absolute favorite homemade holiday treat to whip up and share has to be peppermint bark. It looks so fancy with those festive stripes, but trust me, it’s surprisingly easy to make. It’s become my go-to edible Christmas gift because who doesn’t love a little bit of homemade cheer wrapped up in a box? I still remember the first time I made a huge batch and shared it with my neighbors; their happy faces were all the reward I needed!


- Why You'll Love This Peppermint Bark Recipe
- Gather Your Ingredients for Perfect Peppermint Bark
- Step-by-Step Guide to Making Peppermint Bark
- Tips for the Best Peppermint Bark
- Making Peppermint Bark an Edible Christmas Gift
- Frequently Asked Questions About Peppermint Bark
- Nutritional Information
- Share Your Festive Creations!
Why You’ll Love This Peppermint Bark Recipe
Honestly, this peppermint bark recipe is a winner for so many reasons, and I’m so excited for you to try it! It’s my go-to because:
- It’s ridiculously easy to make! Seriously, if you can melt chocolate, you’re practically there.
- It looks so incredibly festive with those pretty striped layers and crunchy candy cane bits. It screams Christmas!
- The flavor combo of cool peppermint and rich chocolate is just spot-on. It’s like a holiday hug in your mouth.
- It’s the perfect homemade holiday candy – way more personal than store-bought, and it makes for the sweetest edible Christmas gift.
Gather Your Ingredients for Perfect Peppermint Bark
Alright, let’s get our goodies together for this amazing peppermint bark! You don’t need much, but using good quality stuff really makes a difference. Here’s what you’ll want to grab:
- 12 ounces good quality white chocolate, finely chopped. Make sure it’s good quality; it melts way better and tastes way better!
- 12 ounces good quality dark chocolate, also finely chopped. You can use semi-sweet if you prefer!
- 1 teaspoon peppermint extract. We’ll split this between the two chocolates.
- 1 cup crushed candy canes. So, about 10 to 12 standard candy canes should do it.
Step-by-Step Guide to Making Peppermint Bark
Alright, let’s get this party started! Making this peppermint bark is like painting a delicious picture, layer by layer. Don’t worry if it’s not perfect; part of the charm is breaking it into those rustic, irregular pieces. You’ve got this!
Melting the Chocolate for Your Peppermint Bark
This is where the magic really begins. You’ll want to melt your chocolates gently. My favorite way is the double boiler method – it’s super reliable. Just put your chopped chocolate in a heatproof bowl set over a saucepan of barely simmering water (make sure the bottom of the bowl doesn’t touch the water!). Stir it constantly with a heatproof spatula until it’s smooth and gorgeous. Alternatively, you can do this in the microwave, but you’ve gotta be careful! Use 30-second bursts, stir really well in between each one, and stop just before it’s totally melted. The residual heat will finish the job. Once smooth, stir in half a teaspoon of that lovely peppermint extract into each bowl of chocolate. It just wakes up that flavor!
Layering and Topping Your Homemade Holiday Candy
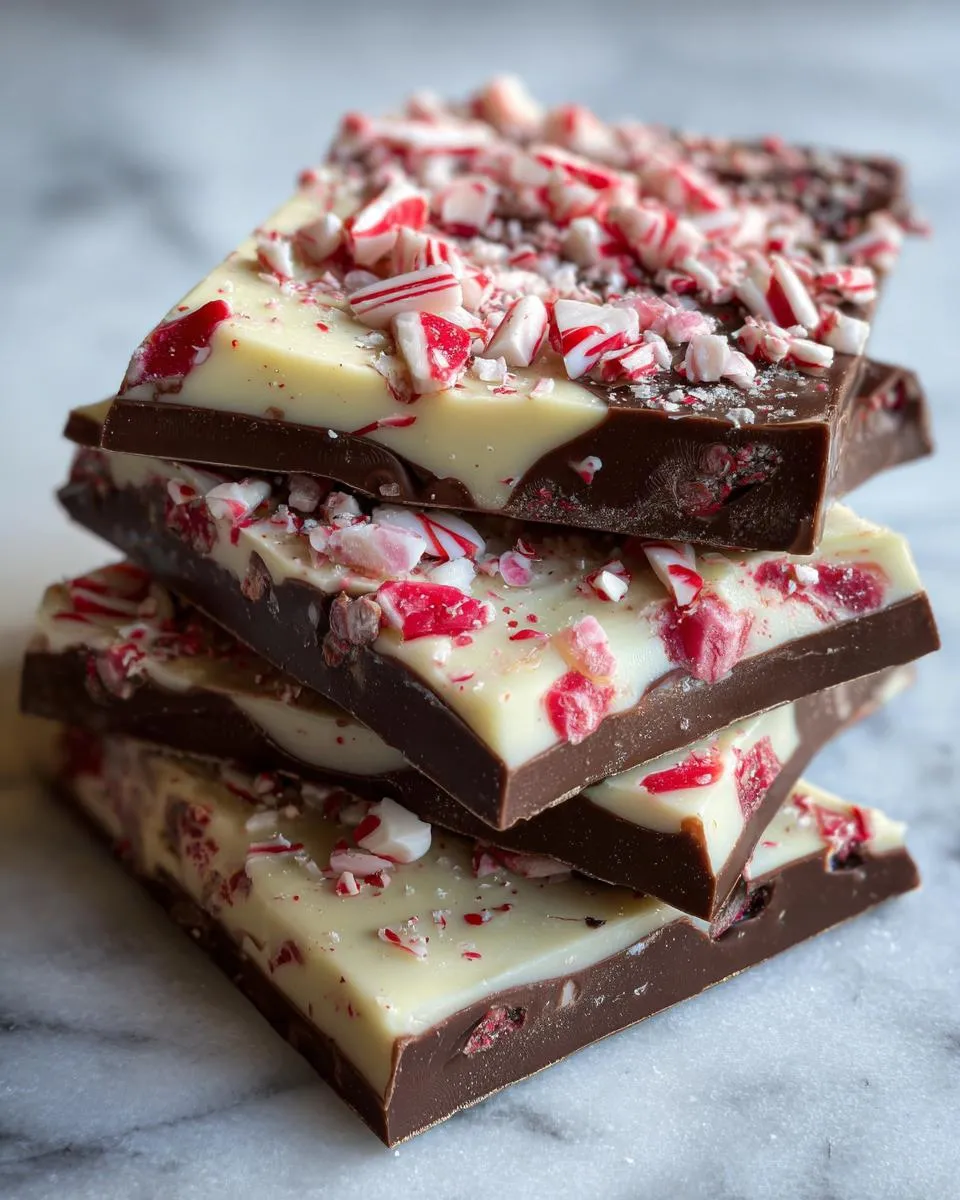
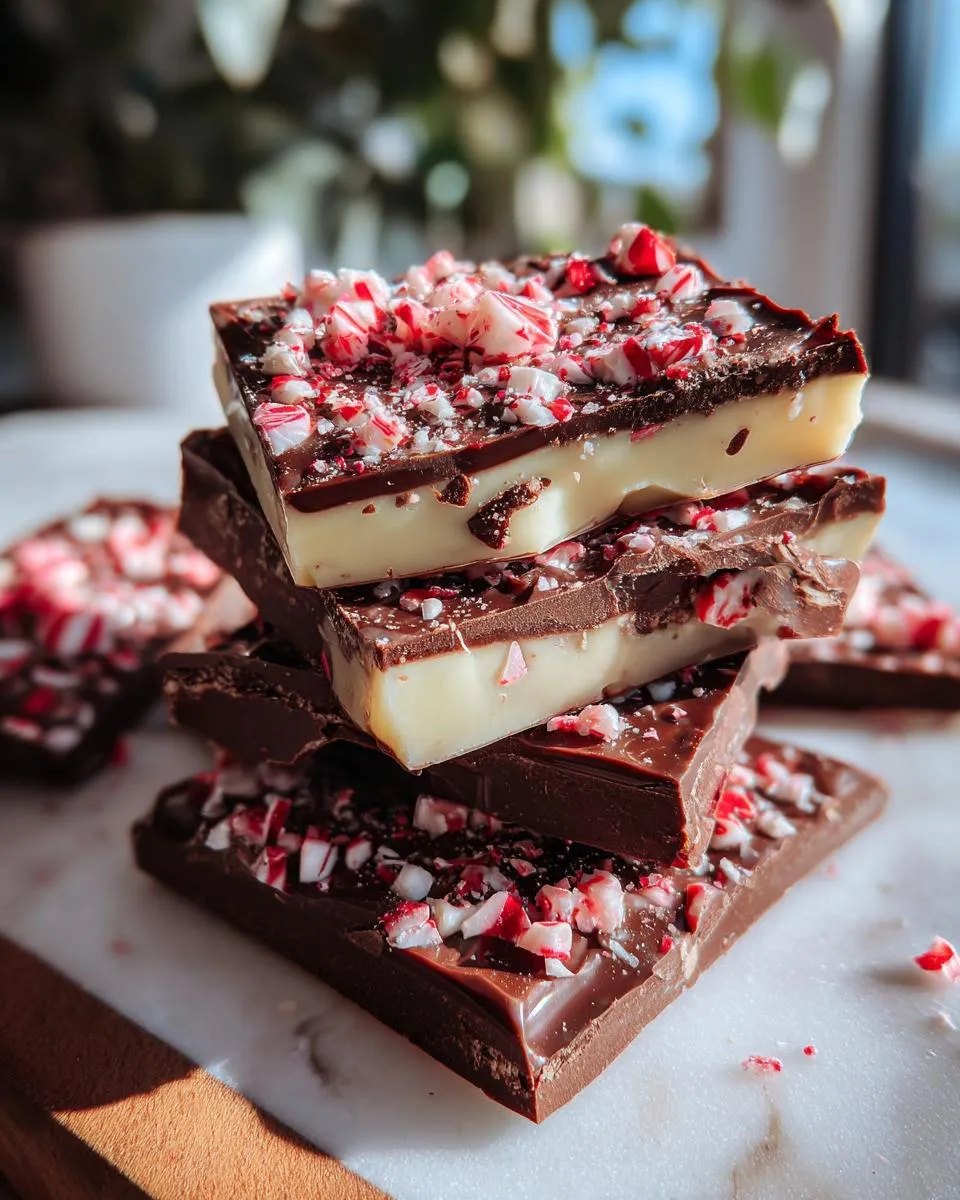
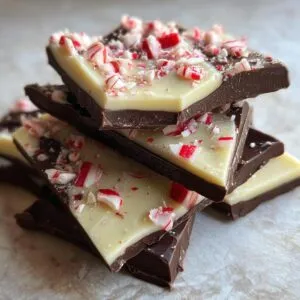
Okay, now for the structure! Grab a baking sheet and line it with parchment paper. Trust me, this is your best friend for easy cleanup and removal. Pour that beautifully melted white chocolate onto the parchment and spread it out super evenly with your spatula. You’re aiming for about a quarter-inch thickness. Now, pop it in the fridge for maybe 10-15 minutes, just until it’s set but not rock hard. This firm base is key! While that’s chilling, melt your dark chocolate just like you did the white, stirring in the rest of the peppermint extract. Once the white chocolate layer is ready, pour the dark chocolate over it and spread it out. For a super cool effect, you can even gently swirl the dark chocolate into the white chocolate with a toothpick before it sets too much—it gives you a gorgeous marbled look. The moment you finish spreading the dark chocolate, hit it all over with those crushed candy canes! They’ll stick right in. Don’t be shy with those crunchy bits!

Setting and Breaking Your Chocolate Mint Bark
Now comes the hardest part: waiting! Let your gorgeous creation set up completely. You can leave it on the counter for a few hours if it’s cool in your kitchen, or pop it in the fridge to speed things up. Just make sure it’s totally firm before you even think about touching it. Once it’s solid, you can either gently lift the parchment paper off the baking sheet and then break the bark with your hands, or use a large knife to score it first. I love just grabbing pieces and making uneven, rustic shards. It feels so homemade and special that way, you know?
Tips for the Best Peppermint Bark
Okay, friends, let’s chat about making this peppermint bark absolutely perfect! Over the years, I’ve picked up a few little tricks that really make a difference, and I want to share them with you. First off, the chocolate quality? Huge. Using good chocolate, not just the generic chips, means it melts smoother and tastes richer. Avoid anything that says ‘chocolate coating’ – you want real chocolate! Also, the biggest enemy of melted chocolate is water. Seriously, one tiny drop can make it seize up into a horrible, grainy mess. So, make sure your bowls, spatulas, and even your candy canes are totally dry. If you’re using the microwave method, be patient and stir, stir, stir! It’s so tempting to blast it, but gentle heat is key. For those super clean breaks, making sure the bark is completely, totally firm before you snap it is essential. If it’s even a little soft, you’ll get smudges instead of snaps. And if you ever want to get fancy, try swirling the dark into the white chocolate before it sets – it looks so professional, but it’s still just melted chocolate and candy canes, right? It’s a little like how my fudgy brownies recipe relies on good quality chocolate too!
Making Peppermint Bark an Edible Christmas Gift
If you ask me, one of the best parts about making peppermint bark is the chance to share it! There’s just something so special about giving a homemade gift, right? It feels like you’re wrapping up a little bit of your own heart and sending it off. My homemade holiday candy has become a Christmas staple for my friends and family. I usually get out my prettiest tins or fill up clear cellophane bags tied with festive ribbons. It looks so professional, but it’s genuinely simple to do. To keep it fresh, I just make sure it’s totally set and then pack it snugly. If you’ve got any moisture in the container, the chocolate can get weird, so dry is key! Every year, I can’t wait to drop off little bags of this chocolate mint bark to my kids’ teachers and the folks who work in my office. Seeing their faces light up when they get a taste of that cool peppermint and chocolate goodness? That’s what the holidays are all about.
Frequently Asked Questions About Peppermint Bark
Got questions about making this amazing peppermint bark? I totally get it! Sometimes chocolate can be a little tricky, but don’t worry, I’ve got your back. Here are some things folks often ask:
Can I use milk chocolate instead of dark chocolate?
Oh, absolutely! If dark chocolate isn’t your jam, go right ahead and use milk chocolate. Just make sure it’s good quality, chopped finely, and melted gently, just like we did with the dark chocolate. The flavor will be a bit sweeter and creamier, which is lovely too! It’s still going to be a fantastic homemade holiday candy.
How do I store peppermint bark to keep it fresh?
Storing is super simple! Once your gorgeous chocolate mint bark is completely firm, just break it into pieces. Then, pop it into an airtight container. If you have wax paper or parchment paper handy, you can layer pieces between sheets to prevent them from sticking together. Keep it somewhere cool and dry, like your pantry, and it should stay delicious for a good couple of weeks. Avoid the fridge unless it’s super hot out, as condensation can make the chocolate get a bit dull.
Why did my chocolate seize up when I melted it?
Ugh, the dreaded seized chocolate! This usually happens when even a tiny bit of water gets into your melting chocolate. It makes it thick and grainy, and unfortunately, there’s no coming back from that. Just make sure everything – your bowls, spatulas, even the air in your kitchen – is completely dry. Also, be gentle with the heat! If you’re microwaving, use short bursts and stir often. If using a double boiler, ensure the steam isn’t getting into the chocolate. If it happens, sadly, you’ll probably need to start over with a fresh batch of chocolate. It’s one of those finicky things about working with chocolate!
Can I add other flavors or toppings to my peppermint bark?
You bet! While I adore the classic peppermint and candy cane combo, feel free to get creative with your peppermint bark. You could try adding a tiny bit of almond extract instead of peppermint, or sprinkle on some festive sprinkles, chopped nuts, or even mini chocolate chips along with the candy canes. It’s your edible Christmas gift, after all!
Nutritional Information
Just a heads-up, these numbers are estimates since everyone’s ingredients can vary a bit:
- Serving Size: About 1 ounce
- Calories: Around 150
- Fat: Roughly 9g (with about 5g saturated)
- Carbohydrates: About 17g
- Sugar: Around 15g
- Protein: About 2g
It’s rich, sweet, and totally worth it for a holiday treat!
Share Your Festive Creations!
Alright, now it’s your turn! I would absolutely LOVE to see your beautiful peppermint bark creations. Did you make them for gifts? For a holiday party? Did you try the marbled effect, or stick to the classic stripes? Snap a photo and tag me on social media – it always makes my day! And if you loved this recipe, please leave a comment or a star rating below. It truly helps other home cooks find their way to simple, joyful baking!
PrintEasy Peppermint Bark Recipe
Create festive and delicious homemade peppermint bark, perfect for gifting during the holidays. This simple recipe combines smooth chocolate and crunchy candy canes for a delightful treat.
- Prep Time: 20 min
- Cook Time: 10 min
- Total Time: 30 min
- Yield: 1 pound 1x
- Category: Dessert
- Method: No-Bake
- Cuisine: American
- Diet: Vegetarian
Ingredients
- 12 ounces good quality white chocolate, chopped
- 12 ounces good quality dark chocolate, chopped
- 1 teaspoon peppermint extract (divided)
- 1 cup crushed candy canes
Instructions
- Line a baking sheet with parchment paper.
- Melt the white chocolate gently using a double boiler or microwave in 30-second intervals, stirring until smooth. Stir in 1/2 teaspoon of peppermint extract.
- Spread the melted white chocolate evenly onto the prepared baking sheet.
- Allow the white chocolate to set slightly, about 10-15 minutes.
- Melt the dark chocolate using the same method as the white chocolate. Stir in the remaining 1/2 teaspoon of peppermint extract.
- Pour the melted dark chocolate over the set white chocolate layer. Spread evenly.
- Immediately sprinkle the crushed candy canes over the dark chocolate layer.
- Let the bark set completely at room temperature or in the refrigerator until firm.
- Once firm, break the peppermint bark into pieces.
Notes
- For a marbled effect, you can swirl the dark chocolate into the white chocolate before it sets.
- Ensure your chocolate is completely dry when melting to prevent seizing.
- Store the peppermint bark in an airtight container at room temperature.
Nutrition
- Serving Size: 1 ounce
- Calories: 150
- Sugar: 15g
- Sodium: 10mg
- Fat: 9g
- Saturated Fat: 5g
- Unsaturated Fat: 4g
- Trans Fat: 0g
- Carbohydrates: 17g
- Fiber: 1g
- Protein: 2g
- Cholesterol: 5mg