 Skip to content
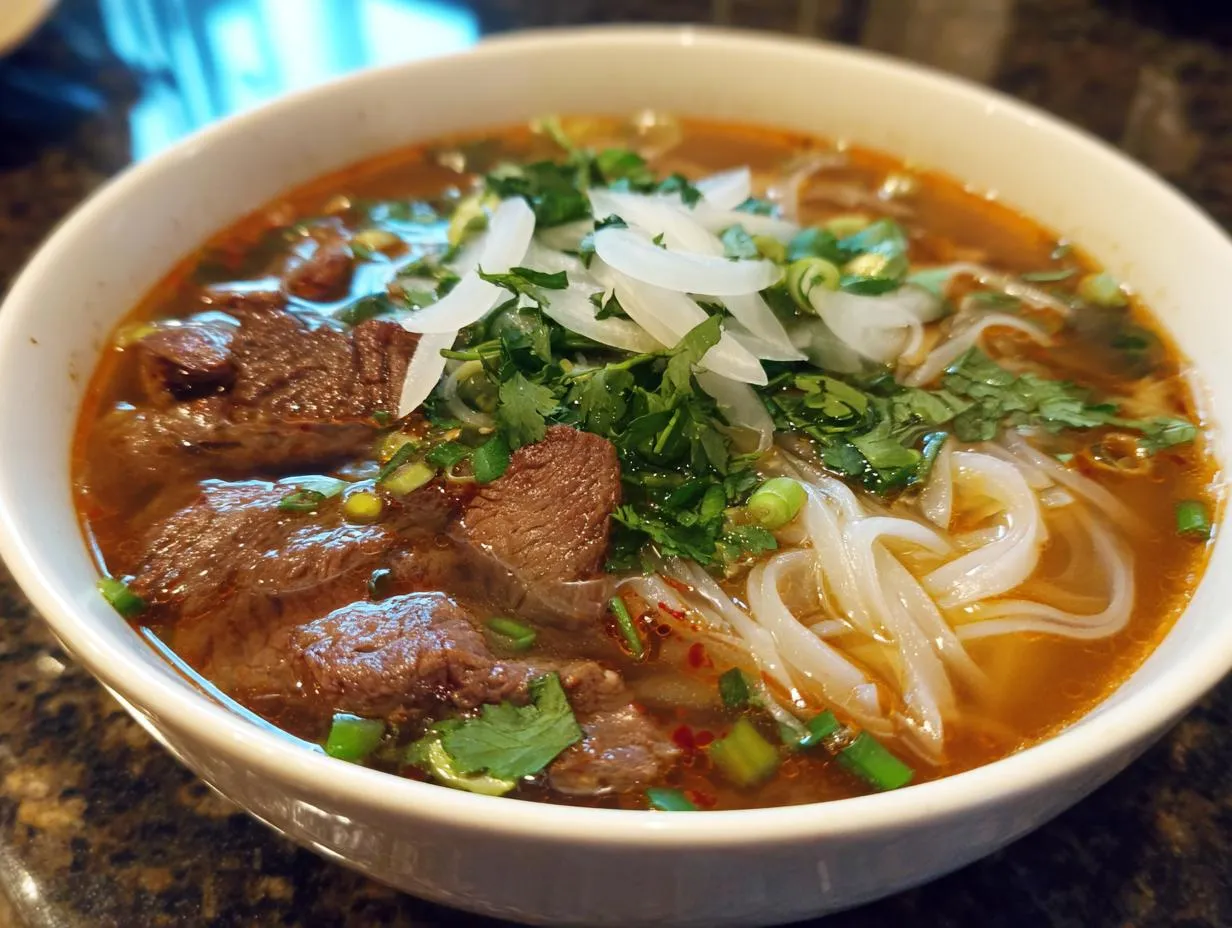

Oh, pho! Just saying the word brings back so many memories. For me, it’s more than just a soup; it’s practically a warm hug in a bowl, right? I remember the first time I tried making *real* pho at home. It felt like climbing Mount Everest – a bit intimidating, lots of steps, but oh, the reward at the top! That deep, fragrant broth, the tender noodles, the fresh herbs… it’s pure magic. And the best part? It’s totally doable. Forget those sad packets, we’re talking a foolproof method to get you that restaurant-quality Vietnamese beef noodle soup right in your own kitchen. Trust me, this pho recipe is a labor of love, but every single minute is worth it!

- Why You'll Love This Authentic Pho Recipe
- Gathering Your Ingredients for the Best Pho Recipe
- Crafting the Perfect Homemade Pho Broth
- Assembling Your Restaurant-Quality Pho
- Tips for Success with This Pho Bo Recipe
- Frequently Asked Questions about Making Pho
- Nutritional Information for Your Pho
- Share Your Pho Creation!
Why You’ll Love This Authentic Pho Recipe
Making pho from scratch might sound like a big undertaking, but trust me, it’s so worth it! Here’s why this recipe is going to become your go-to:
- Incredible Depth of Flavor: We’re talking about a broth that’s simmered for hours, infused with charred aromatics and warming spices. It’s the real deal!
- Surprisingly Achievable: While it takes time, the steps are straightforward and totally manageable for any home cook.
- Restaurant-Quality Results: Seriously, this pho tastes just like what you’d get at your favorite Vietnamese spot. Get ready for compliments!
- A Rewarding Cooking Project: There’s just something so satisfying about creating something this complex and delicious with your own two hands.
- Completely Customizable: Load it up with your favorite herbs, sprouts, and beef slices. It’s *your* perfect bowl.
Gathering Your Ingredients for the Best Pho Recipe
Alright, let’s get down to business! To make a truly amazing bowl of pho, you need to gather your troops – I mean, ingredients! Don’t let this list scare you; these are what make our broth so special. We’re talking beef bones; I like to use about 4 pounds of a mix of marrow bones and knuckle bones. For a little something to slice up later, grab a pound of beef brisket or chuck roast. You’ll want two medium yellow onions and a good chunk of ginger, about 4 inches, that we’ll char later. For seasoning, we’ve got fish sauce (go for a good quality brand!), salt, sugar, and some whole black peppercorns.
Now for the magic star spices that give pho its signature aroma: 6 star anise, 4 cinnamon sticks, 8 whole cloves, and 4 cardamom pods. These might seem like a lot, but trust me, they mellow out beautifully in the broth. Don’t forget a handful of dried shiitake mushrooms for that umami kick! For serving, you absolutely need about a pound of dried flat rice noodles – make sure they say \”pho noodles.\” And for that gorgeous thin-sliced beef you see in pho? About half a pound of raw sirloin or eye of round, sliced super thin, does the trick. Finally, get ready with fresh cilantro, Thai basil, bean sprouts, lime wedges, maybe some thinly sliced jalapeños or serrano peppers, and a bit of thinly sliced yellow or red onion and chopped scallions for garnish. Oh, and don’t forget to check out my favorite soup recipes for more inspiration!
Crafting the Perfect Homemade Pho Broth
Okay, the *real* magic of pho, the stuff that makes it taste like it’s from a bustling Vietnamese street stall, happens right here: in the broth. This is where we build all those amazing, deep flavors. It takes a little time, but trust me, it’s totally worth it. We’re going to parboil the bones to get rid of any gunk, char our aromatics for that signature smoky goodness, and then let it all simmer low and slow. This is how you get that clean, clear, unbelievably fragrant broth that is the heart and soul of our pho.
Preparing the Beef Bones and Meat
First things first, we gotta get those bones super clean. Give them a good rinse under cold water. Then, toss ’em into your biggest pot and cover them with cold water. Crank that heat up and let it boil for about 5 minutes. You’ll see some foamy stuff rise to the top – that’s what we want to get rid of! Drain those bones and give them another good rinse. Now, back into the clean pot they go, along with your brisket or chuck roast. Cover everything with about 6 quarts of fresh cold water. Bring it up to a gentle simmer, and keep skimming off any foam or gunk that floats up. This skimming step is super important for a clear broth, so don’t skip it!
Charring Aromatics for Deep Pho Flavor
This step? It’s a game-changer for that classic pho depth! You need to char your onions and ginger. My favorite way is to stick them right over a gas burner for a few minutes until they’re nice and blackened in spots. If you don’t have a gas stove, no worries! You can pop ’em under the broiler or even grill them. Just keep an eye on them so they don’t burn to a crisp. Once they’re nicely charred, just peel off the blackened outer layers of the onions and ginger. See that little bit of smoky smell? That’s the good stuff!
Infusing the Broth with Spices and Seasonings
Now for the flavor party! Take your charred onions and ginger and bundle them up. I usually use a cheesecloth bag or a big tea infuser for this, along with all those yummy spices: star anise, cinnamon sticks, cloves, cardamom pods, and those black peppercorns we gathered. Tie it up nice and tight. Toss this spice packet into the pot with the simmering bones and meat. Add in your fish sauce, salt, sugar, and those dried shiitake mushrooms. These guys add another layer of savory goodness you won’t believe!
Simmering and Straining Your Pho Broth
Here’s where patience really pays off. Let that beautiful concoction simmer gently, partially covered, for at least 3 to 4 hours. Honestly, the longer, the better – up to 6 or even 8 hours if you have the time! This slow simmer is what really extracts all the flavor from the bones and spices. While it simmers, keep an eye out and skim off any fat or impurities that come to the surface. Once it’s done simmering, carefully remove the brisket or chuck roast – let it cool, then slice it thinly against the grain. Finally, strain that glorious broth through a fine-mesh sieve lined with cheesecloth into a clean pot. Discard all the solids. Give it a taste and add more salt, fish sauce, or a pinch more sugar if needed. Keep this liquid gold hot!
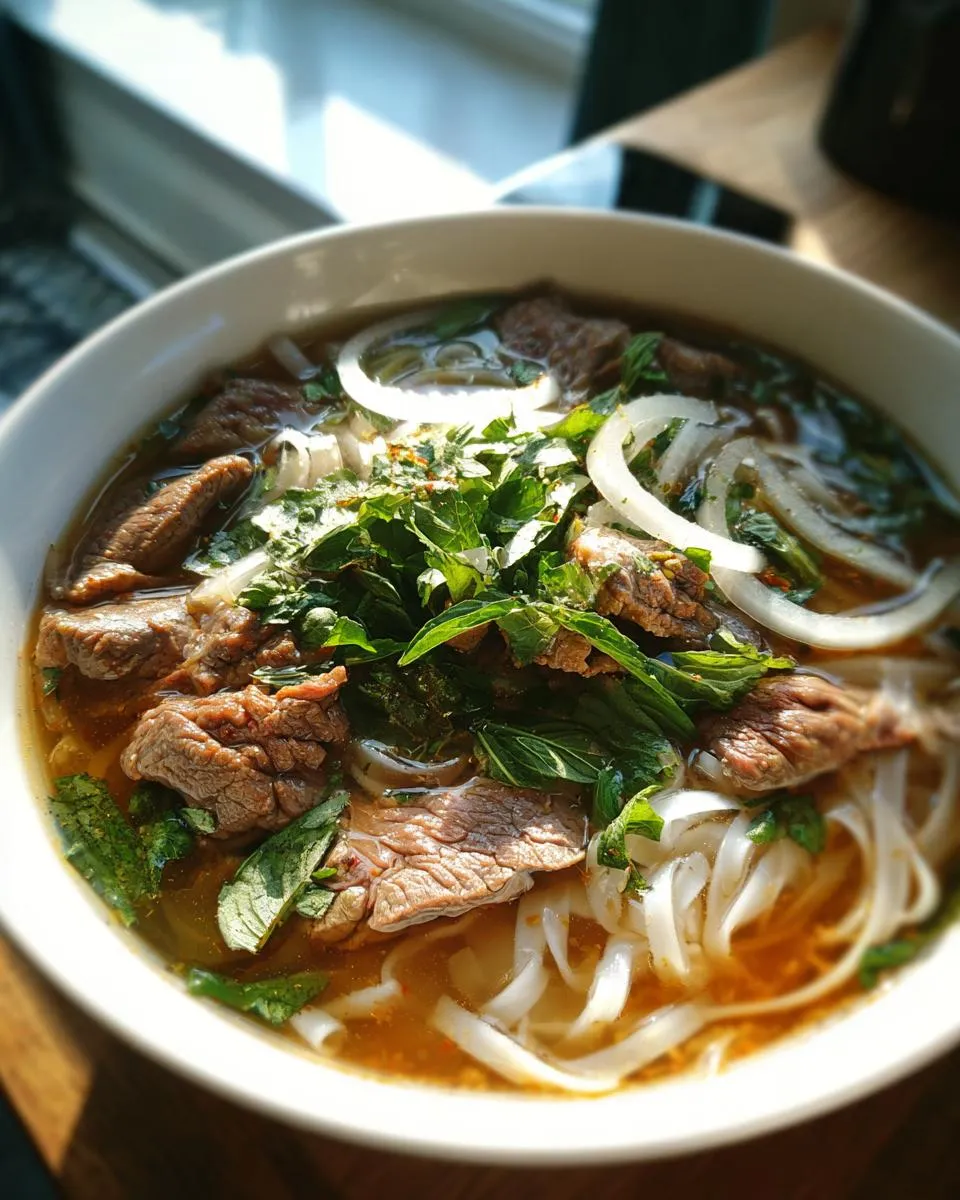
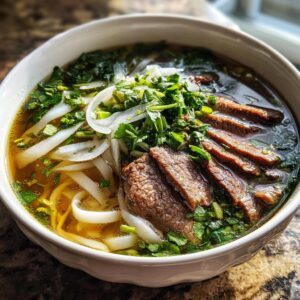
Assembling Your Restaurant-Quality Pho
Okay, the moment of truth! We’ve worked so hard on that incredible broth, and now it’s time to bring it all together for the most amazing bowl of pho you’ve ever made. This is where all those hours pay off. It’s really simple to assemble, and it looks so beautiful when it’s done. Get ready to dive into that fragrant, soul-warming goodness!
Preparing the Noodles and Cooked Beef
First, let’s get those rice noodles ready. Just follow the package directions – usually, it’s a quick soak or boil. Drain them well and give them a rinse with cold water so they don’t stick together. Remember that brisket or chuck roast we cooked in the broth? Slice it up super thin against the grain. A little trick: if you pop it in the freezer for about 15-20 minutes, it makes slicing so much easier!
The Art of Garnish for Your Pho
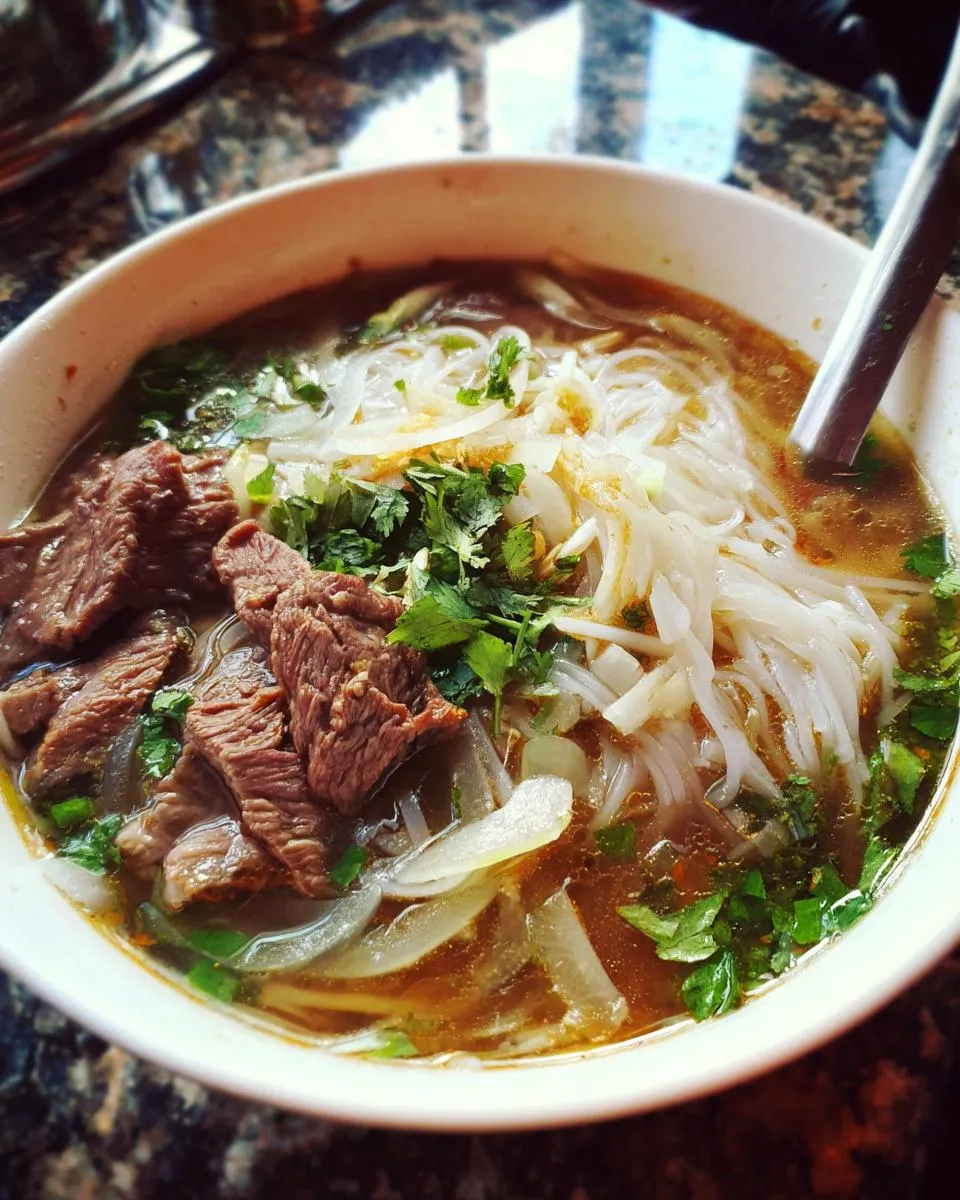
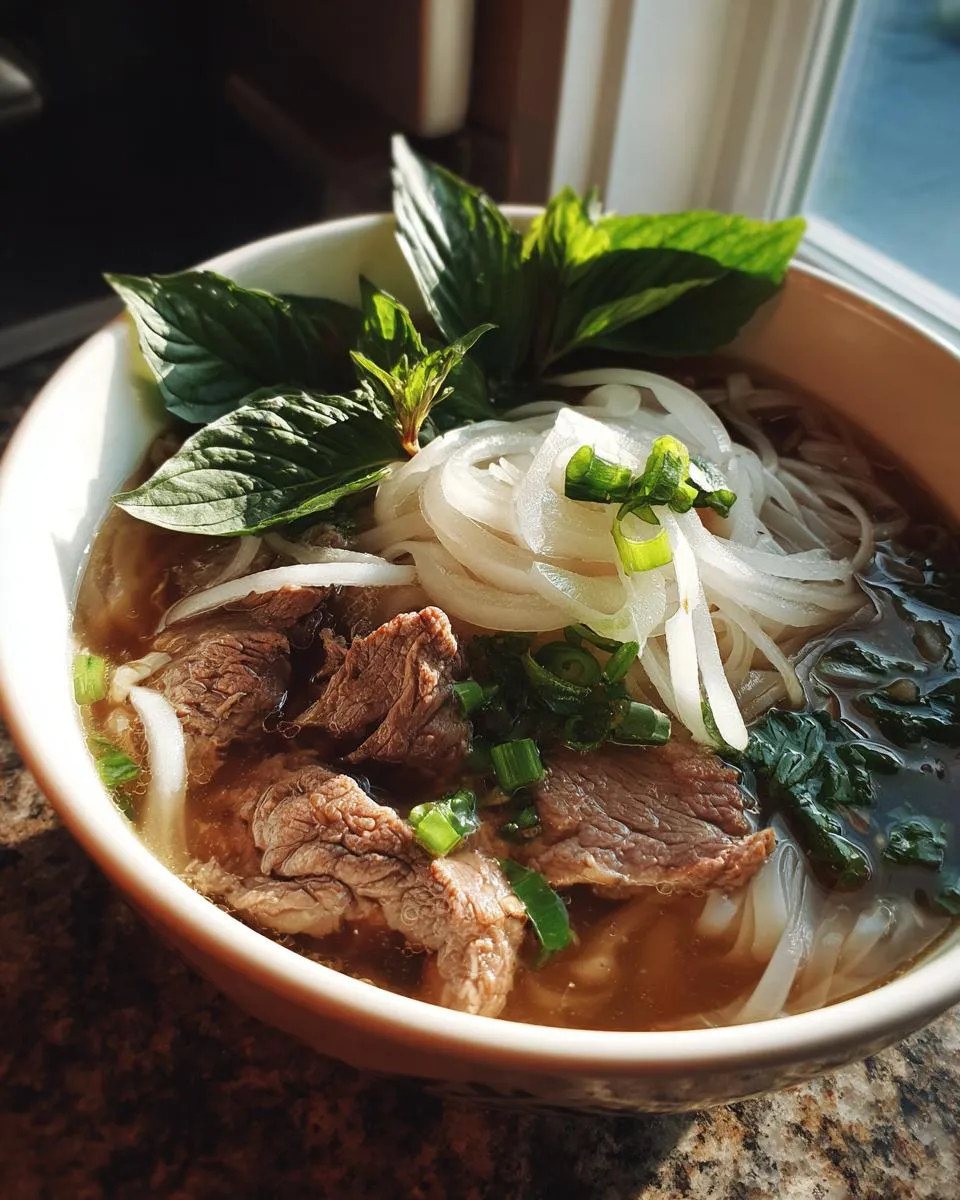
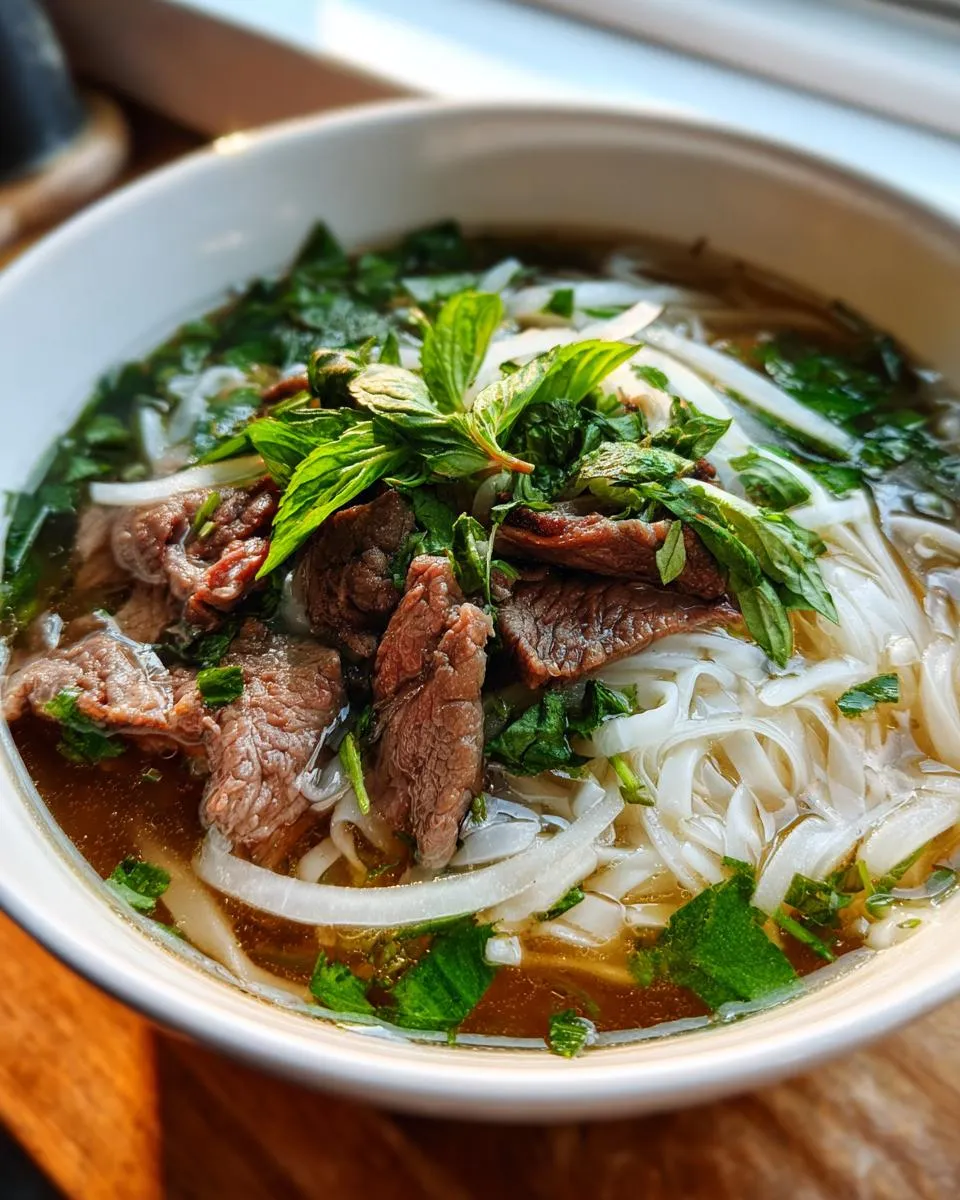
Now for the fun part – the finishing touches! Arrange a nice nest of those noodles in your biggest, prettiest soup bowls. Top them with slices of your cooked beef and, if you like, those thinly sliced raw beef pieces (the hot broth will cook them perfectly!). Then, ladle that piping hot, fragrant pho broth over everything. Finally, pile on your garnishes: fresh cilantro, plenty of Thai basil leaves, a big scoop of bean sprouts, some thinly sliced onions, and a sprinkle of chopped scallions. Serve it up immediately with lime wedges and chilies on the side so everyone can customize their own perfect bowl!
Tips for Success with This Pho Bo Recipe
Alright, my friends, let’s talk about making this pho *perfect*. Sometimes it’s the little things that make a big difference, right? I’ve learned a few tricks over the years that really elevate our pho game. It’s all about respecting the process and using the best ingredients you can find. You can even think of this broth-making process like perfecting a slow-cooker pot roast – patience yields amazing results! And for more tips on creating killer broths, check out this awesome resource.
Ingredient Quality Matters for Pho
Seriously, starting with good stuff makes the biggest impact. Use the best beef bones you can get your hands on – they’re the backbone (literally!) of this broth. And don’t skimp on the fresh ginger and onions; they bring such vibrant flavor.
Achieving a Clear Broth
Remember that parboiling and diligent skimming we talked about? Do it! It sounds like a pain, but it’s the absolute secret to getting that crystal-clear, beautiful broth. No one wants murky pho, right?
Making Pho Broth Ahead of Time
Good news! You can totally make this broth a day or two in advance. Just let it cool completely, then chill it in the fridge. All the fat will solidify on top, making it super easy to scoop off. Reheat it gently, and it’s ready to go!
Frequently Asked Questions about Making Pho
Got questions about whipping up this amazing bowl of pho? You’re not alone! Making authentic Vietnamese beef noodle soup is a journey, and I’m here to help smooth out any bumps.
Can I make Pho with chicken instead of beef?
Absolutely! You can totally make a delicious chicken pho (pho ga). You’d use chicken bones and a whole chicken instead of beef bones and brisket. The aromatics and spices stay pretty much the same, but you’ll often simmer it for a shorter time. It’s a lighter, yet still incredibly flavorful, version of pho.
How long does Pho broth last in the fridge?
If you store your beautiful homemade pho broth properly in an airtight container in the refrigerator, it should last for about 3 to 4 days. Just remember to skim off any solidified fat before reheating it. It freezes really well too, so feel free to make a big batch and freeze portions for quick future meals!
What kind of noodles are best for Pho?
For authentic pho, you really want to use what are typically labeled as “pho noodles.” These are flat rice noodles, usually about 1/4 inch wide. Other types of rice noodles can work in a pinch, but the flat ones have that perfect texture to soak up all that amazing broth. Just follow the package instructions for cooking them!
Can I make Pho broth ahead of time?
Yes, this is actually one of my favorite make-ahead tricks! The pho broth gets even better if it has a chance to chill overnight. Make the broth, strain it, let it cool completely, and then pop it into the fridge. The next day, you can easily skim off all the solidified fat from the top before gently reheating it. It makes assembling your bowls super quick!
Nutritional Information for Your Pho
Making delicious pho at home is such a treat! Here’s an idea of what you’re looking at nutritionally for one serving of this amazing beef noodle soup:
* Calories: around 650
* Fat: about 30g (with 10g saturated)
* Protein: roughly 40g
* Carbohydrates: around 60g
* Sodium: about 1200mg
Keep in mind these are just estimates, as things can vary a bit depending on your exact ingredients and how much you load into your bowl!
Share Your Pho Creation!
I truly hope you’ve enjoyed diving into the world of making authentic pho! Seeing your creations makes my day. If you give this recipe a try, please share your thoughts in the comments below. I’d absolutely love to see pictures of your beautiful bowls of pho – tag me on social media! And if you have any questions or want to share your own pho tips, don’t hesitate to reach out via my contact page. Happy cooking!
PrintAuthentic Vietnamese Beef Pho (Pho Bo)
A comforting and aromatic Vietnamese beef noodle soup, perfect for a weekend project. This recipe guides you through creating a rich broth and assembling a restaurant-quality bowl at home.
- Prep Time: 45 min
- Cook Time: 4-8 hours
- Total Time: 4 hours 45 min
- Yield: 6-8 servings 1x
- Category: Soup
- Method: Simmering
- Cuisine: Vietnamese
- Diet: Vegetarian
Ingredients
- 4 pounds beef bones (marrow bones and knuckle bones)
- 1 pound beef brisket or chuck roast
- 2 medium yellow onions
- 4-inch piece of ginger
- 1/4 cup fish sauce
- 1 tablespoon salt, plus more to taste
- 1 tablespoon sugar, plus more to taste
- 1 teaspoon black peppercorns
- 6 star anise
- 4 cinnamon sticks
- 8 whole cloves
- 4 cardamom pods
- 1/4 cup dried shiitake mushrooms
- 1 pound dried flat rice noodles (pho noodles)
- 1/2 pound thinly sliced raw beef (sirloin or eye of round)
- Fresh cilantro, chopped
- Fresh Thai basil leaves
- Bean sprouts
- Lime wedges
- Thinly sliced jalapeños or serrano peppers
- Thinly sliced yellow or red onion
- Chopped scallions
Instructions
- Rinse beef bones under cold water. Place bones in a large stockpot and cover with cold water. Bring to a boil and cook for 5 minutes. Drain and rinse bones thoroughly to remove impurities.
- Return bones to the clean stockpot. Add brisket or chuck roast. Cover with 6 quarts of fresh cold water. Bring to a simmer, skimming off any foam or impurities that rise to the surface.
- While the broth simmers, char the onions and ginger. You can do this directly over a gas burner, under a broiler, or on a grill until blackened in spots. Once charred, peel the onions and ginger.
- Place charred onions and ginger in a cheesecloth bag or large tea infuser along with star anise, cinnamon sticks, cloves, cardamom pods, and black peppercorns.
- Add the spice bag, fish sauce, salt, sugar, and dried shiitake mushrooms to the simmering broth.
- Simmer the broth gently, partially covered, for at least 3-4 hours, or up to 6-8 hours for a richer flavor. Skim off any fat or impurities as needed.
- Remove the brisket or chuck roast from the broth and let it cool. Once cool enough to handle, slice it thinly against the grain.
- Strain the broth through a fine-mesh sieve lined with cheesecloth into a clean pot. Discard the solids. Taste the broth and adjust seasoning with more salt, fish sauce, or sugar as needed. Keep the broth hot.
- Prepare the rice noodles according to package directions. Drain and rinse with cold water.
- To assemble, place a portion of cooked noodles in each serving bowl. Top with slices of the cooked brisket and thinly sliced raw beef.
- Ladle the hot broth over the noodles and beef. The heat of the broth will cook the raw beef.
- Garnish with chopped cilantro, Thai basil leaves, bean sprouts, sliced onions, and scallions. Serve immediately with lime wedges and sliced chilies on the side.
Notes
- For the clearest broth, parboiling the bones and skimming impurities is crucial.
- You can make the broth ahead of time and refrigerate it. Skim off the solidified fat from the top before reheating.
- Thinly slice the raw beef very thinly; partially freezing it for 15-20 minutes can make this easier.
- Experiment with different cuts of beef for the broth, such as oxtail or beef shank, for added depth of flavor.
- Consider using a sous-vide precision cooker to tenderize tougher cuts of beef for the broth if you have one.
Nutrition
- Serving Size: 1 bowl
- Calories: 650
- Sugar: 5g
- Sodium: 1200mg
- Fat: 30g
- Saturated Fat: 10g
- Unsaturated Fat: 20g
- Trans Fat: 0g
- Carbohydrates: 60g
- Fiber: 3g
- Protein: 40g
- Cholesterol: 150mg