 Skip to content
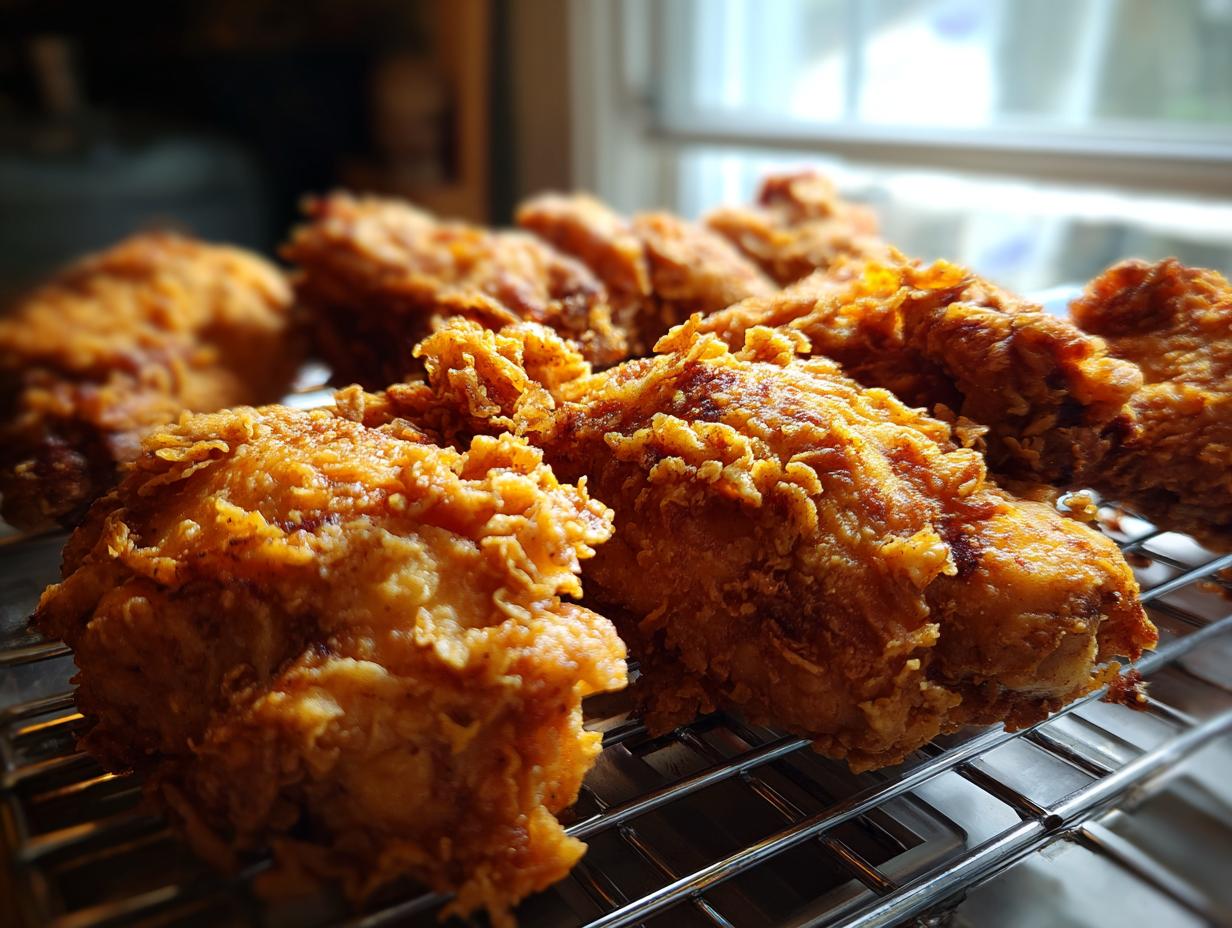

Oh, there’s just something about that perfect piece of fried chicken, isn’t there? That golden, crispy crust gives way to the most tender, juicy meat you can imagine. It’s the ultimate comfort food, the kind that makes everyone at the table sigh with happy contentment. Growing up, Grandma Carla’s kitchen was always filled with the heavenly aroma of her famous fried chicken, especially on Sundays. She had this magical way of making it that felt both simple and incredibly special, a true taste of home. Trust me, mastering this classic Southern fried chicken isn’t as intimidating as it sounds, and the payoff is absolutely worth it!

- Why You'll Love This Crispy Buttermilk Chicken
- Ingredients for Perfect Fried Chicken
- Tips for the Best Southern Fried Chicken
- How to Make Juicy Homemade Fried Chicken
- Equipment Needed for Classic Comfort Food
- Serving Suggestions for Your Fried Chicken
- Storage and Reheating Instructions
- Frequently Asked Questions About Fried Chicken
- Nutritional Information for Classic Fried Chicken
Why You’ll Love This Crispy Buttermilk Chicken
This isn’t just any fried chicken recipe; it’s a ticket to pure comfort food bliss! You’ll absolutely love how:
- It delivers that shatteringly crisp, golden-brown coating every single time. Seriously, the crunch is heavenly!
- The chicken stays unbelievably juicy and tender on the inside, thanks to that magical buttermilk marinade. No dry bites, I promise!
- It’s packed with incredible flavor from a perfectly balanced spice blend that just sings.
- The steps are totally manageable, making it easier than you think to achieve that homemade, “like Grandma made it” perfection.
- It’s the ultimate showstopper for family dinners, potlucks, or whenever you need a seriously satisfying meal.
Ingredients for Perfect Fried Chicken
Gathering these simple things is the first step to fried chicken heaven. You’ll need:
- 4 lbs chicken pieces (I love using a mix of thighs, drumsticks, and breasts – whatever you like best!)
- 2 cups buttermilk (This is non-negotiable for that tender chicken bliss!)
- 2 large eggs
- 2 cups all-purpose flour
- 1 tablespoon salt
- 1 teaspoon black pepper
- 1 teaspoon paprika
- 1/2 teaspoon garlic powder
- 1/2 teaspoon onion powder
- Vegetable oil or shortening, enough for about 2-3 inches in your pan for frying
Tips for the Best Southern Fried Chicken
Alright, let’s talk about the little secrets that make this fried chicken truly sing! Cooking this can feel a bit thrilling, but with a few tricks up your sleeve, you’ll nail it every time. Don’t worry, I’ve learned a thing or two over the years, and I’m happy to share!
First up, oil temperature is your best friend. That 350°F (175°C) mark is key. Too cool, and your chicken gets greasy and soggy – nobody wants that! Too hot, and you’ll have burnt crust with raw chicken inside. Keep a close eye on it, especially when you add the chicken. If it drops too much, let it heat back up before adding the next batch. And speaking of batches, don’t overcrowd the pan! Give those pieces space to bubble and crisp up beautifully. It’s tempting to just toss it all in, but trust me, cooking in batches is crucial for amazing crunch.
Now, about that coating! If you want truly epic crispiness, try a double-dip. After you dredge it in the flour the first time, give it another quick dip in the egg, then back into the flour. This builds up a thicker crust that gets wonderfully crunchy. Also, that little rest period after coating? It’s not just a suggestion! Letting the coated chicken sit for 15-20 minutes helps the coating stick better and prevents it from falling off in the hot oil. Think of it as the coating getting cozy with the chicken!

One question I get a lot is about buttermilk substitutes. If you’re out, no worries! Just mix up 2 cups of regular milk with 2 tablespoons of lemon juice or white vinegar, let it sit for about 5 minutes until it looks a bit curdled. It works like a charm for tenderizing the chicken. And if you happen to have any leftover chicken, it’s amazing reheated on a wire rack in a medium oven (around 375°F or 190°C) for about 10-15 minutes. It helps bring back some of that glorious crispiness!
How to Make Juicy Homemade Fried Chicken
Okay, let’s roll up our sleeves and get this delicious chicken ready! It feels like a bit of an event, doesn’t it? But honestly, it’s more about a few key steps than anything complicated. Your kitchen is about to smell amazing!
Marinating the Chicken
First things first, get that chicken into the buttermilk. Submerging it completely is super important because the buttermilk really works its magic, breaking down the proteins to make the chicken unbelievably tender and juicy inside. I like to leave mine for at least 4 hours, but honestly, overnight in the fridge is where the real magic happens.
Preparing the Coating
While the chicken is marinating, let’s get our dredging station ready. You’ll need two shallow dishes. In one, whisk those eggs until they’re nice and smooth. In the other, we’re making our flavor powerhouse: the flour mixture. Combine the flour, salt, pepper, paprika, garlic powder, and onion powder. Give it all a good whisk so all those spices are perfectly distributed. This is where all that savory goodness comes from!
Coating the Chicken
Now for the fun part – coating the chicken! Take a piece out of the buttermilk, letting any excess drip off. Then, dip it into the egg wash, making sure it’s fully coated. Immediately transfer it to the flour mixture. Here’s the trick: really press that flour onto the chicken. It helps the coating stick better. Give it a good coating, then place it on a wire rack. Let it rest for about 15-20 minutes. This little pause is crucial for getting that coating to actually stay on when it hits the hot oil!
Frying the Fried Chicken
Time to get that oil hot! You want it at a steady 350°F (175°C). A heavy skillet or a Dutch oven works best here, and you’ll need about 2 to 3 inches of oil. Carefully, and I mean *carefully*, place your coated chicken pieces skin-side down into the hot oil. Don’t crowd the pan, or the oil temperature will drop too much, and you won’t get that lovely crisp. You might have to fry in batches, which is totally fine! Fry for about 6 to 8 minutes per side. You’re looking for that gorgeous deep golden-brown color. The best way to know it’s done is by checking the internal temperature – it should hit 165°F (74°C) in the thickest part of the meat.
Draining and Serving
Once your chicken is perfectly golden and cooked through, lift it out with tongs and place it on a clean wire rack set over a baking sheet. Letting it drain this way helps keep the crust wonderfully crisp. And that’s it! Serve it up hot and bask in the glory of your amazing homemade fried chicken!

Equipment Needed for Classic Comfort Food
To make this amazing fried chicken, you’ll want a few trusty tools in your kitchen. Having the right gear really makes a difference! You’ll definitely need a large, heavy skillet or a Dutch oven – something that can hold a good amount of oil and heat evenly. A reliable thermometer is super helpful for keeping that oil at the perfect 350°F. And don’t forget a wire rack set over a baking sheet for draining the chicken – this is key for keeping that crust crispy!
Serving Suggestions for Your Fried Chicken
Now that you’ve got this gorgeous, crispy fried chicken, what are you going to serve it with? You’ve gotta go classic Southern, of course! It’s just begging for some creamy coleslaw, maybe with a little zip, or some fluffy mashed potatoes to catch all those delicious juices.
My personal favorites are a good, hearty portion of jalapeño cheddar cornbread and my signature creamy Southern coleslaw. They just hit all the right notes alongside that savory fried chicken. Mac and cheese is always a winner too, or maybe some sweet baked beans for that perfect Southern comfort meal.
Storage and Reheating Instructions
So, you have some leftover fried chicken? Lucky you! To keep it tasting as good as possible, let it cool completely before storing. Pop it into an airtight container or wrap it snugly in plastic wrap and then foil.
You can store it in the refrigerator for up to 3 days. Reheating is key to getting some of that crunch back! The best way is to pop it in a single layer on a baking sheet in a preheated oven at 375°F (190°C) for about 10-15 minutes, flipping halfway through. Avoid the microwave if you can – it tends to make things a bit soggy. If you’re feeling adventurous and have freezer space, you can freeze it for longer, but it’s definitely best enjoyed fresh!
Frequently Asked Questions About Fried Chicken
Got questions about getting that perfect crispy chicken? I totally get it! It can sometimes feel like a science, but I promise, with a few little tips, you’ll be making amazing fried chicken like a pro in no time. Here are some of the things folks ask me most often:
Can I make fried chicken in an air fryer?
You sure can try! While it won’t be *exactly* the same as deep-fried, an air fryer can give you a pretty good result. Make sure to follow the coating steps, maybe do a double-coat, and preheat your air fryer. You’ll likely need to spray the chicken with a little oil and cook at a slightly lower temperature than you might expect, flipping halfway through. It’s a good option if you’re looking for a lighter take on crispy chicken!
What oil is best for deep-frying chicken?
For that classic, golden-brown fried chicken, you want an oil with a high smoke point that can handle the heat without burning. Vegetable oil or shortening, like the recipe suggests, are fantastic choices. They get nice and hot, which is essential for getting that super crispy coating and cooking the chicken through properly. Just make sure you have enough – about 2-3 inches in your pan is ideal!
How do I ensure my fried chicken is cooked through?
This is super important to avoid that dreaded pink center! The best way is definitely to use an instant-read thermometer. You’re looking for an internal temperature of 165°F (74°C) in the thickest part of the chicken. Visually, you want it to be gorgeously golden brown on the outside. If the outside is getting dark too fast, you can lower the heat just a hair and give it a bit more time, or finish it off in a warm oven for a few minutes.
Nutritional Information for Classic Fried Chicken
A little note on nutrition: Fried chicken is definitely a treat, and the numbers can vary a bit depending on exactly how you make it and which cuts of chicken you use. But, to give you a general idea, here’s an estimate for one serving of this classic Southern fried chicken. Remember, these are just ballpark figures, so enjoy it as the delicious comfort food it is!
- Serving Size: 1 piece
- Calories: ~450
- Fat: ~28g
- Saturated Fat: ~8g
- Unsaturated Fat: ~20g
- Trans Fat: 0g
- Cholesterol: ~120mg
- Sodium: ~600mg
- Carbohydrates: ~25g
- Fiber: ~2g
- Protein: ~25g
- Sugar: ~2g
Classic Southern Fried Chicken
A recipe for crispy, juicy, and tender Southern fried chicken, perfect for a comforting meal.
- Prep Time: 30 min
- Cook Time: 30 min
- Total Time: 4 hr 30 min
- Yield: 6 servings 1x
- Category: Main Course
- Method: Deep Frying
- Cuisine: Southern
- Diet: Vegetarian
Ingredients
- 4 lbs chicken pieces (e.g., thighs, drumsticks, breasts)
- 2 cups buttermilk
- 2 large eggs
- 2 cups all-purpose flour
- 1 tablespoon salt
- 1 teaspoon black pepper
- 1 teaspoon paprika
- 1/2 teaspoon garlic powder
- 1/2 teaspoon onion powder
- Vegetable oil or shortening, for frying
Instructions
- Place chicken pieces in a large bowl. Pour buttermilk over chicken, ensuring all pieces are coated. Cover and refrigerate for at least 4 hours, or preferably overnight.
- In a shallow dish, whisk together eggs. In another shallow dish, combine flour, salt, pepper, paprika, garlic powder, and onion powder.
- Remove chicken from buttermilk, letting excess drip off. Dip each piece into the beaten eggs, then dredge thoroughly in the flour mixture, pressing to ensure a good coating. Place coated chicken on a wire rack and let it sit for 15-20 minutes to allow the coating to set.
- In a large, heavy skillet or Dutch oven, heat about 2-3 inches of vegetable oil or shortening to 350°F (175°C).
- Carefully place chicken pieces into the hot oil, skin-side down, without overcrowding the skillet. Fry in batches for about 6-8 minutes per side, or until golden brown and cooked through. The internal temperature should reach 165°F (74°C).
- Remove chicken from skillet and place on a clean wire rack set over a baking sheet to drain excess oil.
- Serve hot.
Notes
- For extra crispy skin, you can double-coat the chicken: dip in egg, then flour, then egg again, then flour again.
- Ensure the oil temperature remains consistent for even cooking. If it gets too hot, the outside will burn before the inside is cooked.
- If you don’t have buttermilk, you can make a substitute by mixing 2 cups of milk with 2 tablespoons of lemon juice or white vinegar and letting it sit for 5-10 minutes.
Nutrition
- Serving Size: 1 piece
- Calories: 450
- Sugar: 2g
- Sodium: 600mg
- Fat: 28g
- Saturated Fat: 8g
- Unsaturated Fat: 20g
- Trans Fat: 0g
- Carbohydrates: 25g
- Fiber: 2g
- Protein: 25g
- Cholesterol: 120mg