 Skip to content

Oh my goodness, are you ready for the EASIEST, most spooktacular little treats you’ll ever make? I’m talking about these adorable Halloween Oreo truffles! Seriously, they’re a lifesaver when you need something cute and festive in a hurry. We’re talking just three main ingredients, and the decorating? Pure, unadulterated fun. You can turn them into little mummies, spooky ghosts, or cheerful pumpkins. These are exactly the kind of simple, joyful recipes that make my kitchen sing, and they’ll be the hit of any Halloween party or family gathering, I promise!

## Why You’ll Love These Halloween Oreo Truffles
Trust me, these little guys are pure magic for a few reasons:
- Crazy Easy: Seriously, only 3 main ingredients and no baking required! Perfect for those busy days.
- Super Versatile: You can decorate them a million ways – mummies, ghosts, pumpkins – your creativity is the limit!
- Crowd Pleasers: Everyone, kids and adults alike, goes wild for these. They disappear fast at parties!
- Beginner Friendly: Even if you’re new to the kitchen, you can totally nail these. They’re pretty forgiving!
- Festive & Fun: They instantly up your Halloween game without a ton of effort.
- The Magic of 3 Ingredient Oreo Truffles
- How to Make Halloween Oreo Truffles: Step-by-Step
- Tips for Perfect Halloween Oreo Truffles
- Storage and Oreo Truffle Shelf Life
- Frequently Asked Questions about Halloween Oreo Truffles
- Pairing Your Halloween Treats
- Nutritional Information
- Share Your Halloween Creations!
The Magic of 3 Ingredient Oreo Truffles
Honestly, the best recipes are the ones that make you feel like a kitchen rockstar with minimal fuss, right? That’s exactly what these 3 ingredient Oreo truffles do! It’s all about taking simple, pantry-staple ingredients and turning them into something totally magical for Halloween. Using just Oreos, cream cheese, and a good coating feels like cheating, but it really works! It creates this wonderfully rich, fudgy center that’s just begging to be dressed up for the spooky season. It reminds me so much of my grandma’s philosophy – using good, honest ingredients to create pure joy.
Ingredients for Halloween Oreo Truffles
So, for these no-bake gems, you only need a handful of things to get started. It’s so simple it feels like a dream! You’ll need about 24 Oreo cookies, and make sure you crush them up *really* fine – like dust! Then, you’ll add in 8 ounces of softened cream cheese. Make sure that cream cheese is nice and soft so it mixes in smoothly with the cookie crumbs. Once you’ve got those little balls rolled, the fun part is the coating: grab about 12 ounces of white chocolate melting wafers or candy melts. And if you want to get super cute with it, have some black edible marker or candy eyes ready for decorating!
Ingredient Spotlight: White Chocolate vs. Candy Melts
Okay, let’s talk about the coating, because this is where a lot of folks get a little stumped, especially when they’re trying to dip things like these Oreo balls and don’t want that dreaded crack. My go-to for these Halloween Oreo truffles is definitely candy melts or melting wafers. They are SO much easier if you’re not a seasoned chocolatier! They’re made specifically to melt smoothly and set up firm and shiny without any fuss. If you try using real white chocolate though, it can be a bit trickier. You usually have to temper it carefully to get it to set nicely, otherwise, it can get that bloom or crack like you mentioned. So, for the easiest, most foolproof coating that will give you perfect results every time, I really recommend the candy melts. It makes achieving that beautiful finish and avoiding cracks way simpler!
How to Make Halloween Oreo Truffles: Step-by-Step
Alright, let’s get these spooky little guys made! It’s really quite simple, I promise. First things first, you’ll want to crush up those Oreos until they’re really fine crumbs. I pop mine in a food processor, but honestly, shoving them in a Ziploc bag and going at them with a rolling pin works wonders too – it’s a great stress reliever! Then, you’ll mix those fine crumbs with your softened cream cheese until it’s all combined into a nice, thick dough. Next, grab a small cookie scoop, or just use your hands, and roll that mixture into about 1-inch balls. Pop them onto a baking sheet lined with parchment paper – this is super important so they don’t stick! Now, here’s a crucial step for success: you need to chill these little balls in the fridge for at least 30 minutes. This makes them firm up, which is key for getting a nice, clean dip later on.
Mastering the Dip: How to Dip Oreo Balls Without Cracking
This is where the magic really happens, and how you get that super smooth, flawless coating on your Halloween Oreo balls. Once those truffles are nice and firm from chilling, it’s time to melt your white chocolate or candy melts. I usually pop mine in a microwave-safe bowl and zap them in 30-second bursts, stirring really well in between each burst. This stops them from burning. If you’re using candy melts, they’re designed to set up beautifully without any special tricks, which is why I love them! If you’re using real white chocolate, you might need to temper it a bit, but honestly, for these Halloween Oreo truffles, the candy melts are just so much easier and give you that perfect finish without the cracking hassle. Once it’s smooth and melted, gently drop a cold truffle in, give it a little swirl to cover it completely, and then lift it out with a fork. Let all that excess coating drip back into the bowl – it helps keep your coating smooth and your truffles looking neat!
Creative Halloween Oreo Truffle Decorations
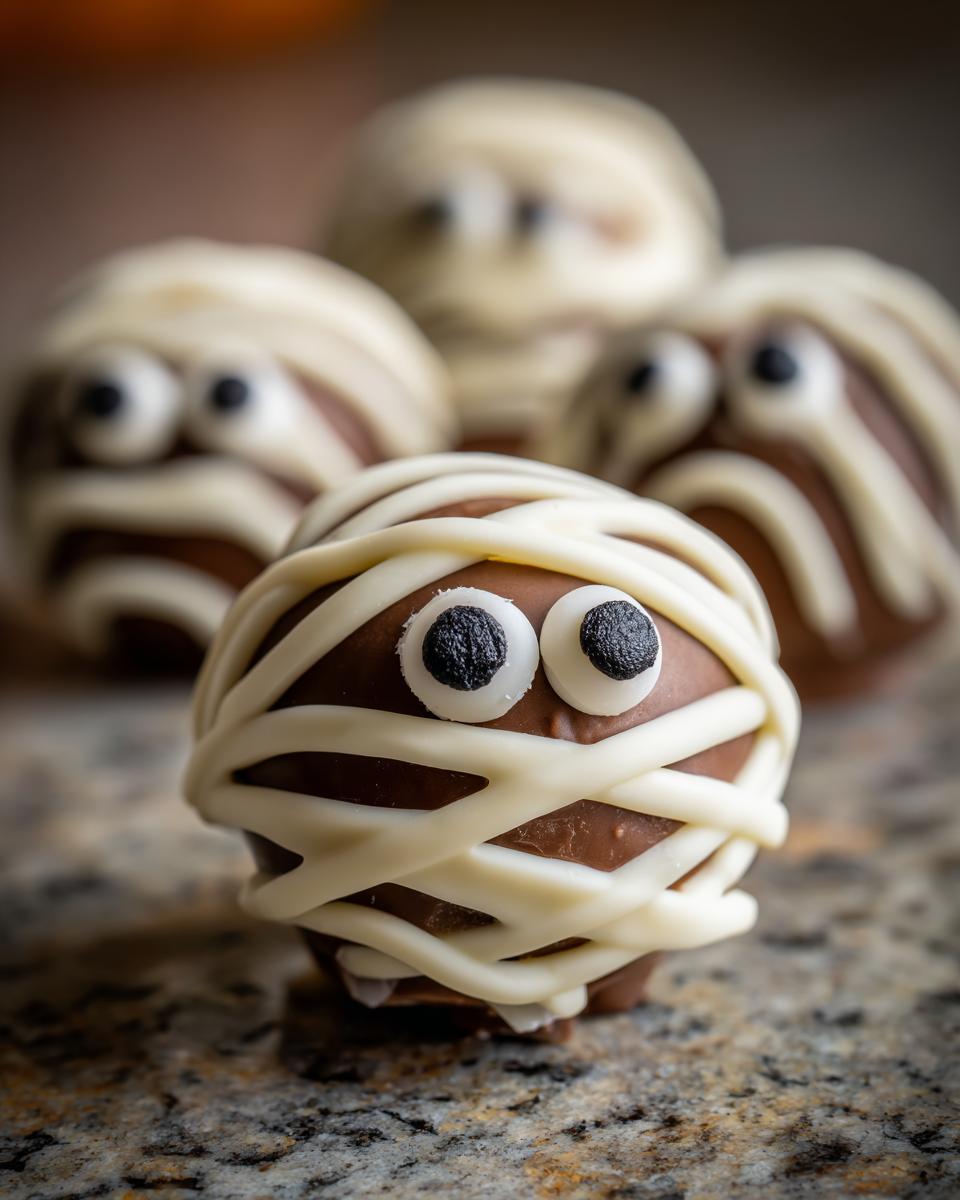
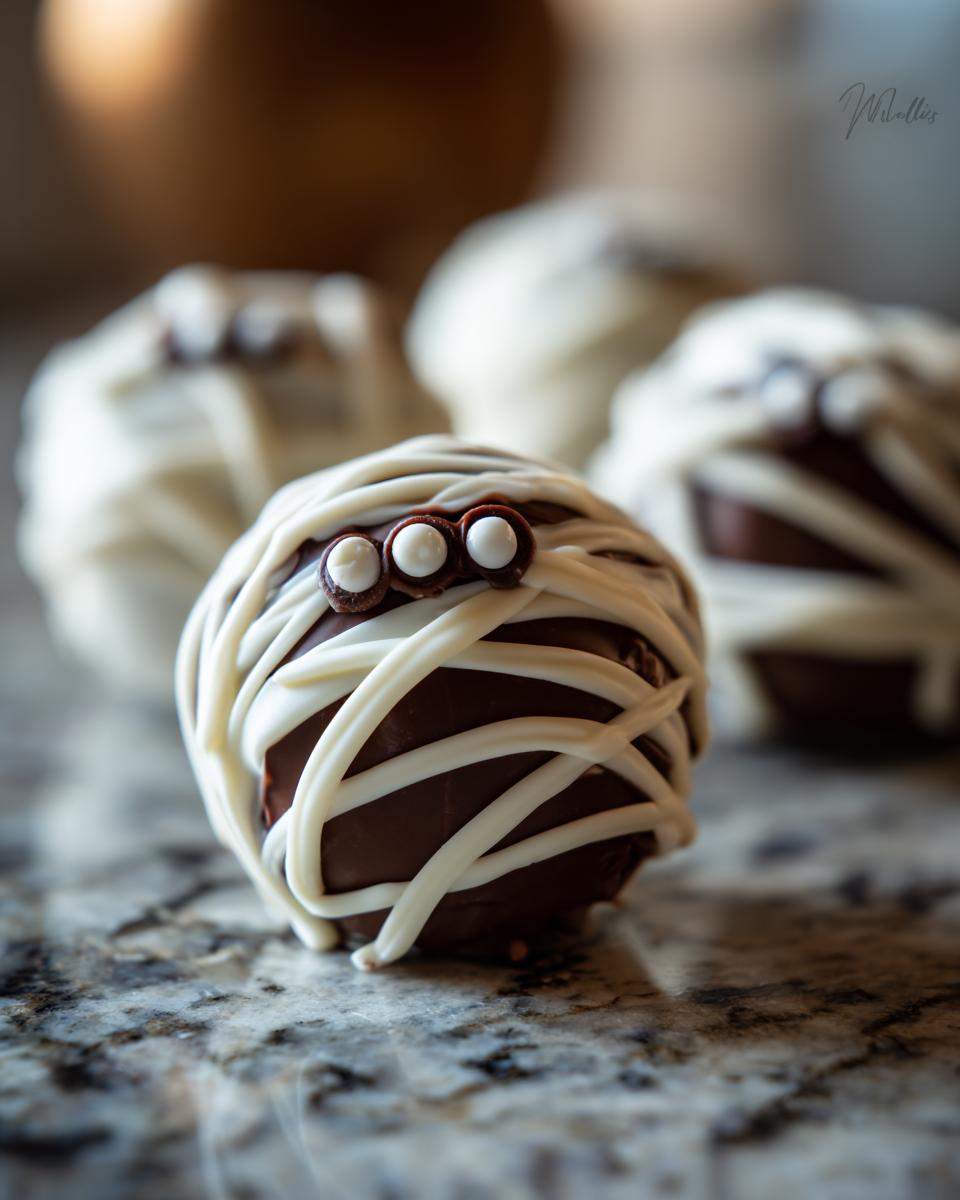
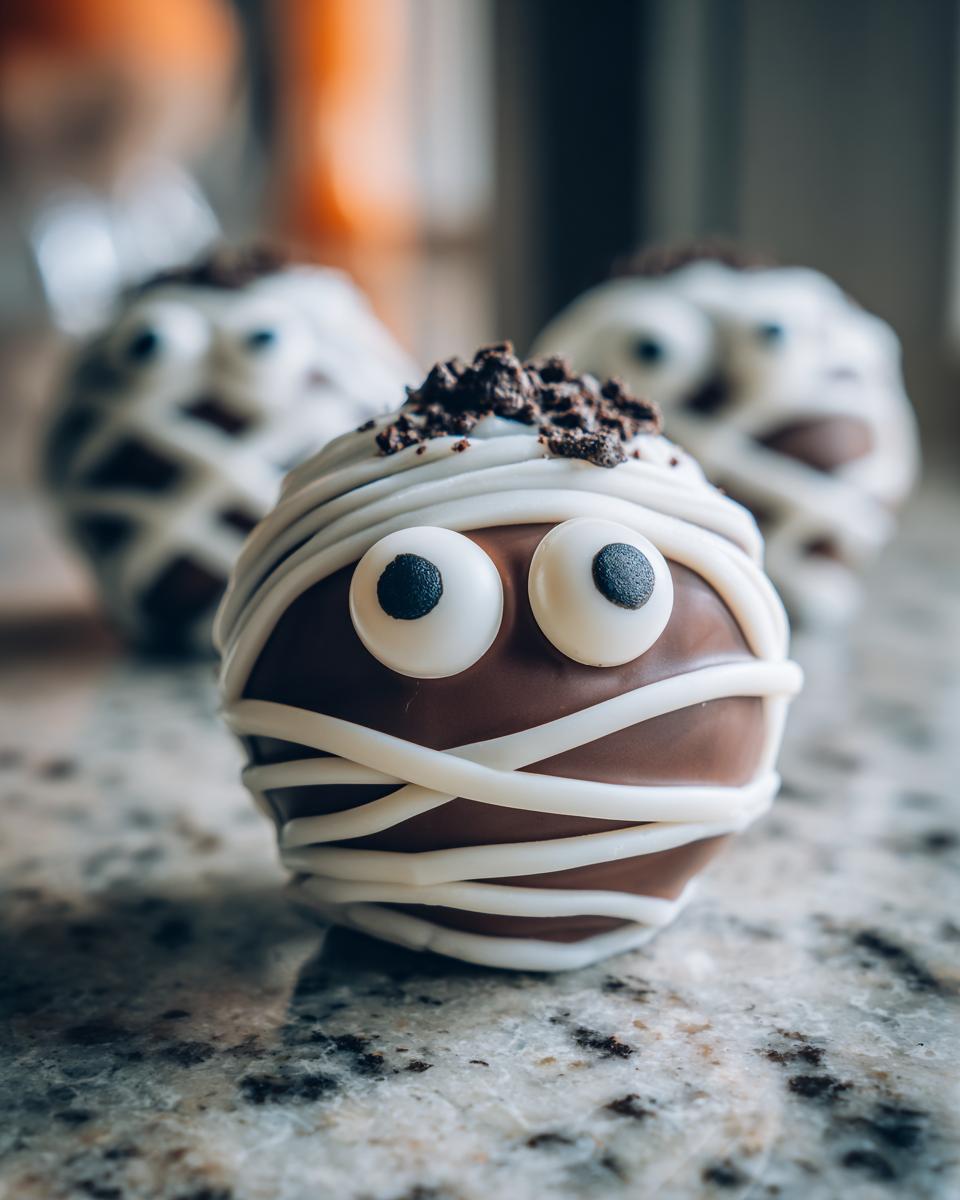
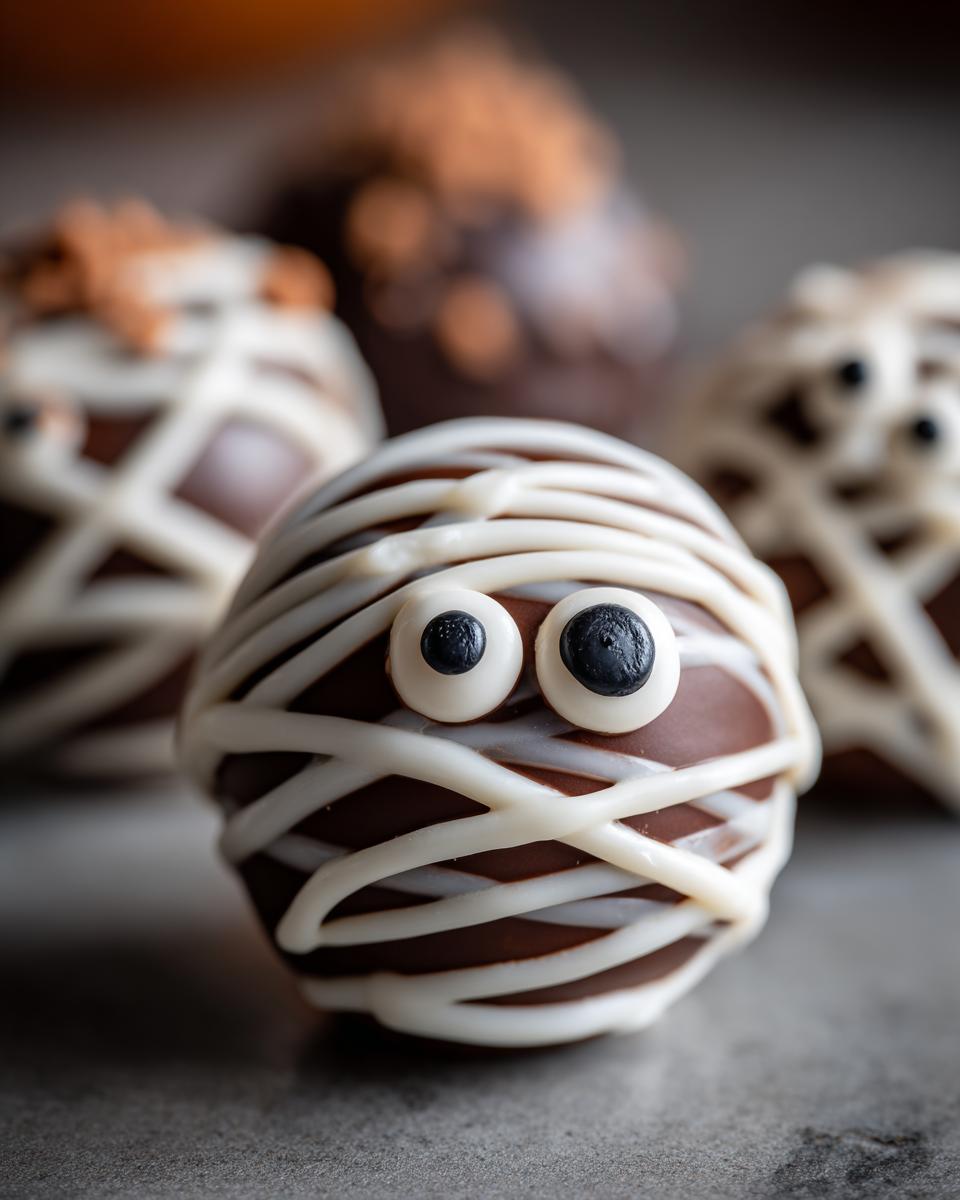
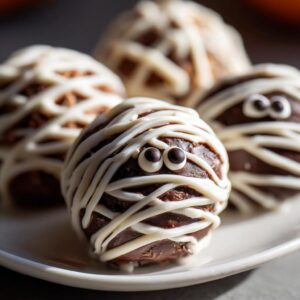
Now for the super fun part – making them look like little Halloween characters! As soon as you dip a truffle and place it back on the parchment paper, while the coating is still wet, that’s when you add your details. For the mummy ones, I just take a fork or a piping bag with a really small tip and drizzle thin lines of melted white chocolate back and forth across the truffle to make those mummy wrappings. Then, I’ll use a tiny dab of melted chocolate to stick on candy eyes, or sometimes I just use a black edible marker to draw little eyes. For ghosts, it’s similar – you just drizzle that melted coating in a slightly more upright, flowing shape. You can pop on candy eyes or draw them on too! And the pumpkins? You can even tint some of your melted coating a nice pumpkin orange if you want. Then, just drizzle those signature pumpkin lines down the sides. Sometimes I’ll even add a little green candy melt or a tiny piece of a melted chocolate kiss for a stem if I’m feeling fancy!
Setting and Finishing Your Halloween Treats
Once all your spooky little characters are decorated, you just need to let them set. You can leave them right there on the parchment-lined baking sheet. They’ll usually set up pretty nicely at room temperature if your kitchen isn’t too warm. If you’re in a hurry, or if it’s a super warm day, popping them in the fridge for about 15 to 20 minutes will speed things up and make sure that coating is nice and firm before you handle them too much. Just keep an eye on them so they don’t get *too* hard, especially if you used real chocolate, as they can get a bit brittle.
Tips for Perfect Halloween Oreo Truffles
Okay, so making these little Halloween Oreo truffles is pretty forgiving, but a few little tricks I’ve learned will make them even better! First, really take your time crushing those Oreos. Finer crumbs mean a smoother truffle mixture, which then rolls into perfect little balls. Speaking of balls, make sure they’re chilled until they’re *really* firm. If they’re still a bit soft, they’ll fall apart when you dip them, and nobody wants a melty mess! And if your melted coating seems a little too thick, just stir in a tiny bit of coconut oil or shortening – it makes dipping SO much easier. It’s these little things that help you get that gorgeous, clean finish, kind of like how I always share secrets for my classic apple pie, or even tips for perfectly crunchy roasted chickpeas!
Storage and Oreo Truffle Shelf Life
Once your adorable Halloween Oreo truffles are all set and ready to go, you’ll want to store them properly to keep them tasting their best. The key is an airtight container! This is super important for maintaining their quality and that yummy texture. I usually pop mine in a container and keep them in the refrigerator. This helps them stay firm, especially with the coating. Honestly, you can count on them staying delicious for about a week, maybe even a little longer! It’s just like how I prep my make-ahead breakfast burritos; getting them stored right makes all the difference!
Frequently Asked Questions about Halloween Oreo Truffles
Got questions about these spooky little bites? I totally get it! It’s always good to have a few tips tucked away, especially when you’re whipping up fun no bake halloween treats. Let’s chat about a few things that might pop up!
Can I use cookies other than Oreos?
Oh, absolutely! While Oreos give these truffles their classic chocolatey flavor and perfectly fudgy texture, you can totally experiment. Golden Oreos would make for a lighter base, or you could even try chocolate chip cookies for a different vibe. Just make sure whatever cookie you choose, you crush them up super fine for the best results. It’s all about getting creative in the kitchen!
Can these Halloween Oreo Truffles be made ahead of time?
Yes, definitely! These are fantastic for making ahead, which is a lifesaver for parties. You can make the truffle balls and dip them a day or two in advance. Just store them in an airtight container in the refrigerator. They actually tend to get even firmer and easier to handle after a little chill time, which is great for decorating!
What if my white chocolate or candy melts seize up?
Ugh, seizing is the worst, isn’t it? Usually, it happens if even a tiny bit of water gets into the melted chocolate. The best trick if your chocolate seizes is to stir in a teaspoon of vegetable shortening or coconut oil. It helps to smooth it out and make it usable again, kind of like how you can sometimes save a sauce that’s gone wrong! It might not be perfect, but it usually works in a pinch.
How do I get that clean drizzle for the mummy or ghost look?
For those clean lines, a piping bag with a small round tip is your best friend. If you don’t have one, you can just snip a tiny corner off a sturdy Ziploc bag. Make sure your melted coating isn’t too hot or too thick. It should flow easily but not be watery. Like when I’m making these smashburger tacos, getting the consistency just right is key to making them look amazing!
Pairing Your Halloween Treats
These little Halloween Oreo truffles are super versatile for parties! They’re amazing on their own, of course, but they also pair wonderfully with other festive treats. If you’re looking for a signature drink, my Apple Cider Sangria is just perfect for fall gatherings – it’s festive and not too sweet. For more fun finger foods that kids adore, you absolutely have to check out my mummy hot dogs, or even the other version I have for Halloween mummy hot dogs! They all come together pretty easily and make for such a fun, themed spread.
Nutritional Information
Just a heads-up, the nutrition info for these Halloween Oreo truffles is estimated per truffle, assuming about 24 servings. It’s pretty typical for treats like this – around 150 calories, with about 15g of sugar and 9g of fat. They’re definitely a fun indulgence for the holiday!
Share Your Halloween Creations!
I just LOVE seeing what you all whip up in your kitchens! If you make these Halloween Oreo truffles, please, please share a picture or tell me about how they turned out in the comments below. Seeing your spooky little masterpieces makes my day and reminds me why I love sharing these simple, joyful recipes so much. And if you enjoyed them, a quick rating is always appreciated too! You can always reach out via my contact page if you have any questions!
PrintHalloween Oreo Truffles
Easy 3-ingredient Halloween Oreo truffles decorated as mummies, ghosts, or pumpkins. These no-bake treats are perfect for parties.
- Prep Time: 30 min
- Cook Time: 5 min
- Total Time: 35 min
- Yield: 24 truffles 1x
- Category: Dessert
- Method: No Bake
- Cuisine: American
- Diet: Vegetarian
Ingredients
- 24 Oreo cookies
- 8 oz cream cheese, softened
- 12 oz white chocolate melting wafers or candy melts
- Optional: black edible marker or candy eyes
Instructions
- Crush the Oreo cookies into fine crumbs using a food processor or by placing them in a zip-top bag and crushing with a rolling pin.
- In a medium bowl, mix the Oreo crumbs and softened cream cheese until well combined.
- Roll the mixture into 1-inch balls and place them on a baking sheet lined with parchment paper.
- Chill the Oreo balls in the refrigerator for at least 30 minutes until firm.
- Melt the white chocolate melting wafers or candy melts according to package directions. You can use a double boiler or microwave in short intervals, stirring frequently. If using candy melts, they are designed to set without tempering. If using white chocolate, you may need to temper it for a smooth, shiny coating that doesn’t crack.
- Dip each chilled Oreo ball into the melted coating, ensuring it is fully covered. Let excess coating drip off.
- Place the coated truffles back on the parchment-lined baking sheet.
- Decorate immediately while the coating is still wet:
- For mummies: Drizzle thin lines of melted coating back and forth across the truffle to create mummy wrappings. Use a black edible marker or small dots of melted coating to add eyes.
- For ghosts: Drizzle thin lines of melted coating to create a ghostly shape. Add candy eyes or use a black edible marker for eyes.
- For pumpkins: Tint some of the melted coating orange if desired. Drizzle thin lines to resemble pumpkin ribs. Add a small stem with green candy melts or a piece of a chocolate kiss if desired.
- Allow the truffles to set completely at room temperature or in the refrigerator for about 15-20 minutes.
Notes
- For a clean dip, ensure your Oreo balls are very cold and firm before dipping.
- Store leftover truffles in an airtight container in the refrigerator for up to 1 week.
- You can use milk or dark chocolate for dipping, but white chocolate is often preferred for Halloween decorating.
- If your melted coating seems too thick, you can stir in a teaspoon of coconut oil or vegetable shortening to thin it out.
Nutrition
- Serving Size: 1 truffle
- Calories: 150
- Sugar: 15g
- Sodium: 50mg
- Fat: 9g
- Saturated Fat: 5g
- Unsaturated Fat: 4g
- Trans Fat: 0g
- Carbohydrates: 17g
- Fiber: 1g
- Protein: 2g
- Cholesterol: 10mg